

What Does A Website Blog Button Look Like
How to create a blog
Adding a blog to your website is a great way to drive traffic to your website and grow your mailing list.
How to add a blog page
To create a blog page on your website, navigate to the Websites tab on Sites. Then:
-
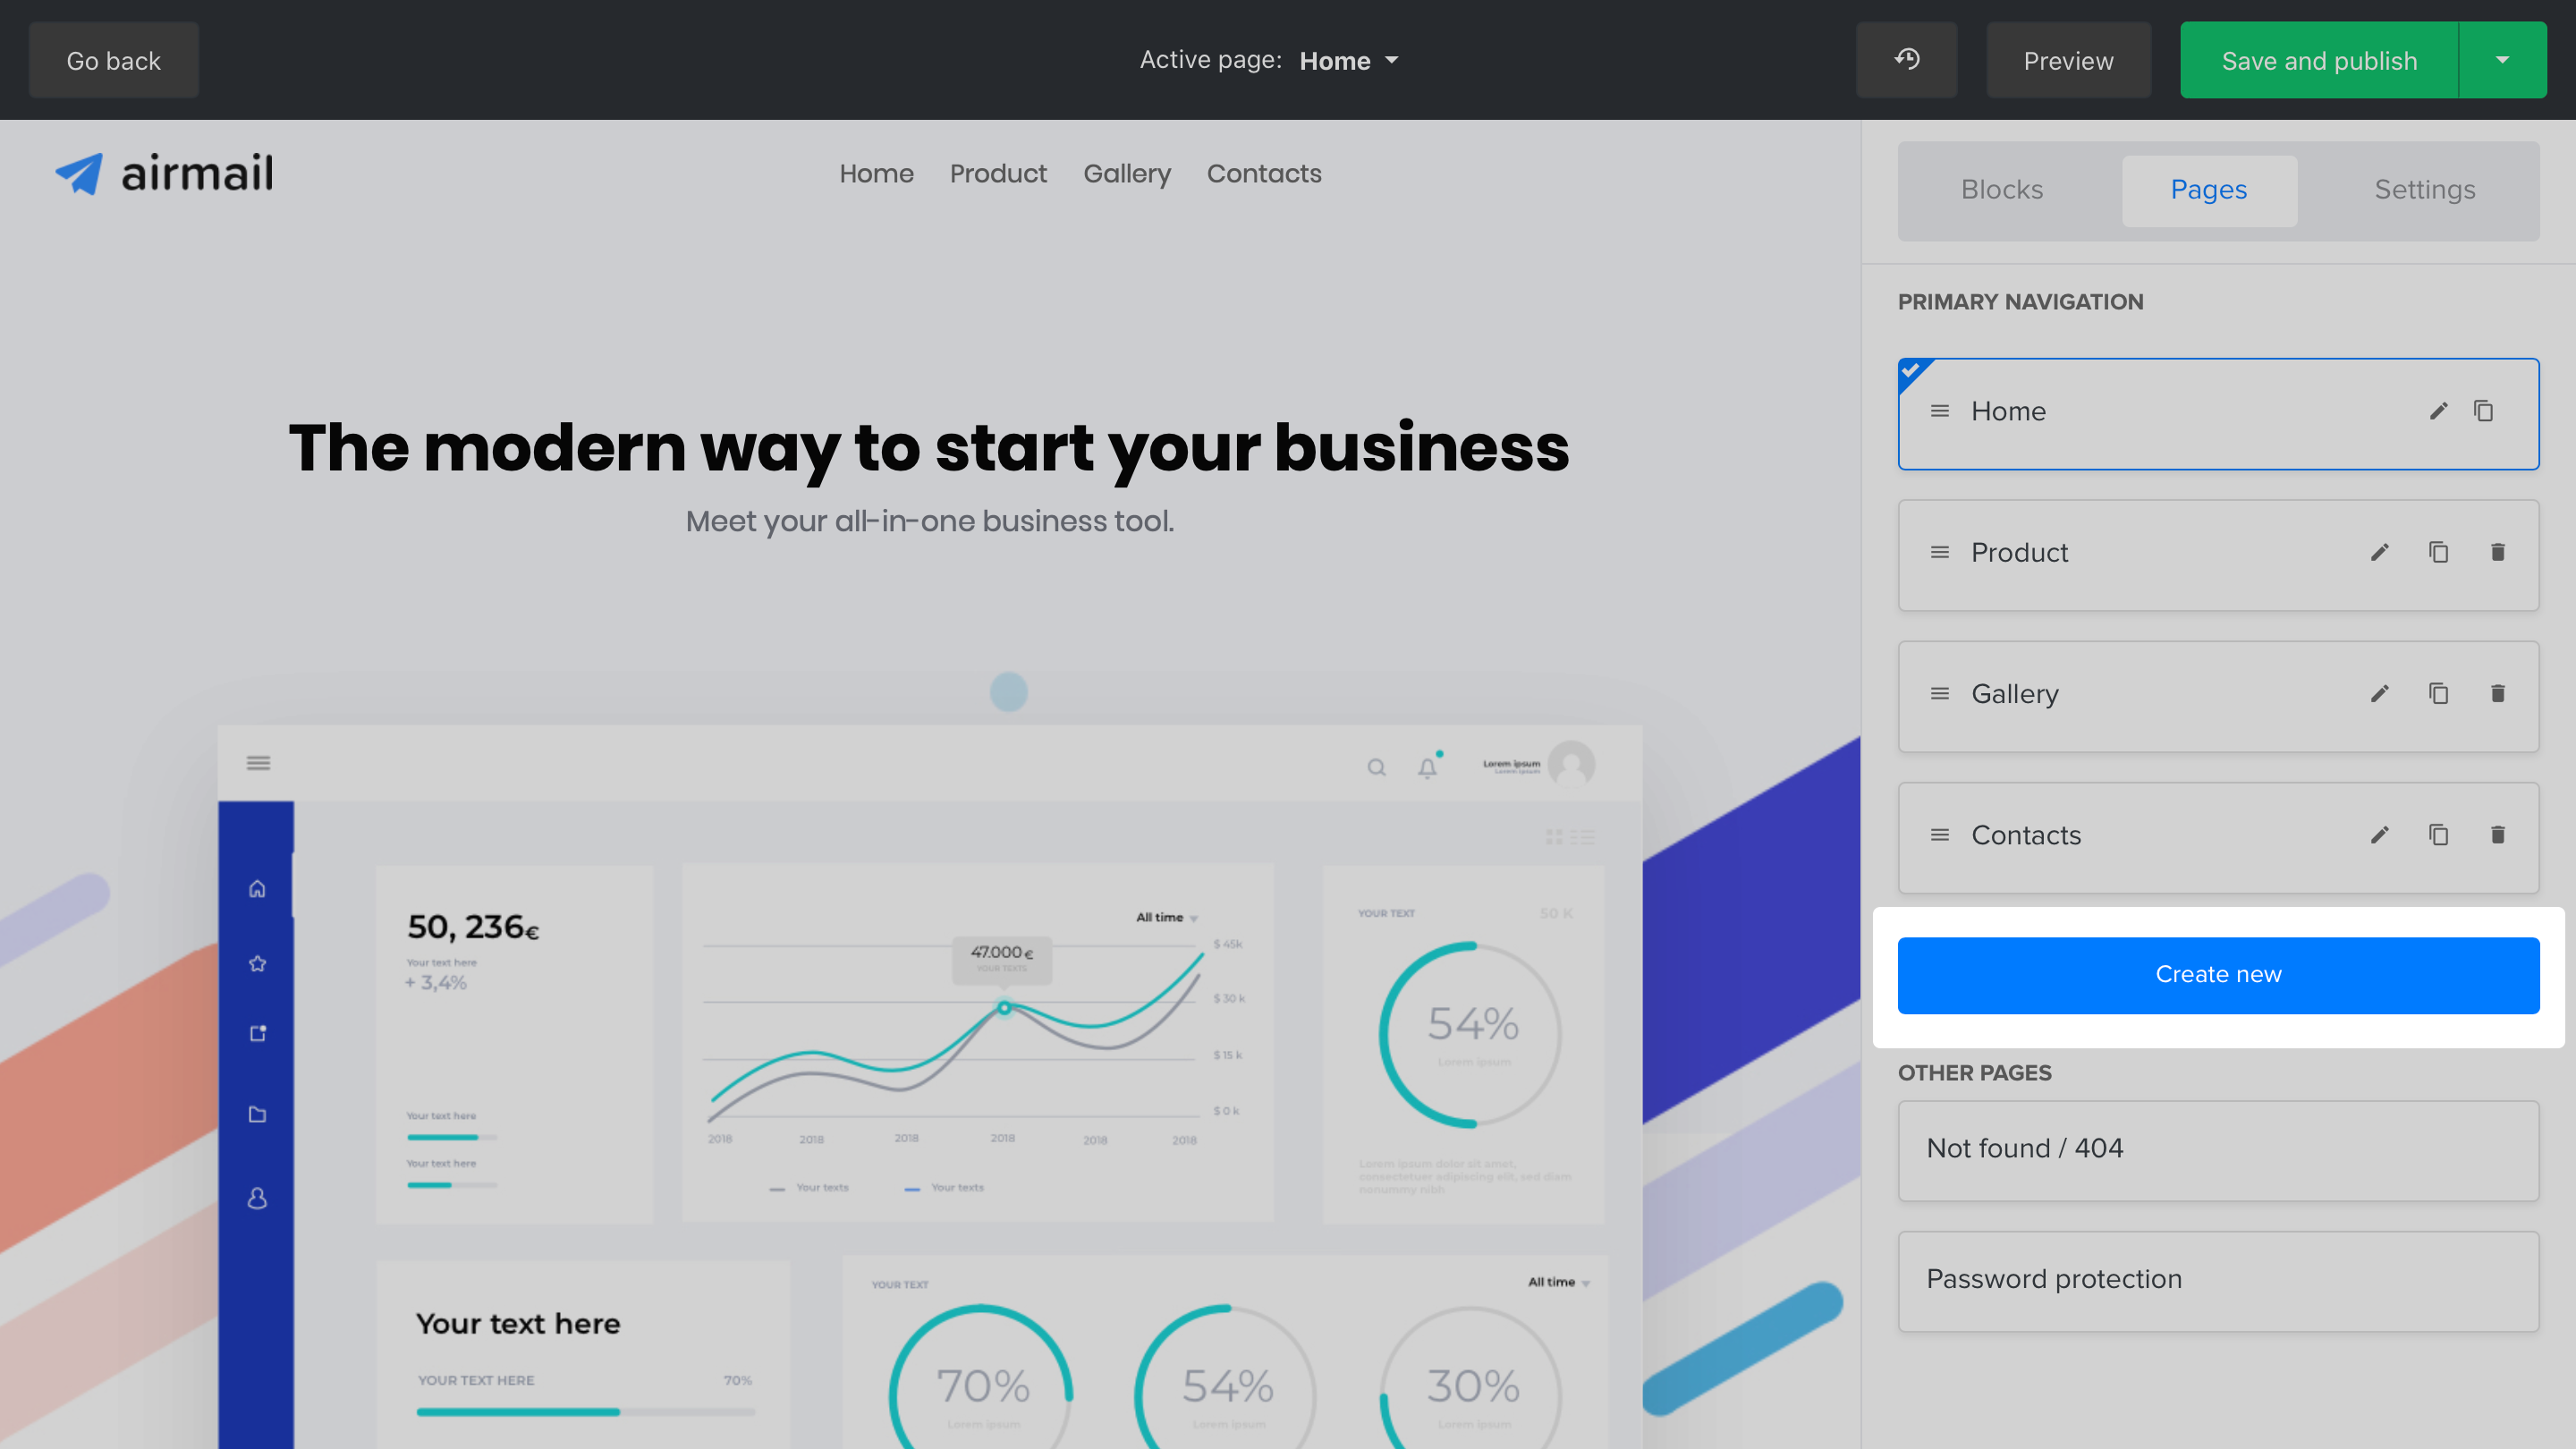
Open your website in the website builder.
-
In the sidebar, click thePages tab.
-
ClickCreate new to add a new page.
-
SelectBlog as your new page type.

-
Choose the name for your blog page. The name is how it will appear in your website's navigation.
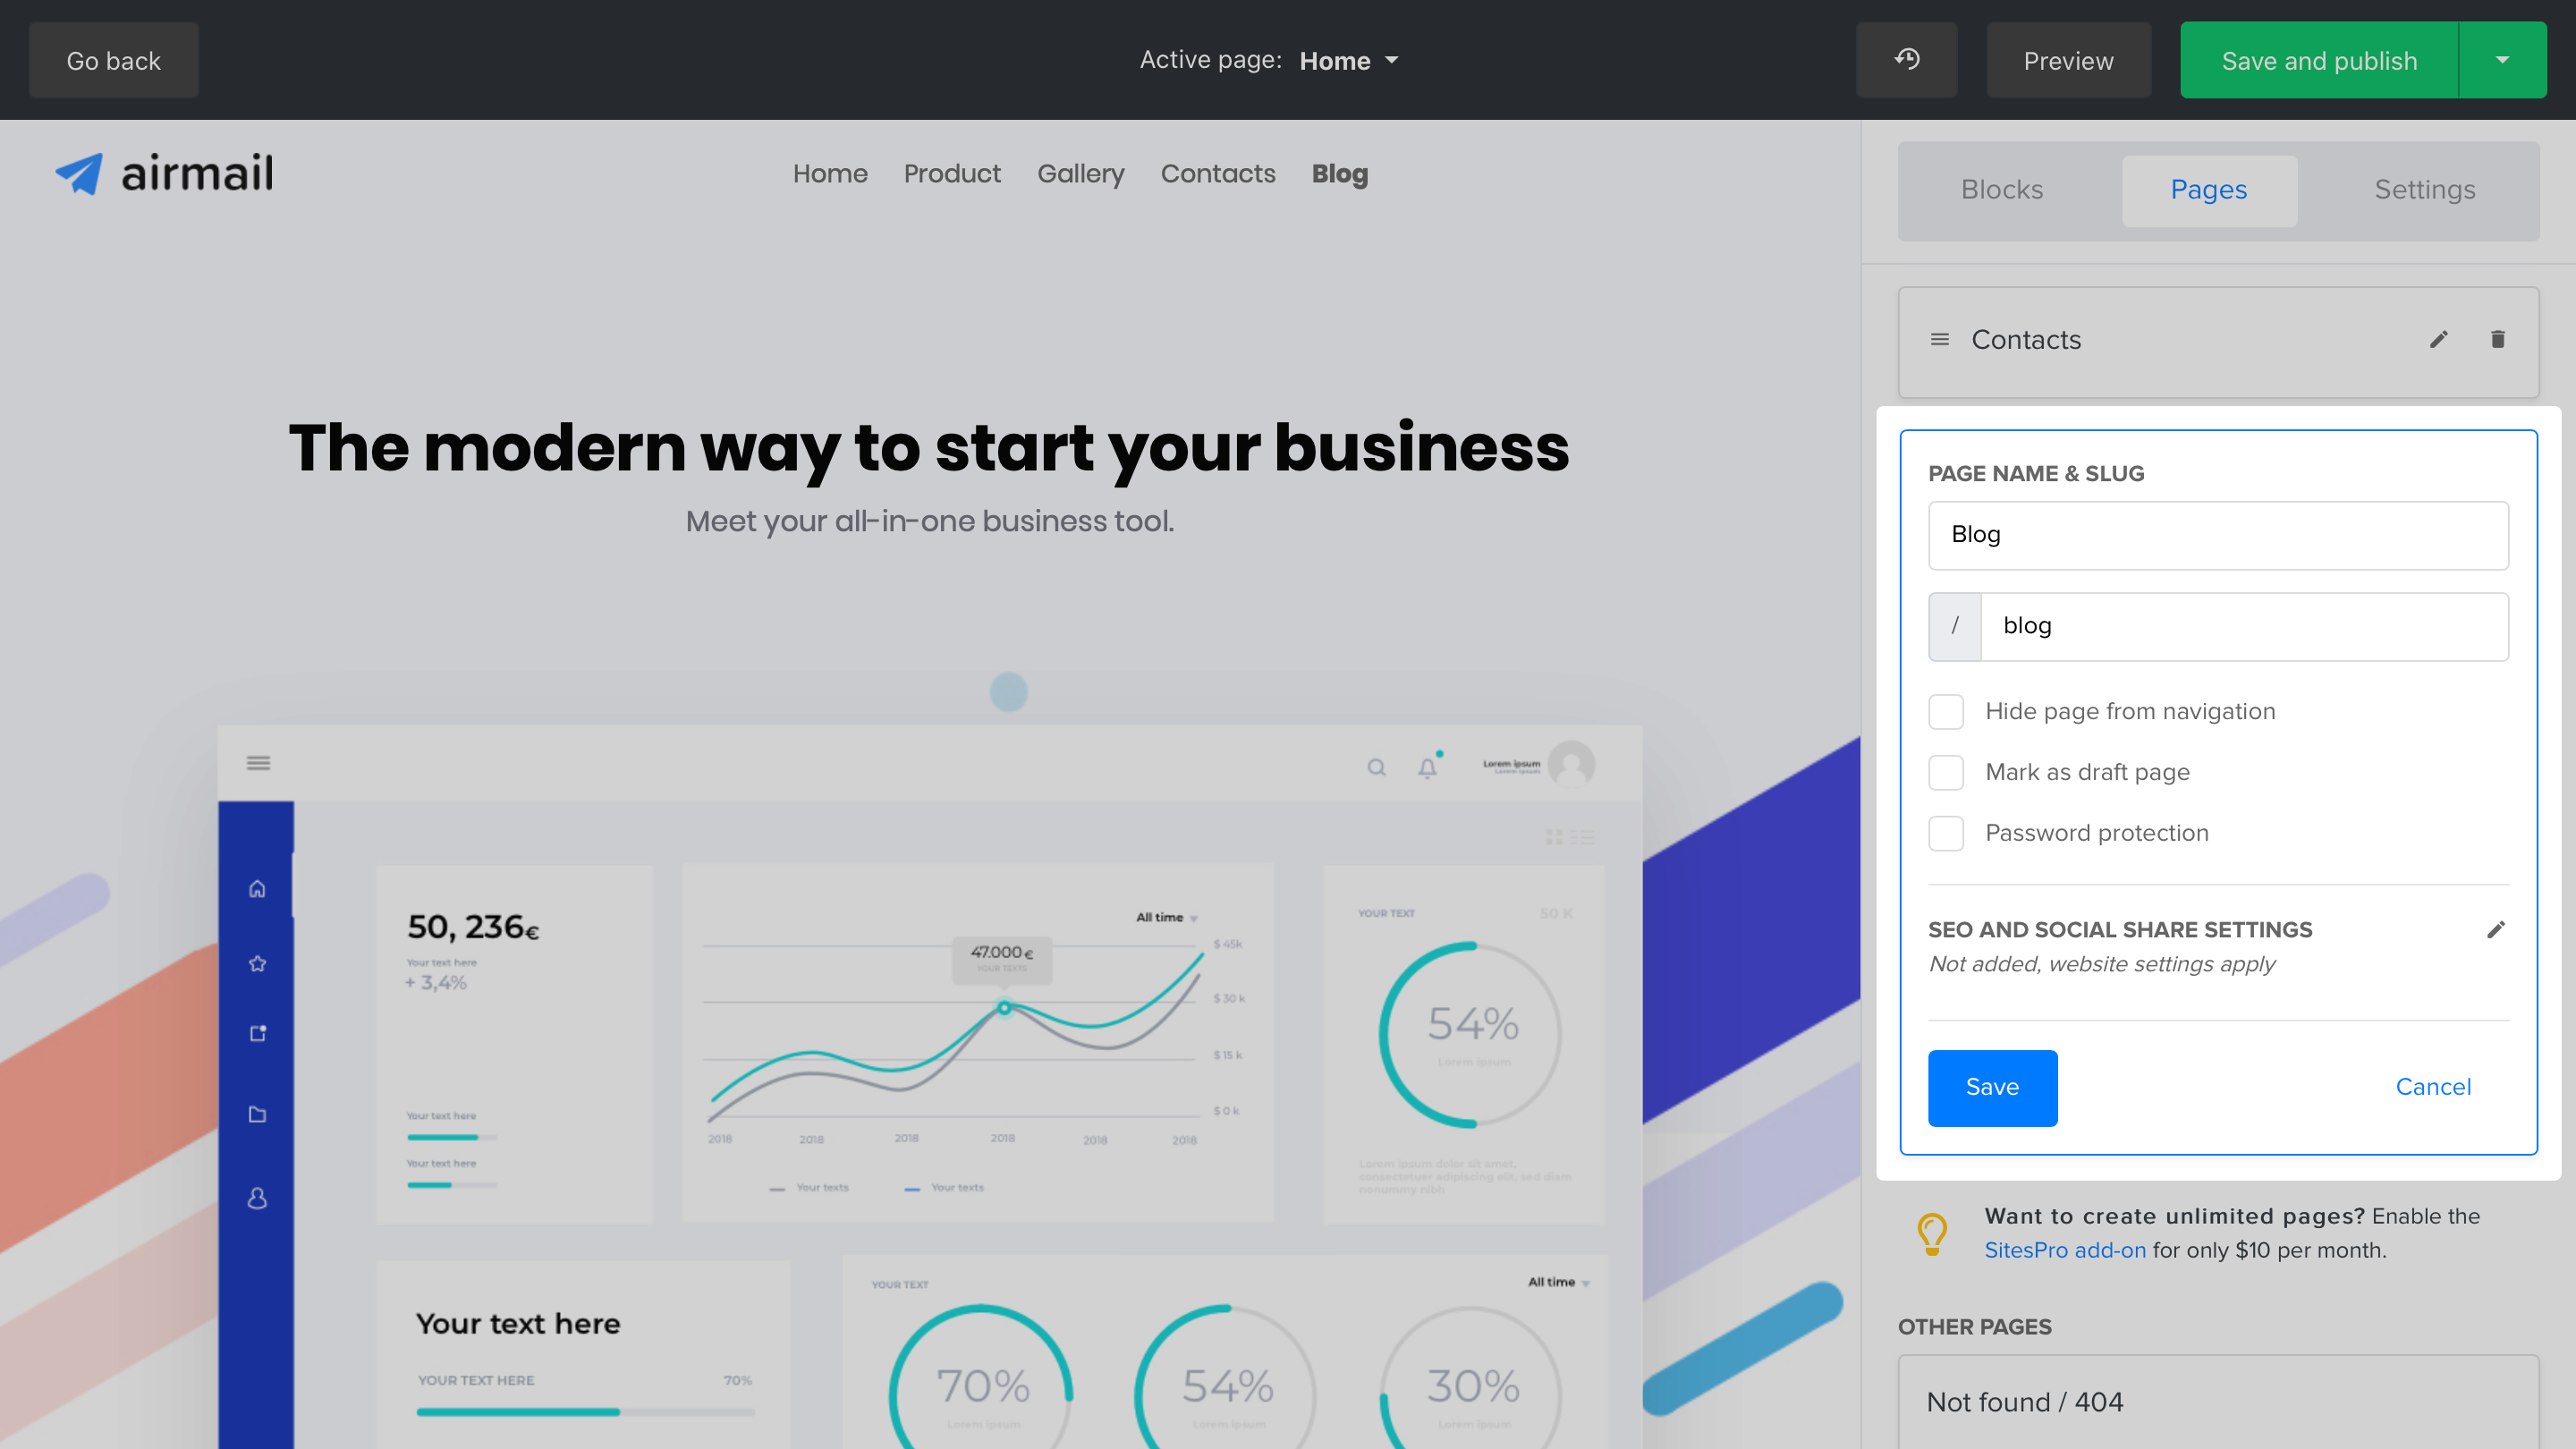
Tip: If you do not want your blog page to be visible on your published website, check the box labeledMark as draft pageandHide page from Navigation. This saves your changes without publishing the page to your website.
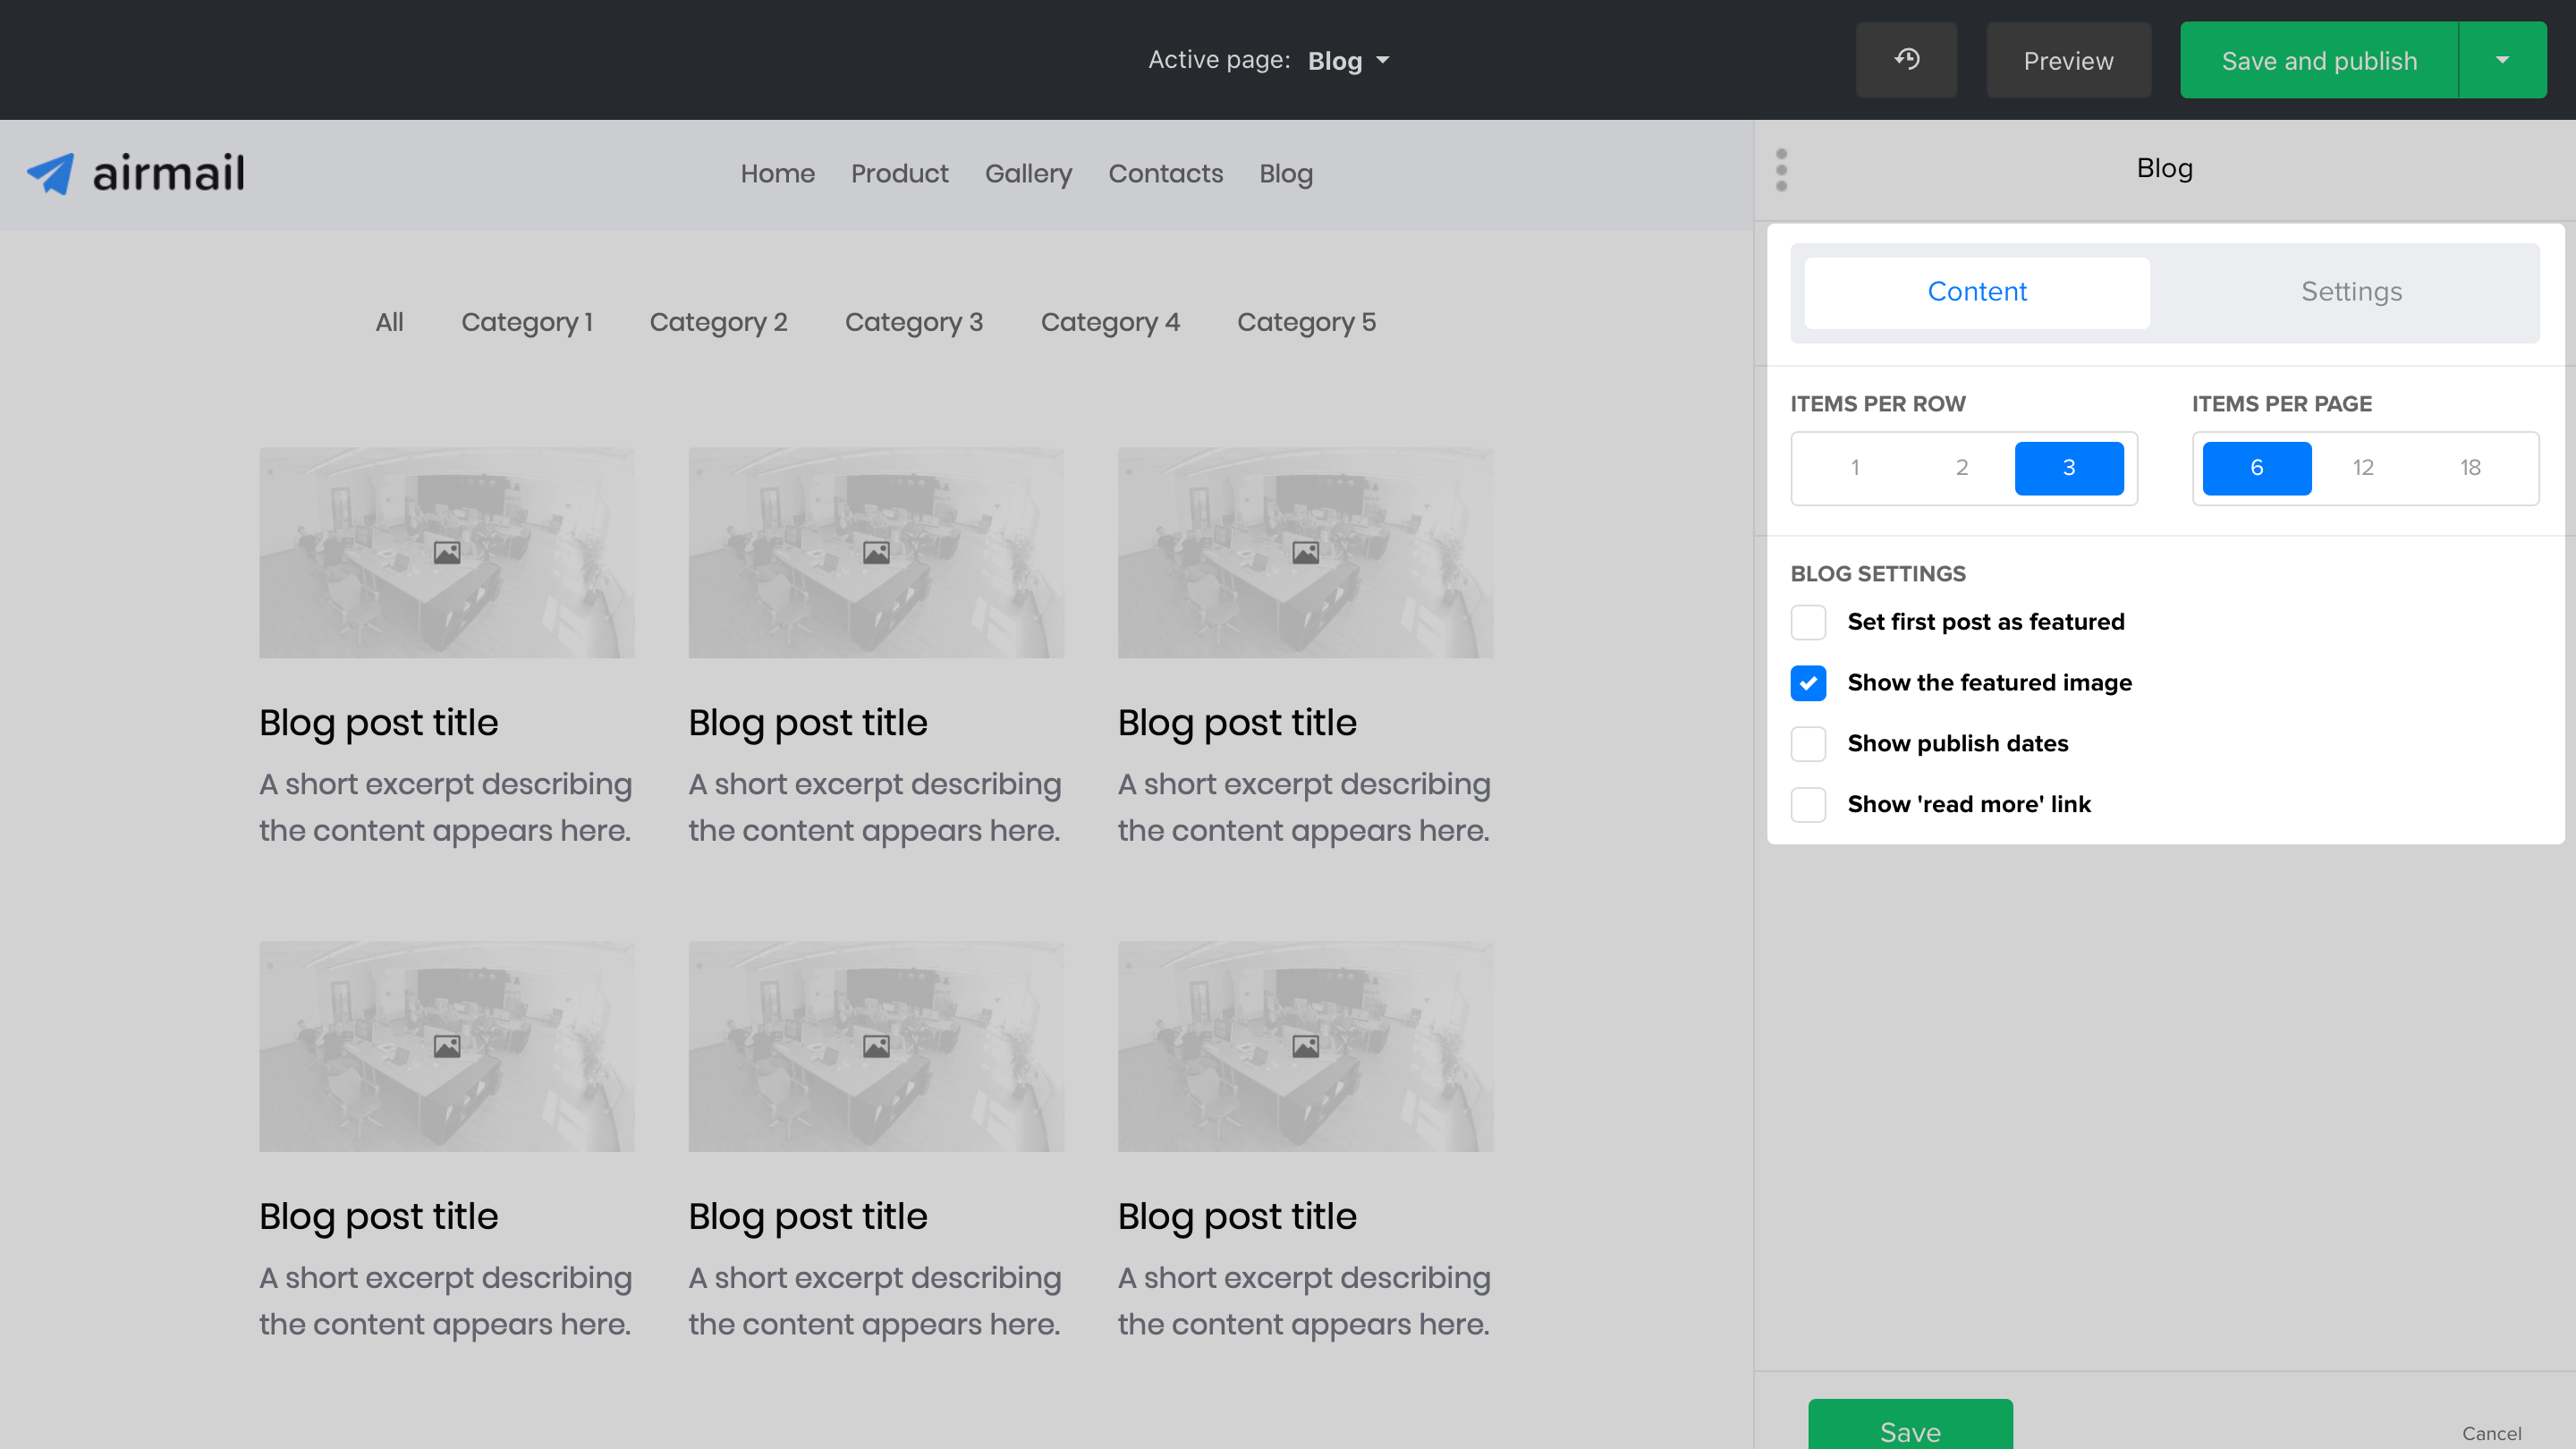
Once created, you can edit your Blog settings in the sidebar under theContent tab.
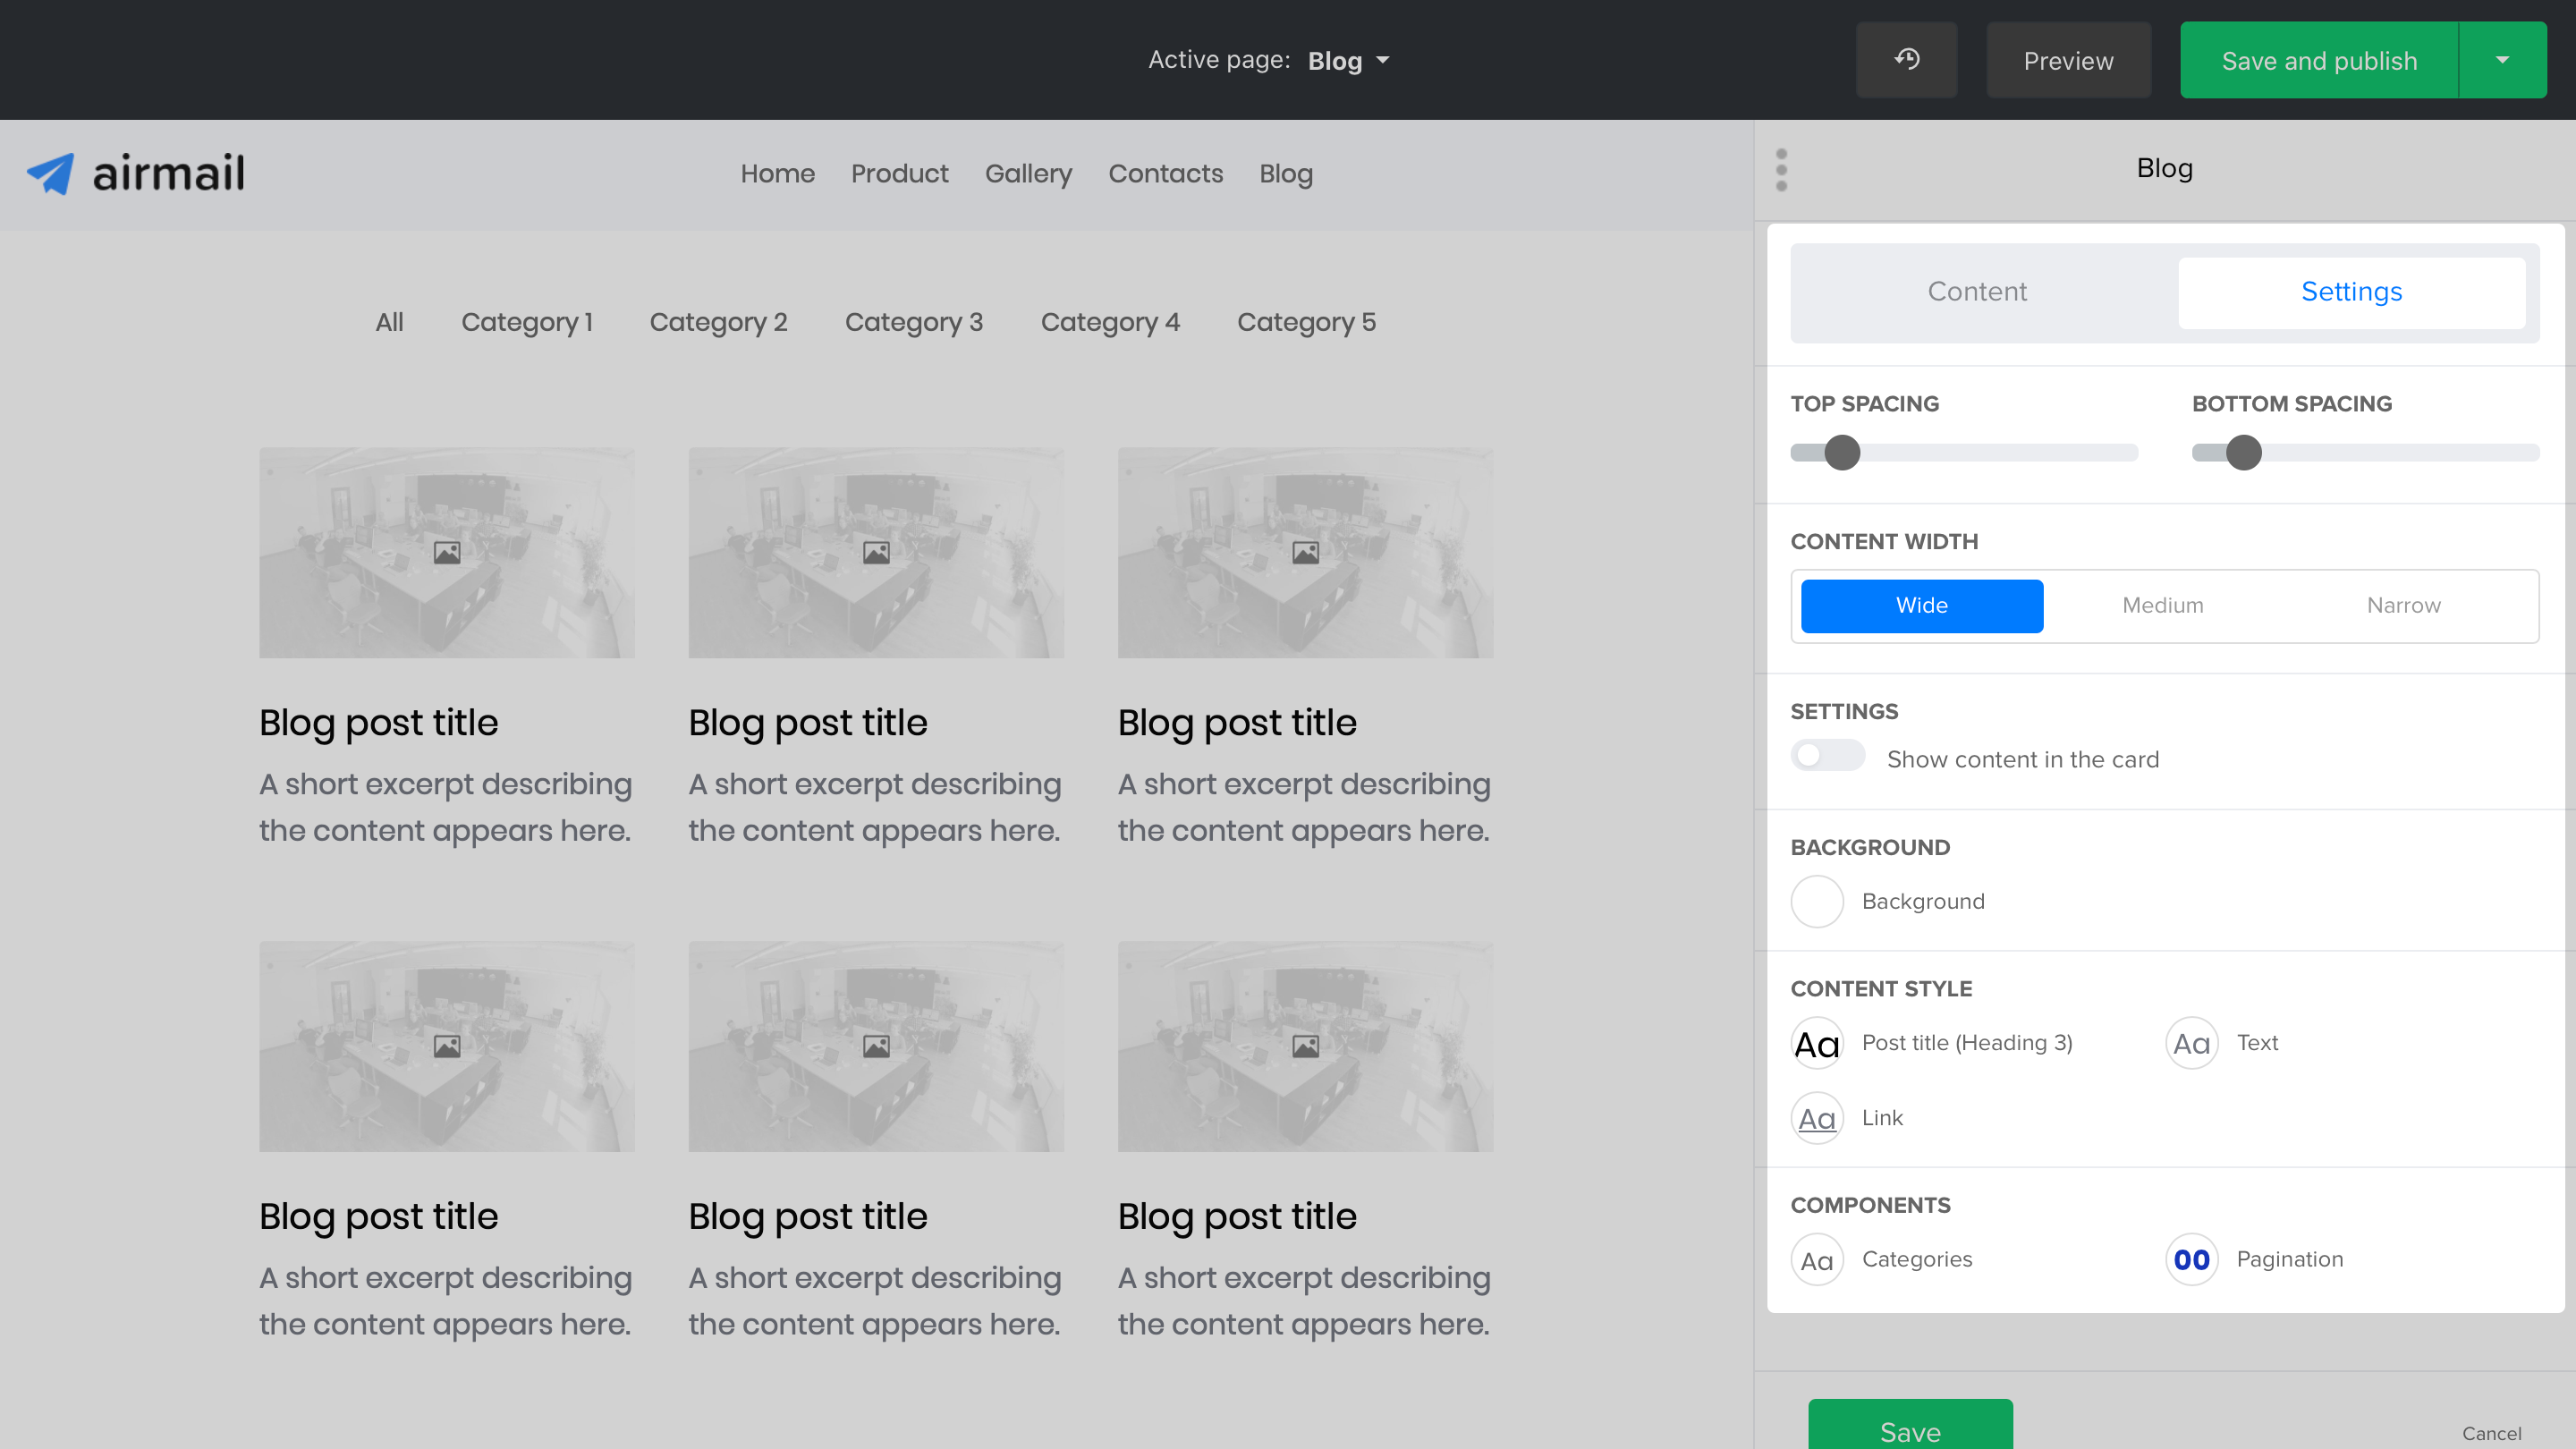
To edit the design settings of your blog page, click theSettings tab in the sidebar.
Each website you create can have one blog page.
How to add/edit blog posts
Blog posts can be found and created on Sites under theWebsites tab when you click on the title of your website.
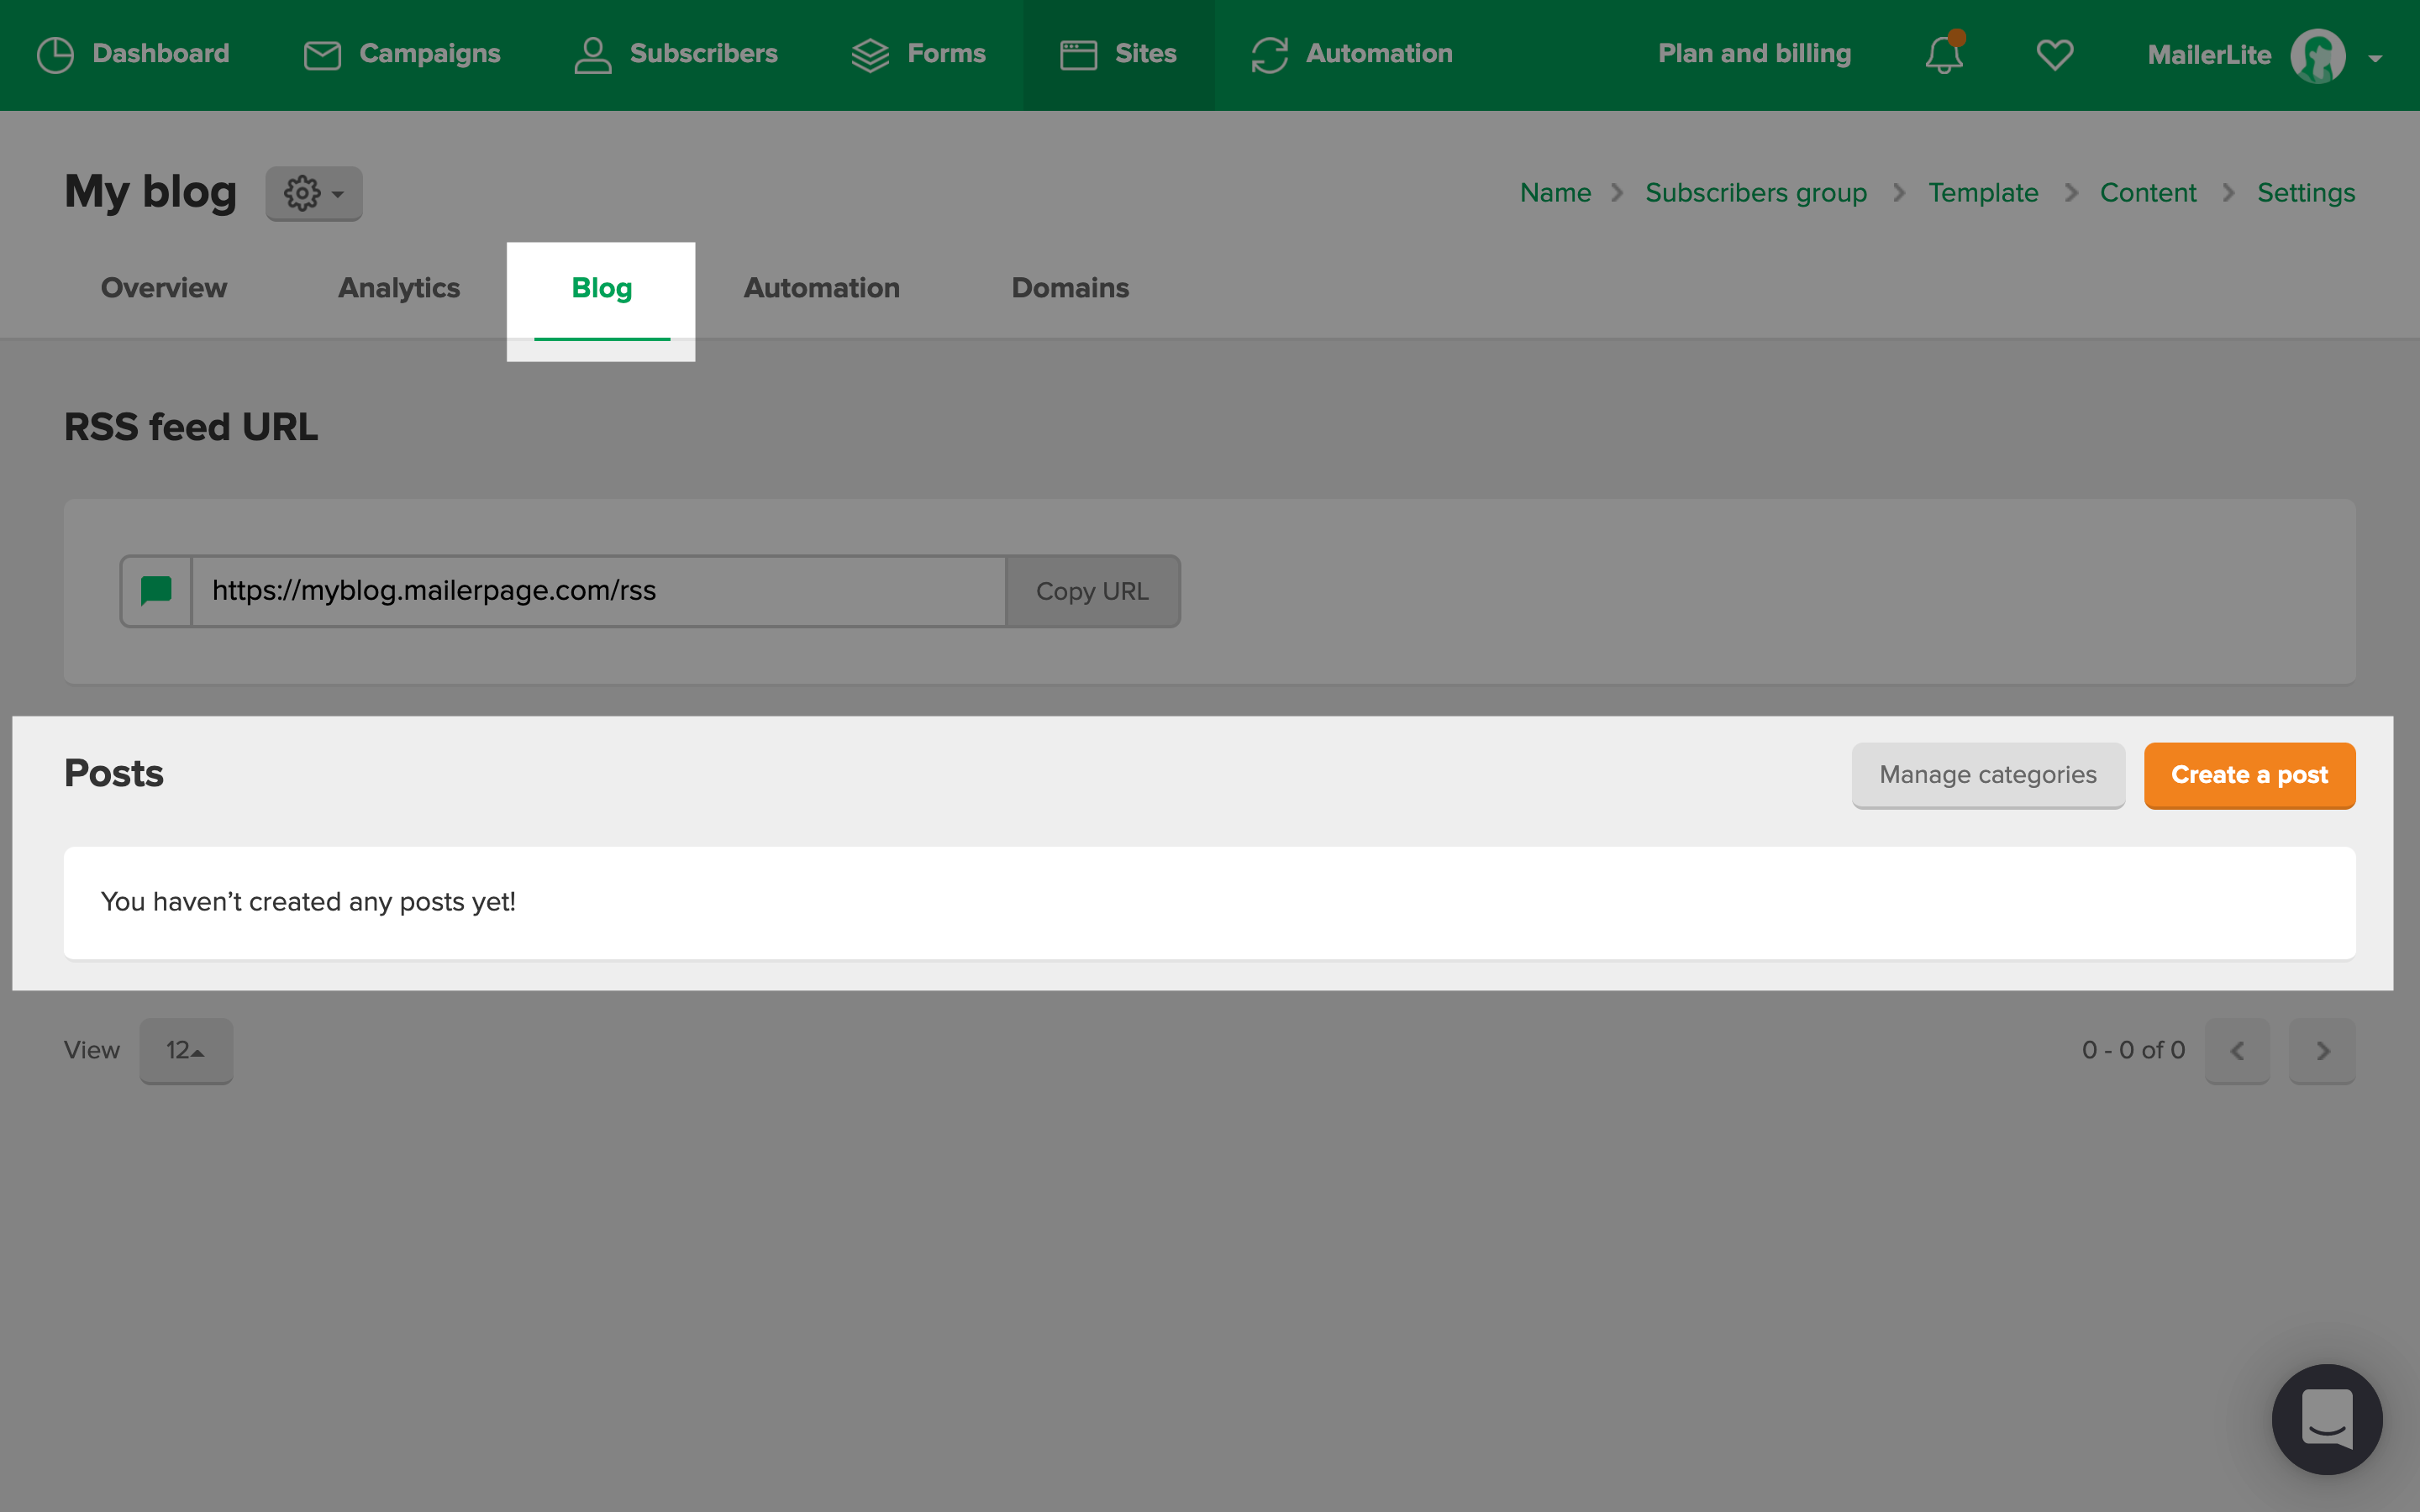
To create a post:
-
ClickCreate a post and give your blog post a title.
-
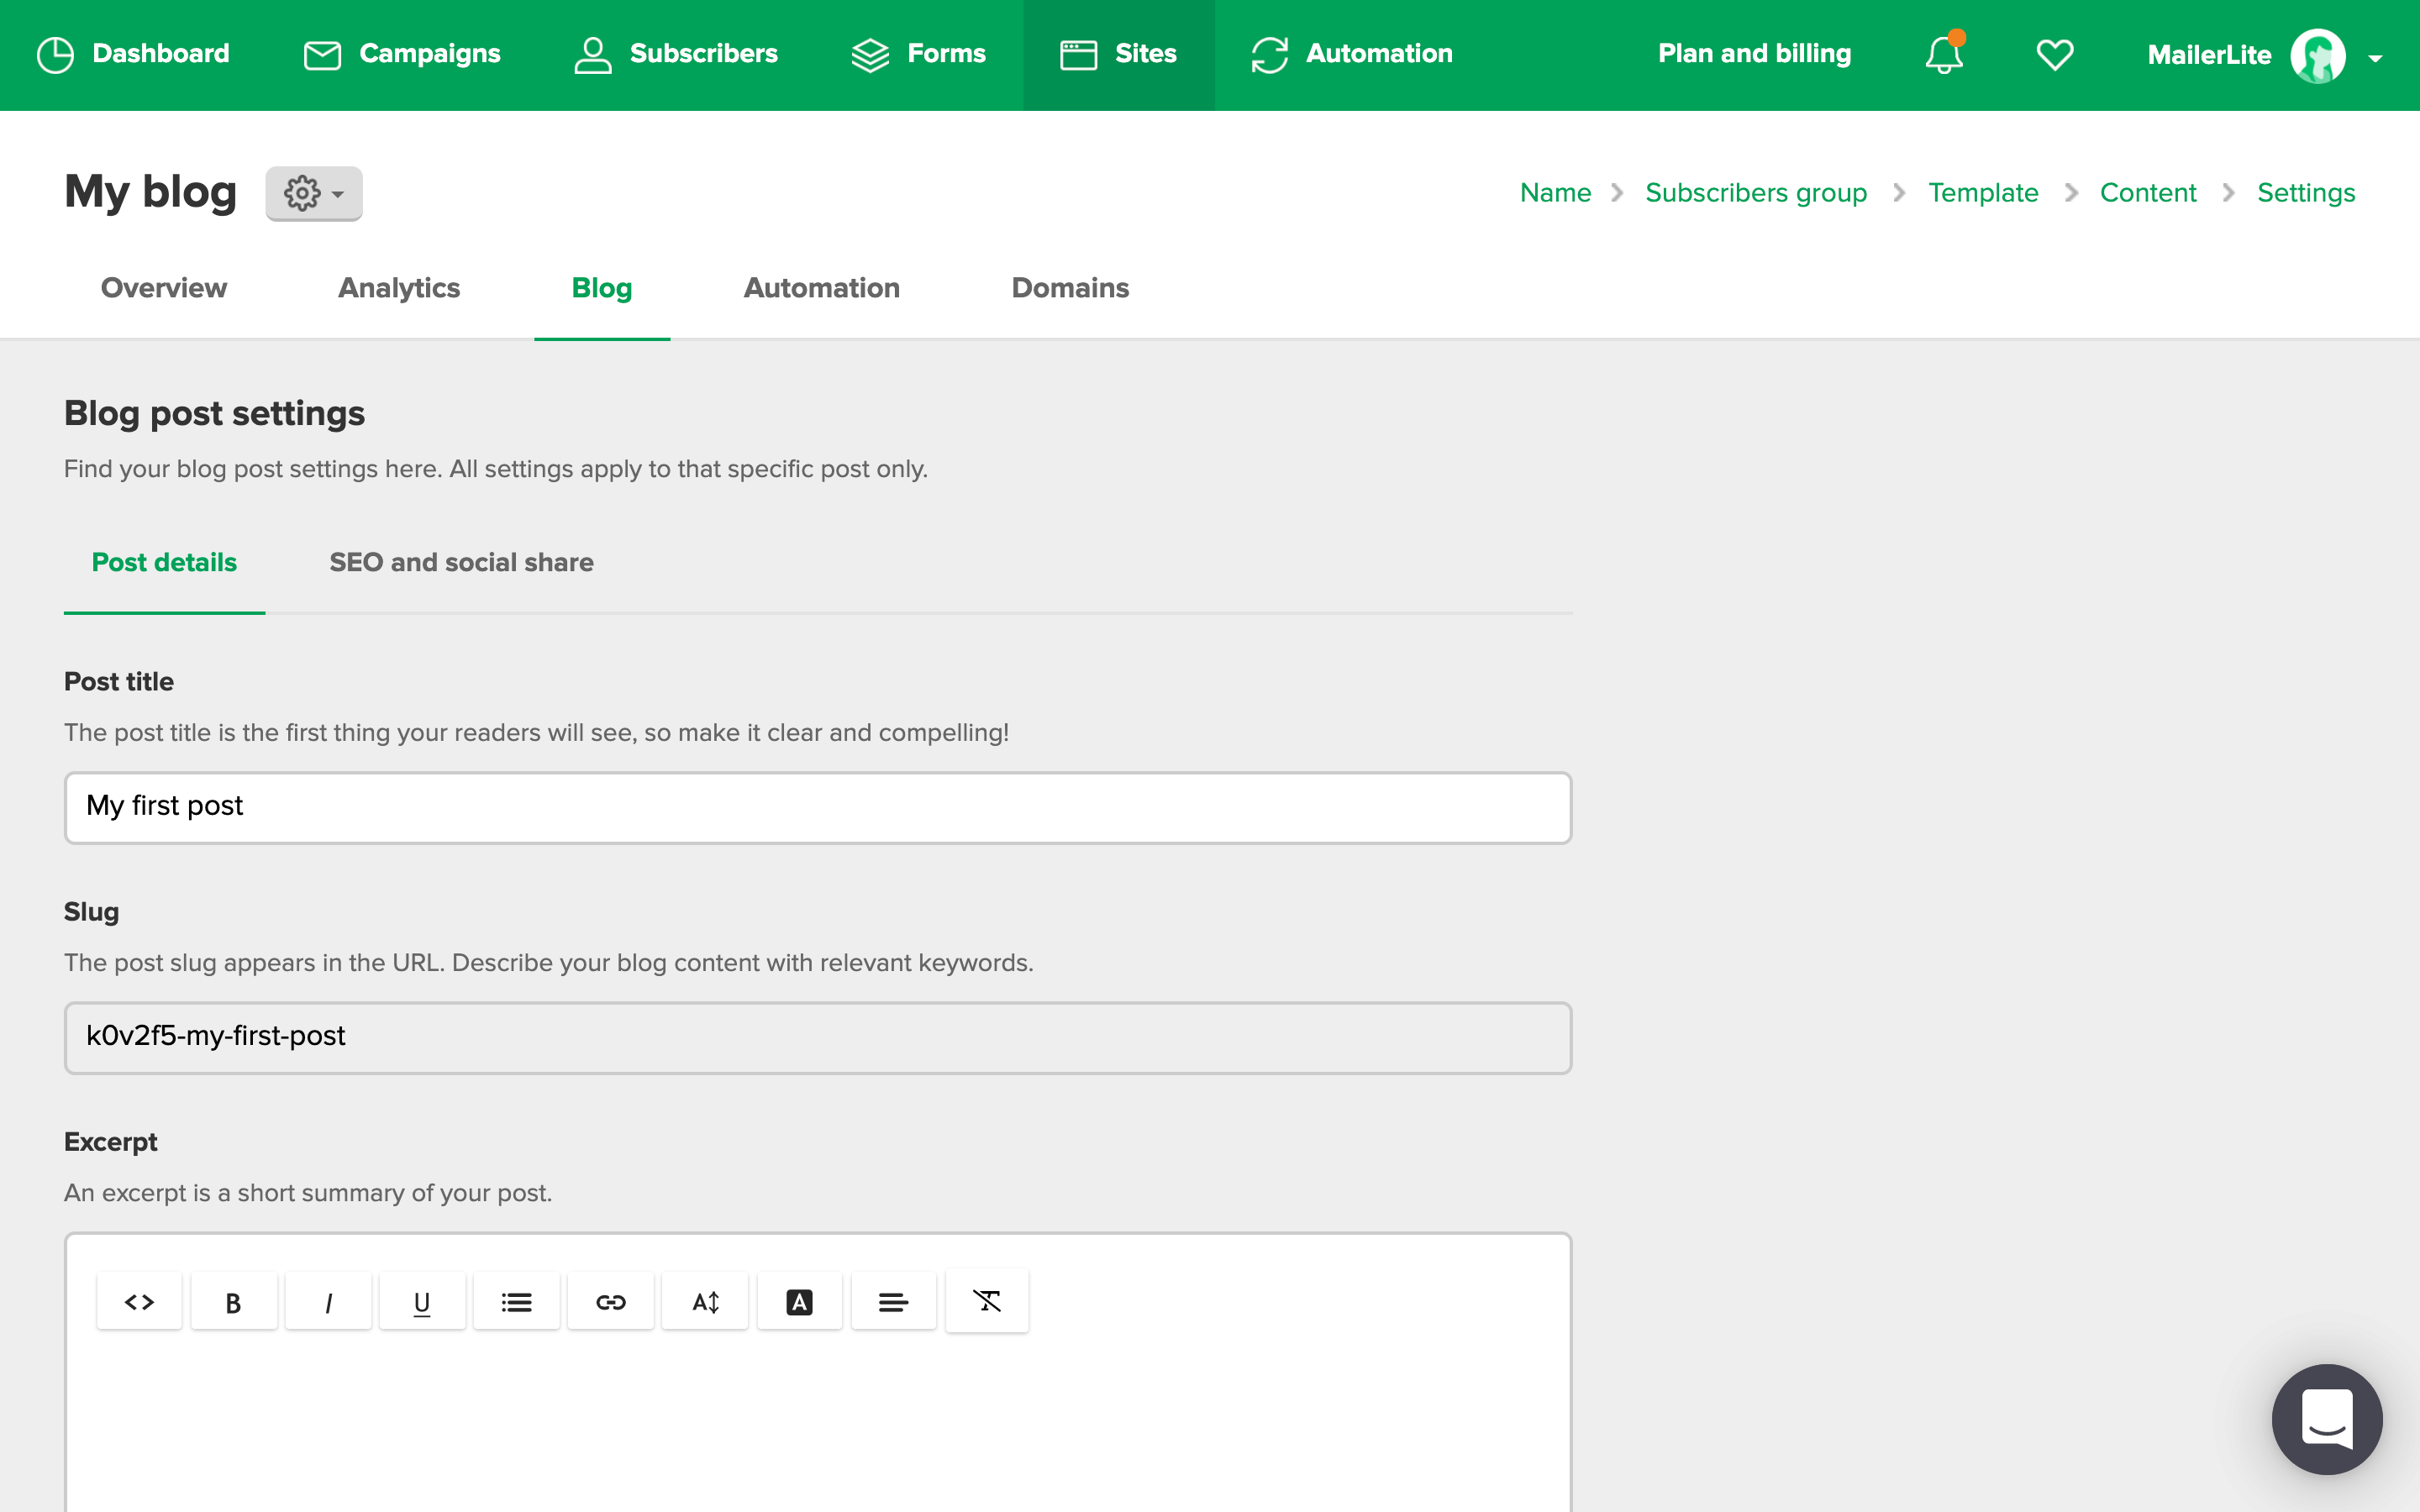
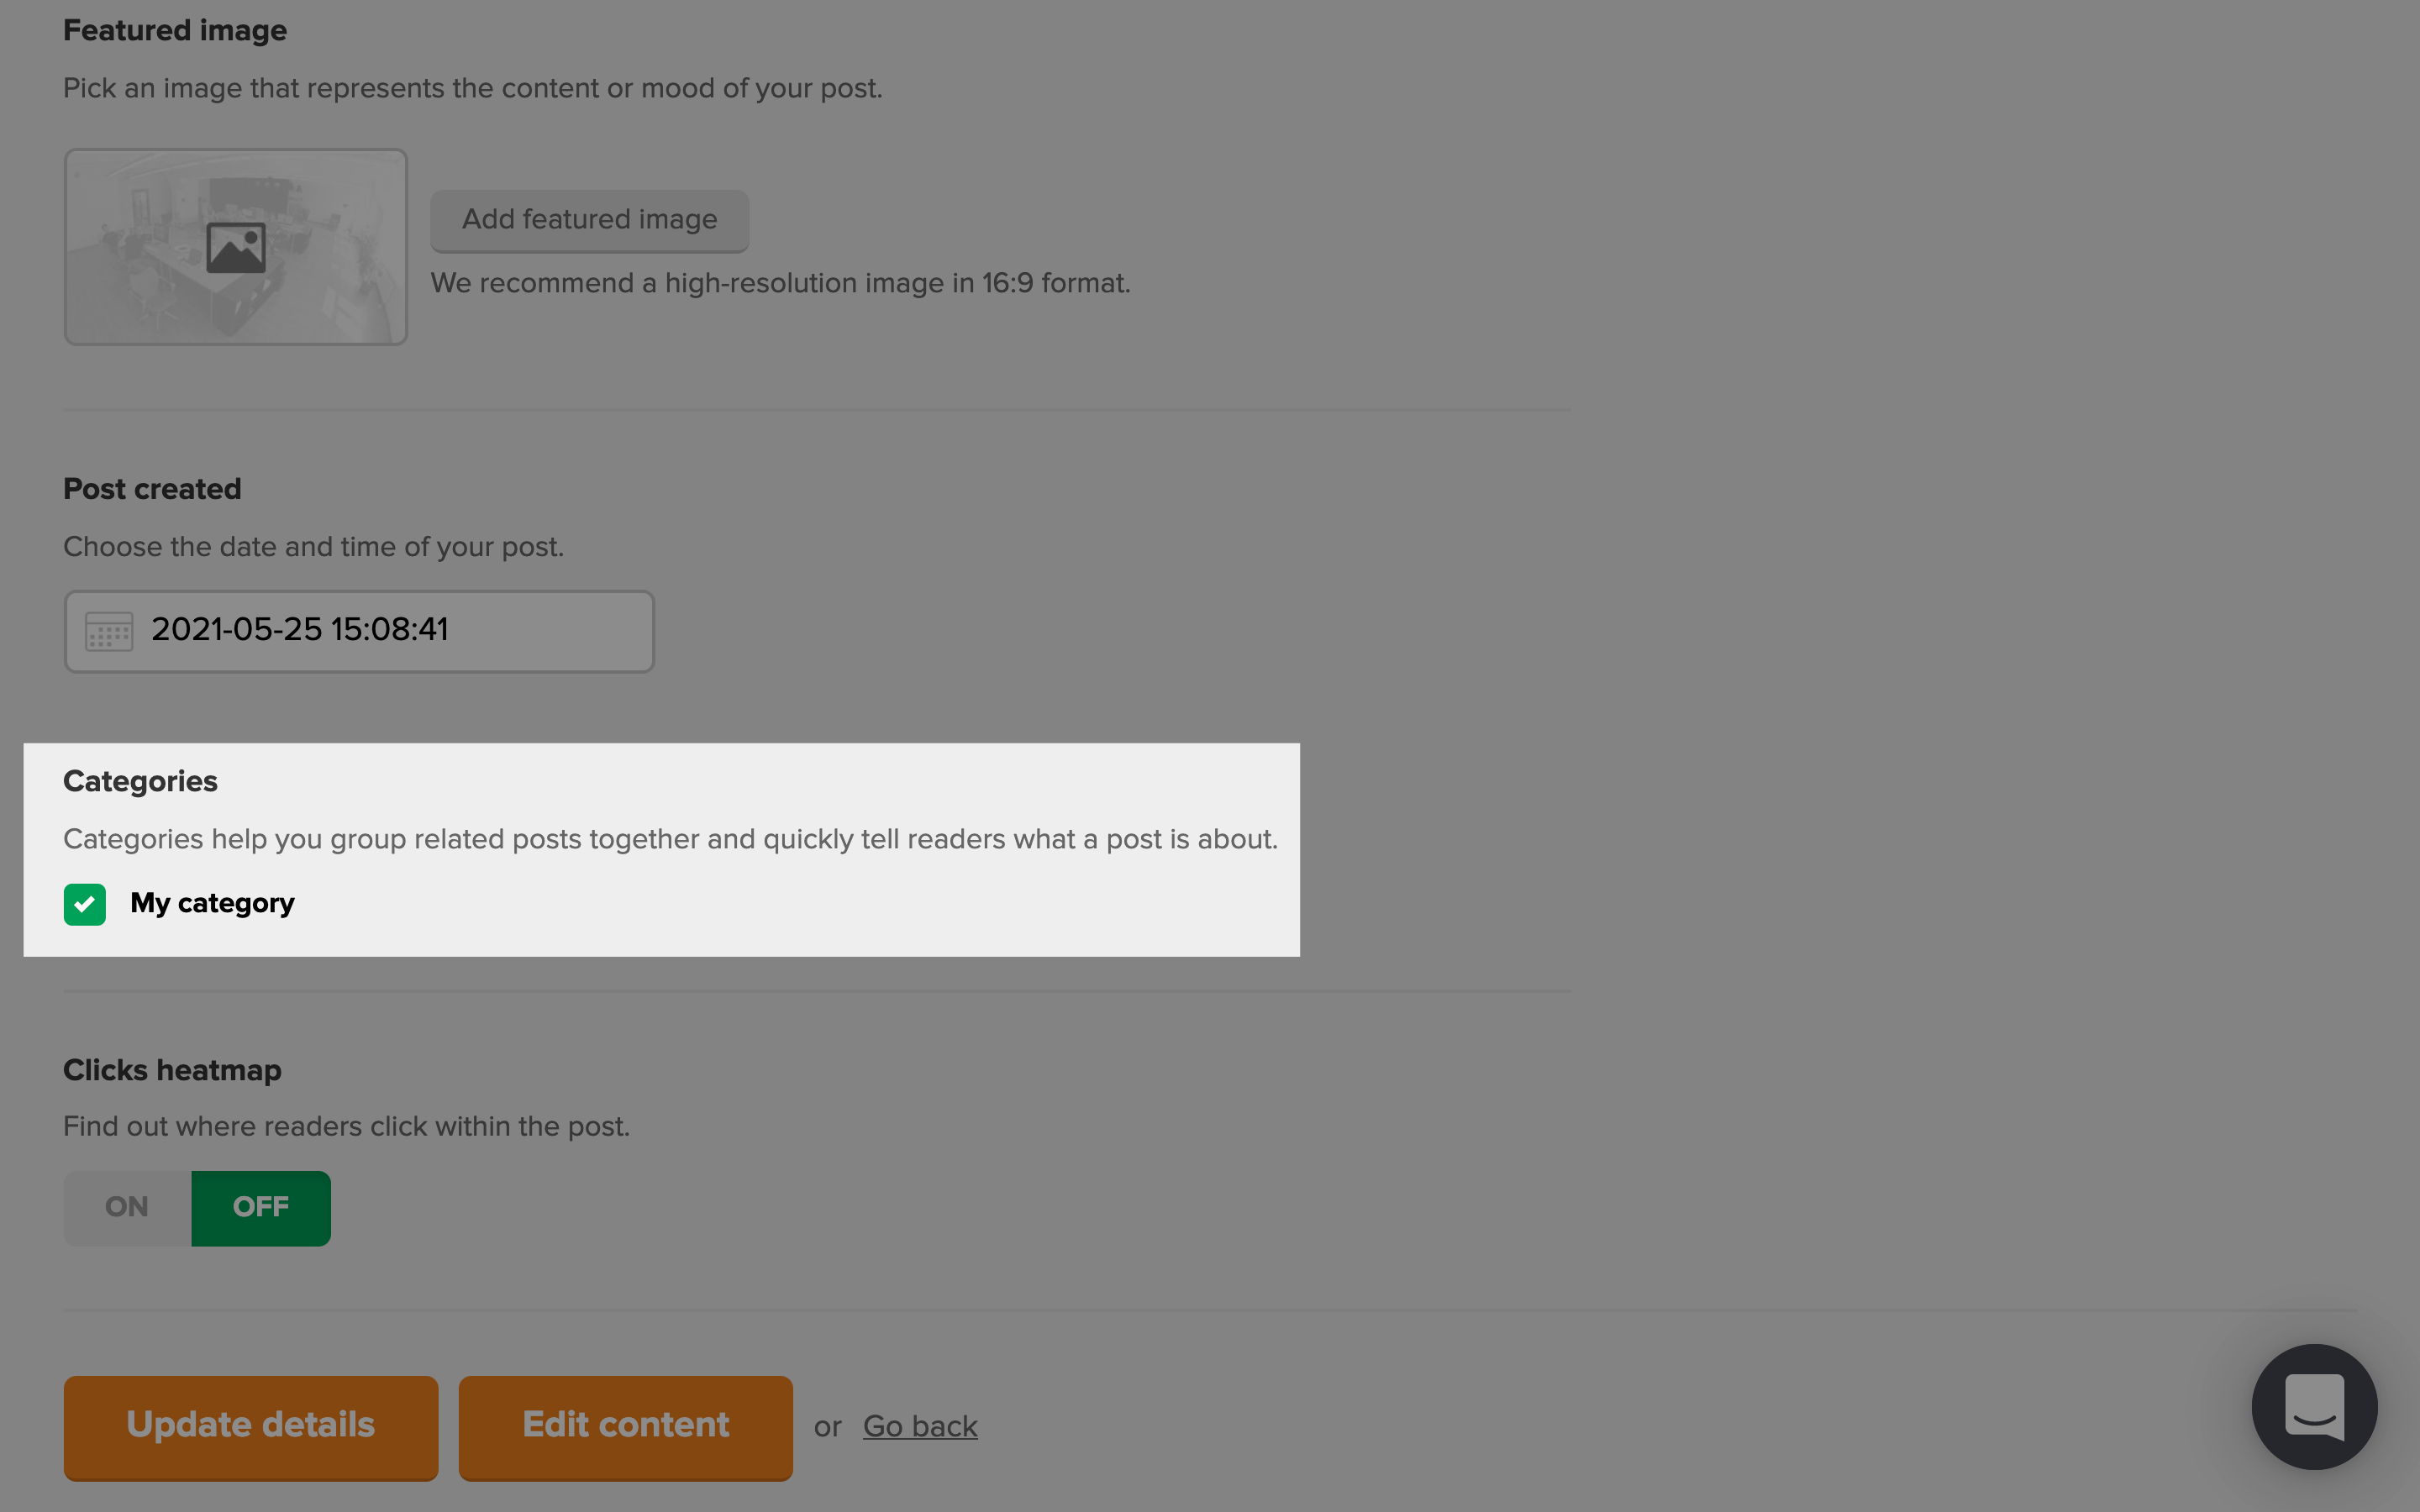
You can then edit thePost title,Excerpt, andFeatured image of your blog post. If you have created categories, they will also appear here.
-
Click Updatedetails to save your changes then clickEditcontent.
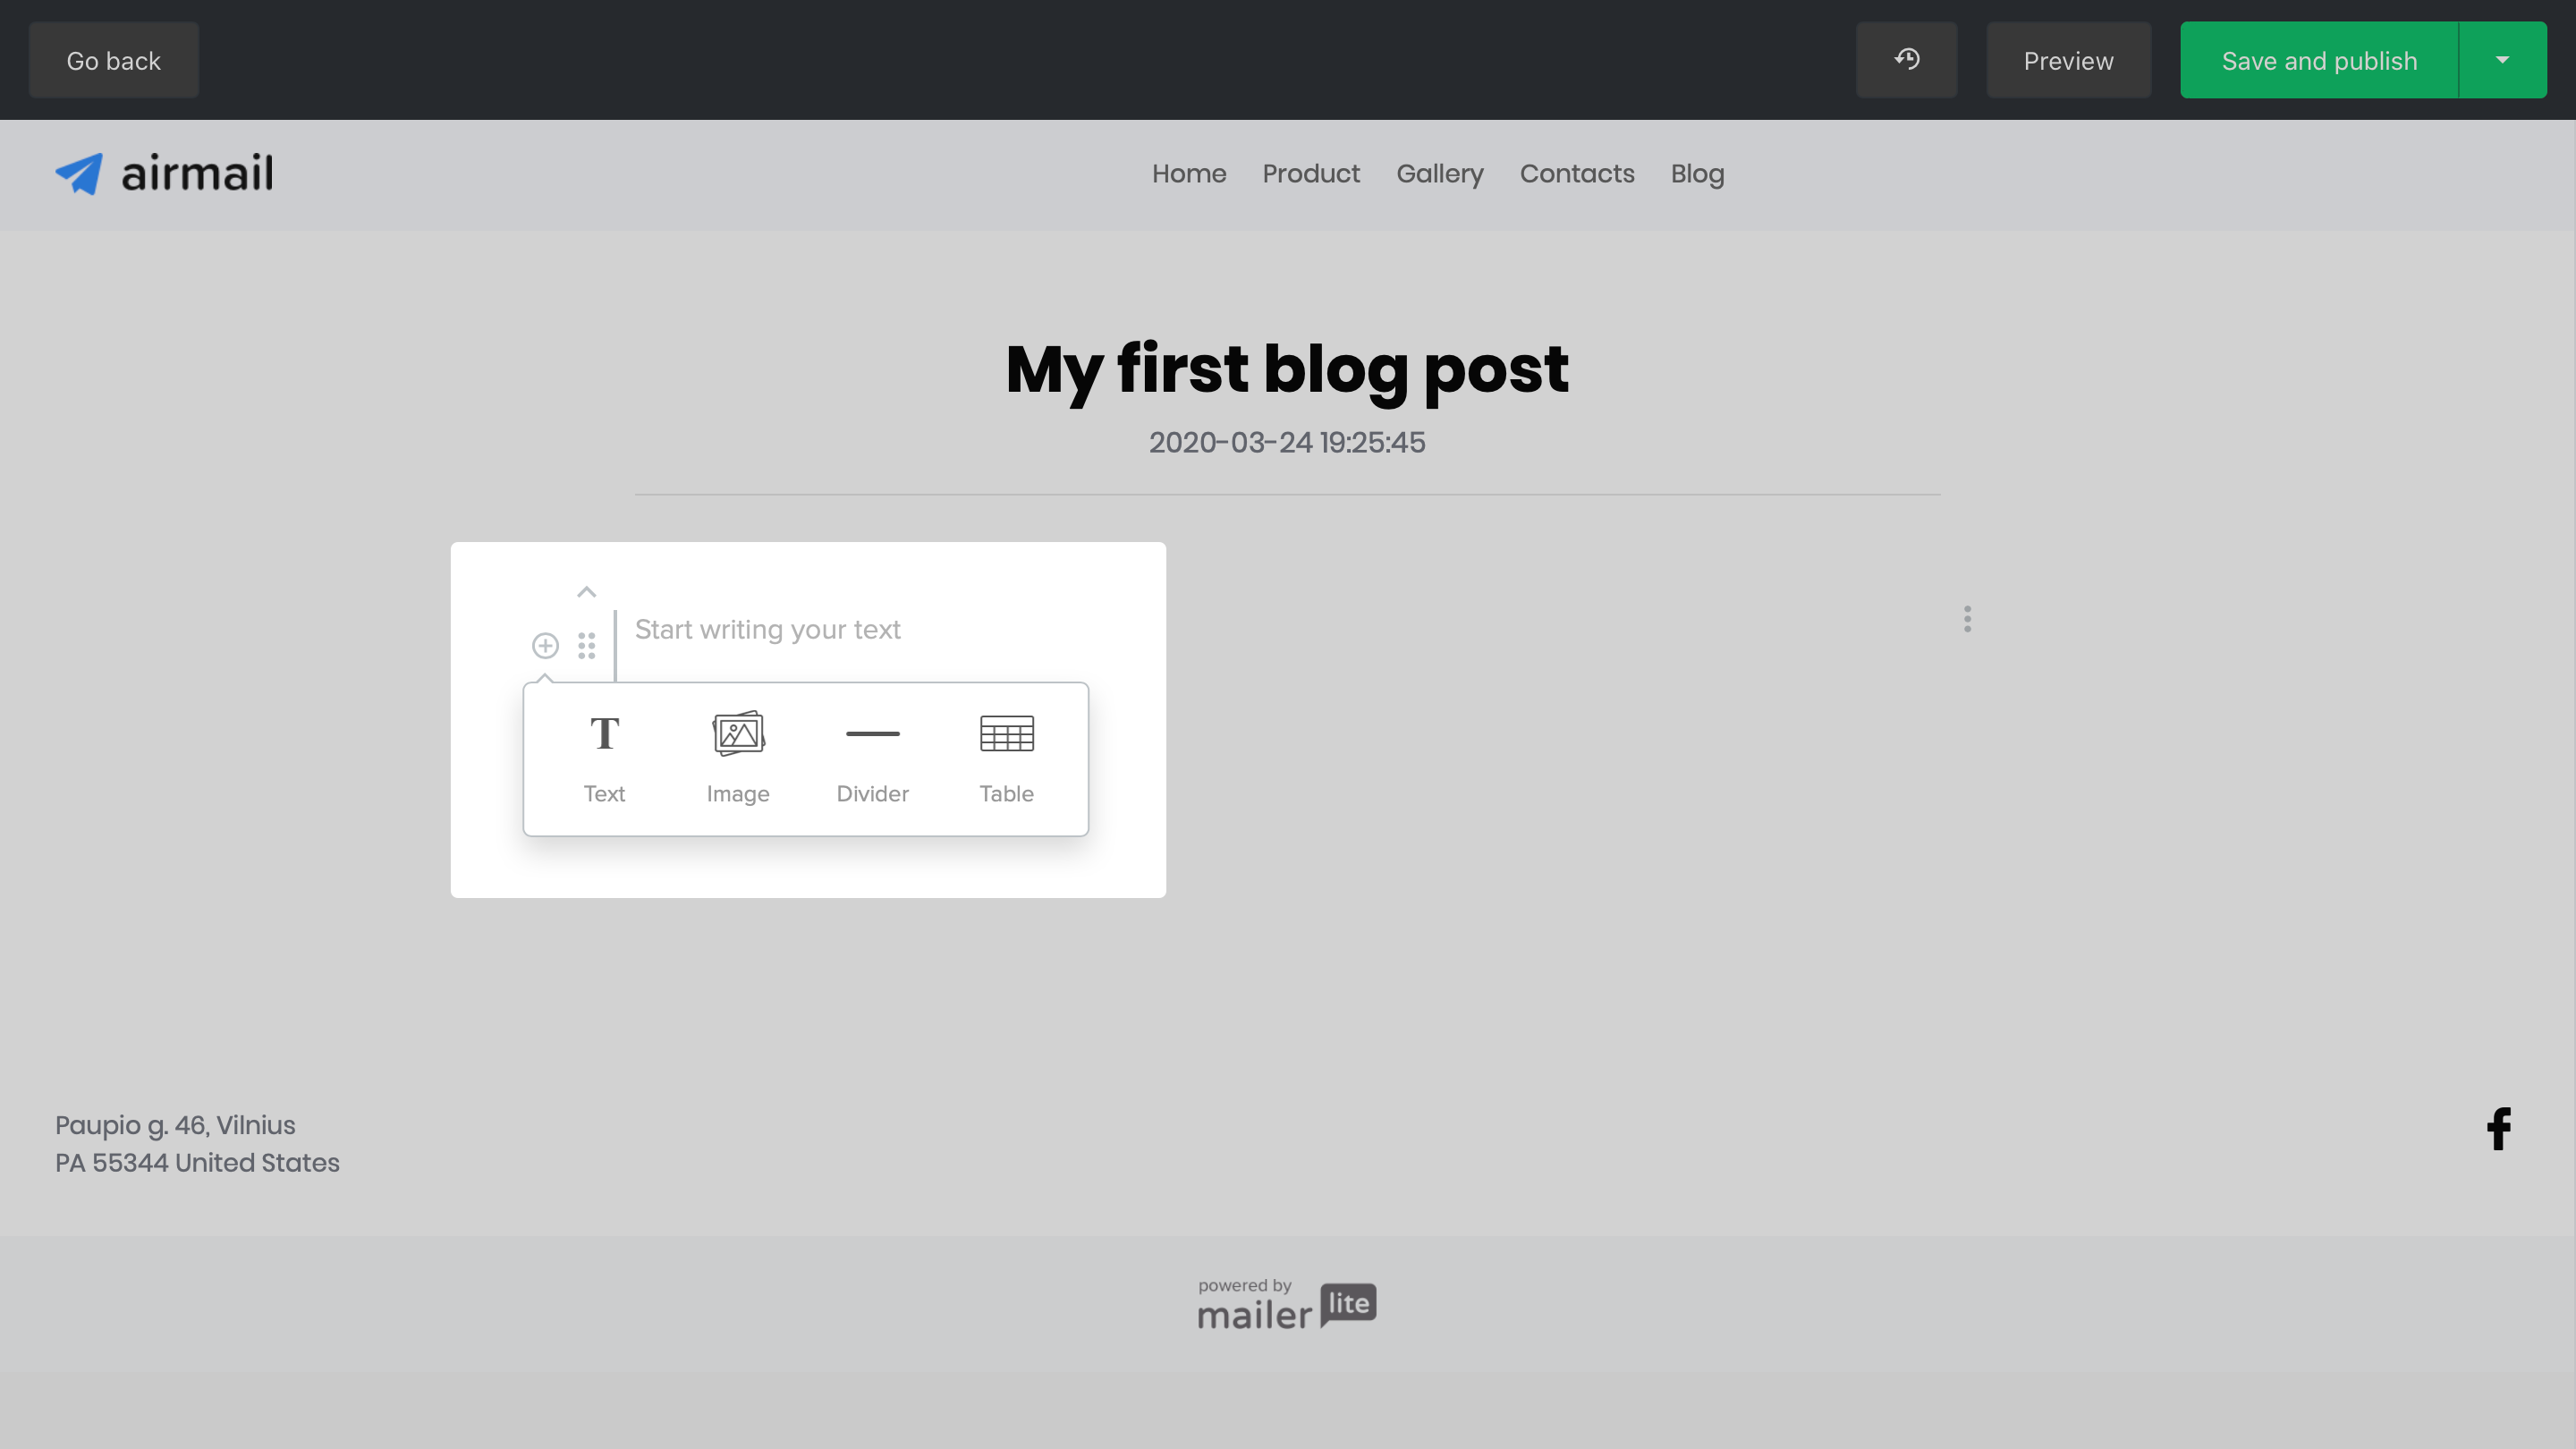
Now you can begin writing your blog post by typing directly into the blog post editor.

How to add blocks to a blog post
There are eight types of blocks you can use in a blog post:
-
Text - Add text to your blog post
-
Image - Insert an image from your File manager
-
Divider - Break up the content of your blog
-
Table - Insert a table into your blog post
-
Code - Customize your blog post by inserting additional code
-
Signup form - Invite readers to join your email list
-
Video - Embed videos into your blog post
To add blocks to your blog post:
-
Hover over the margin to the left of your text until a+ button appears
-
Click the+ button to add additional blocks to your blog post
How to publish a blog post
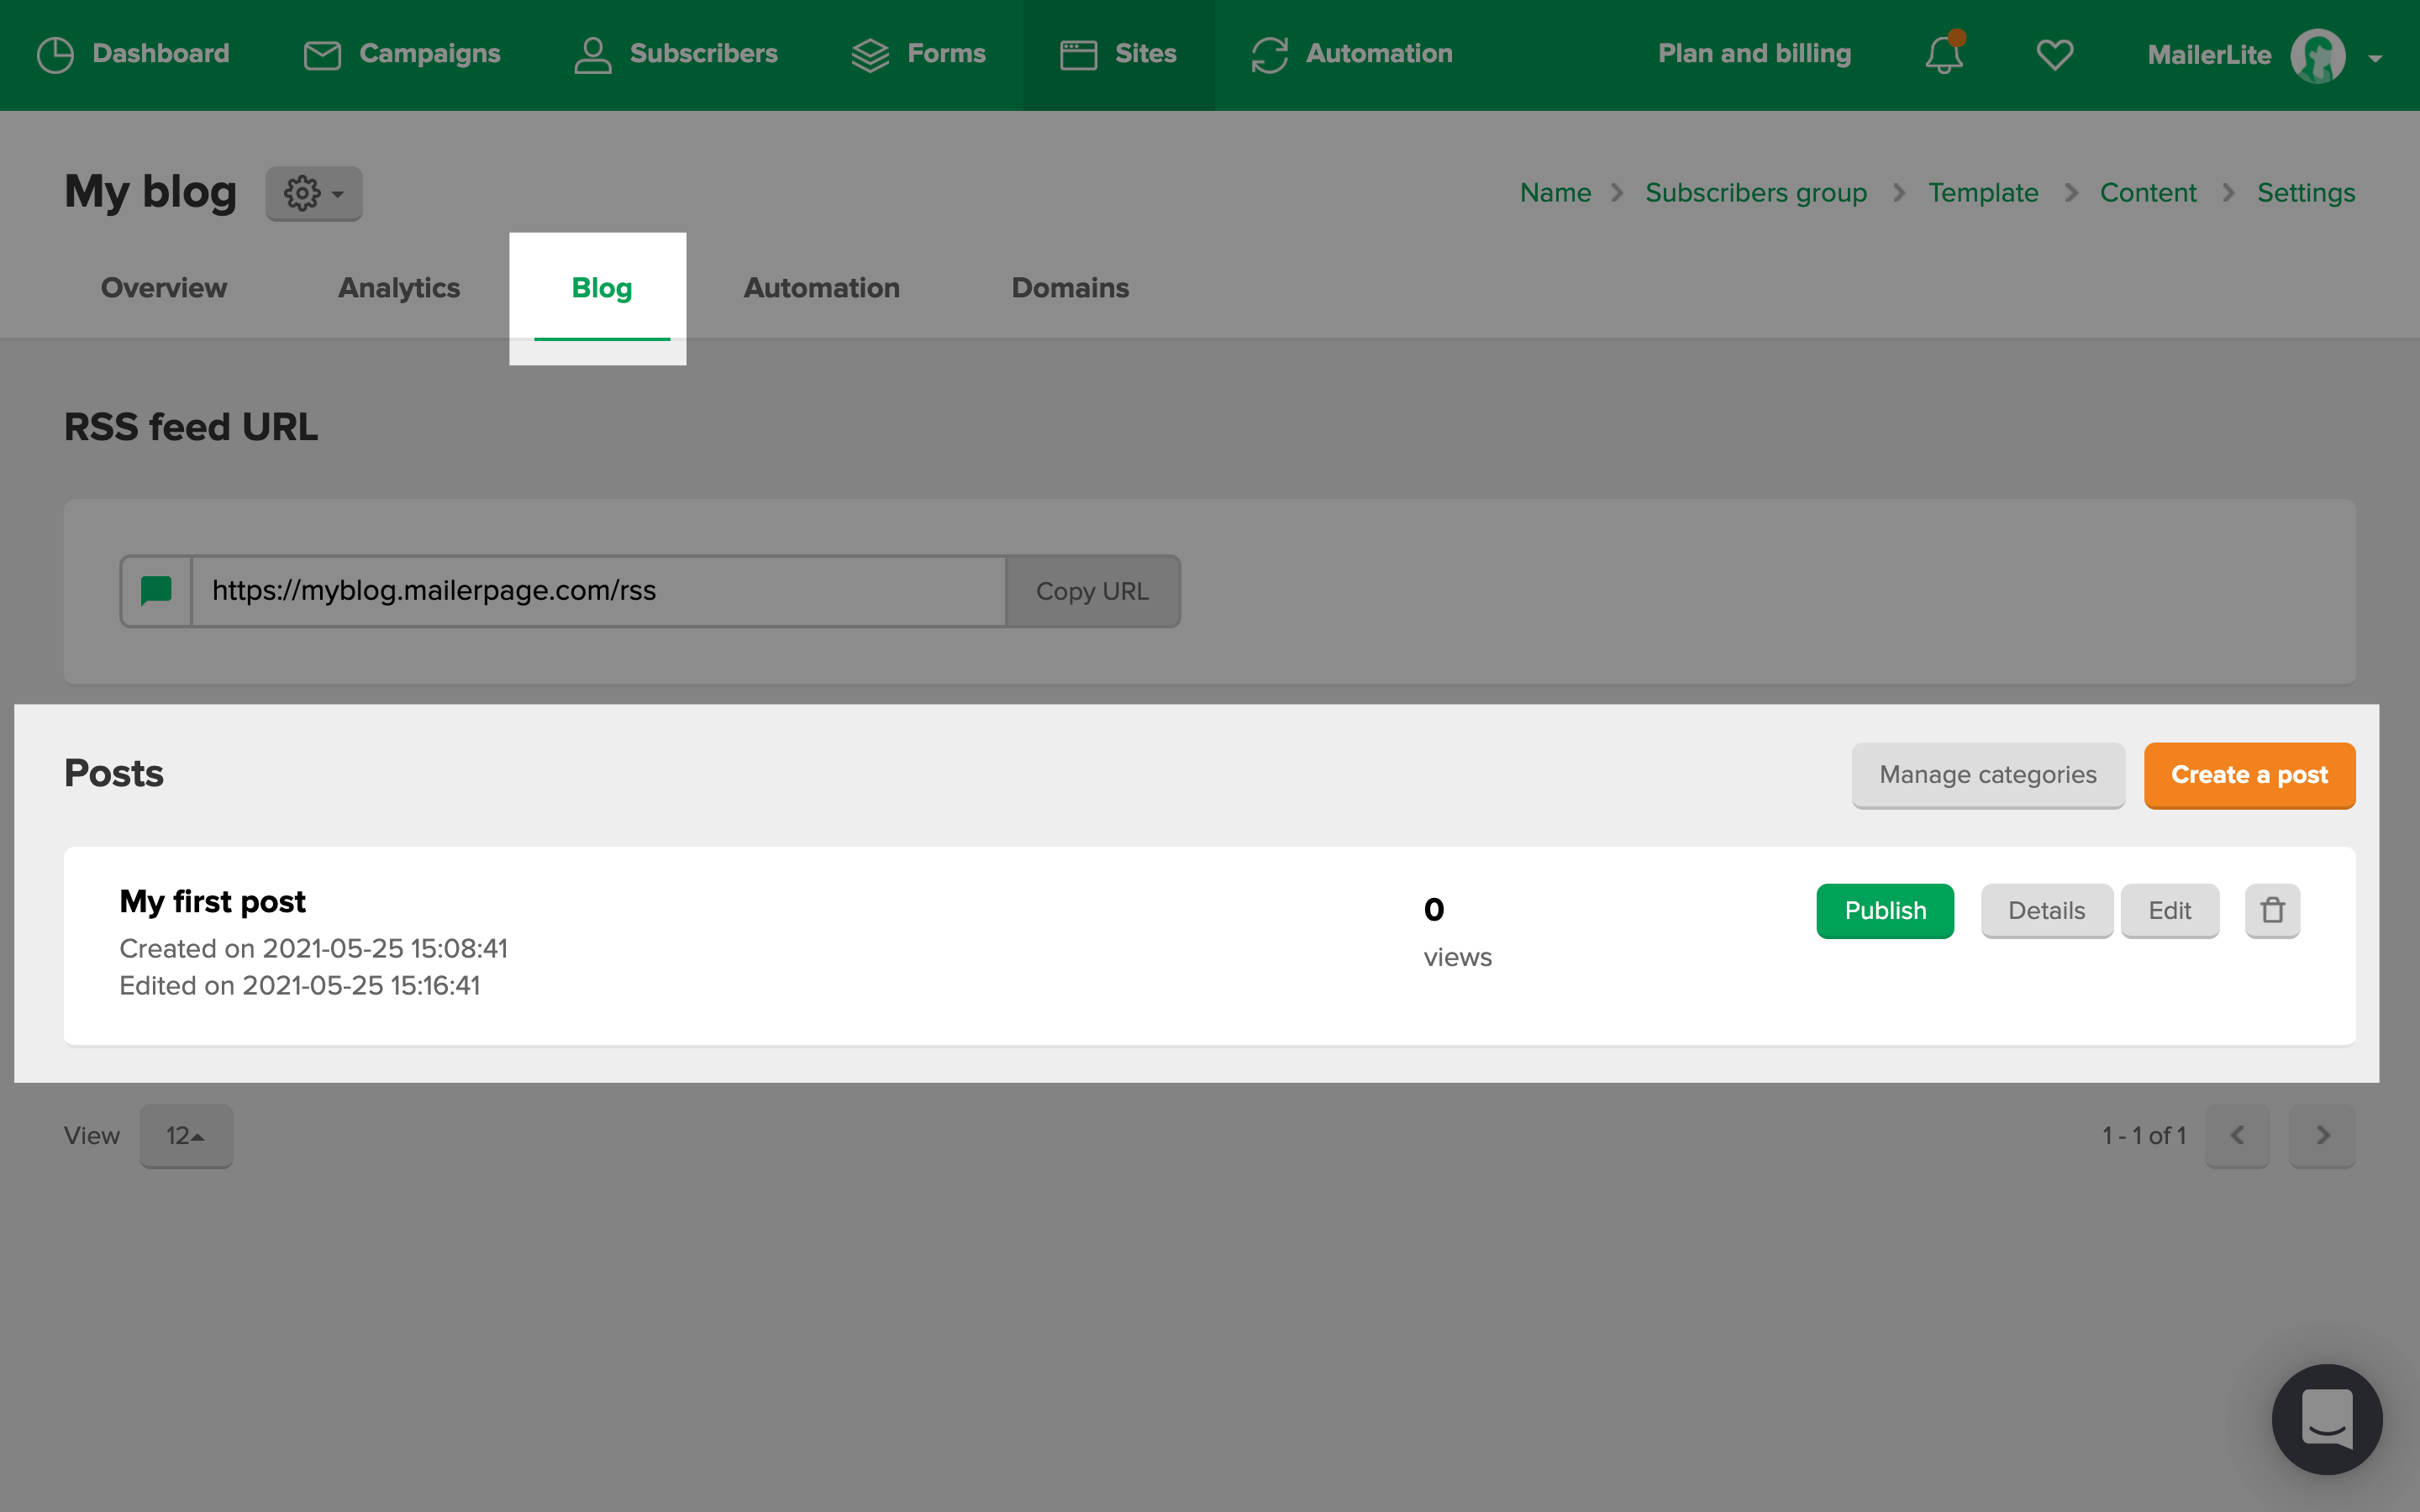
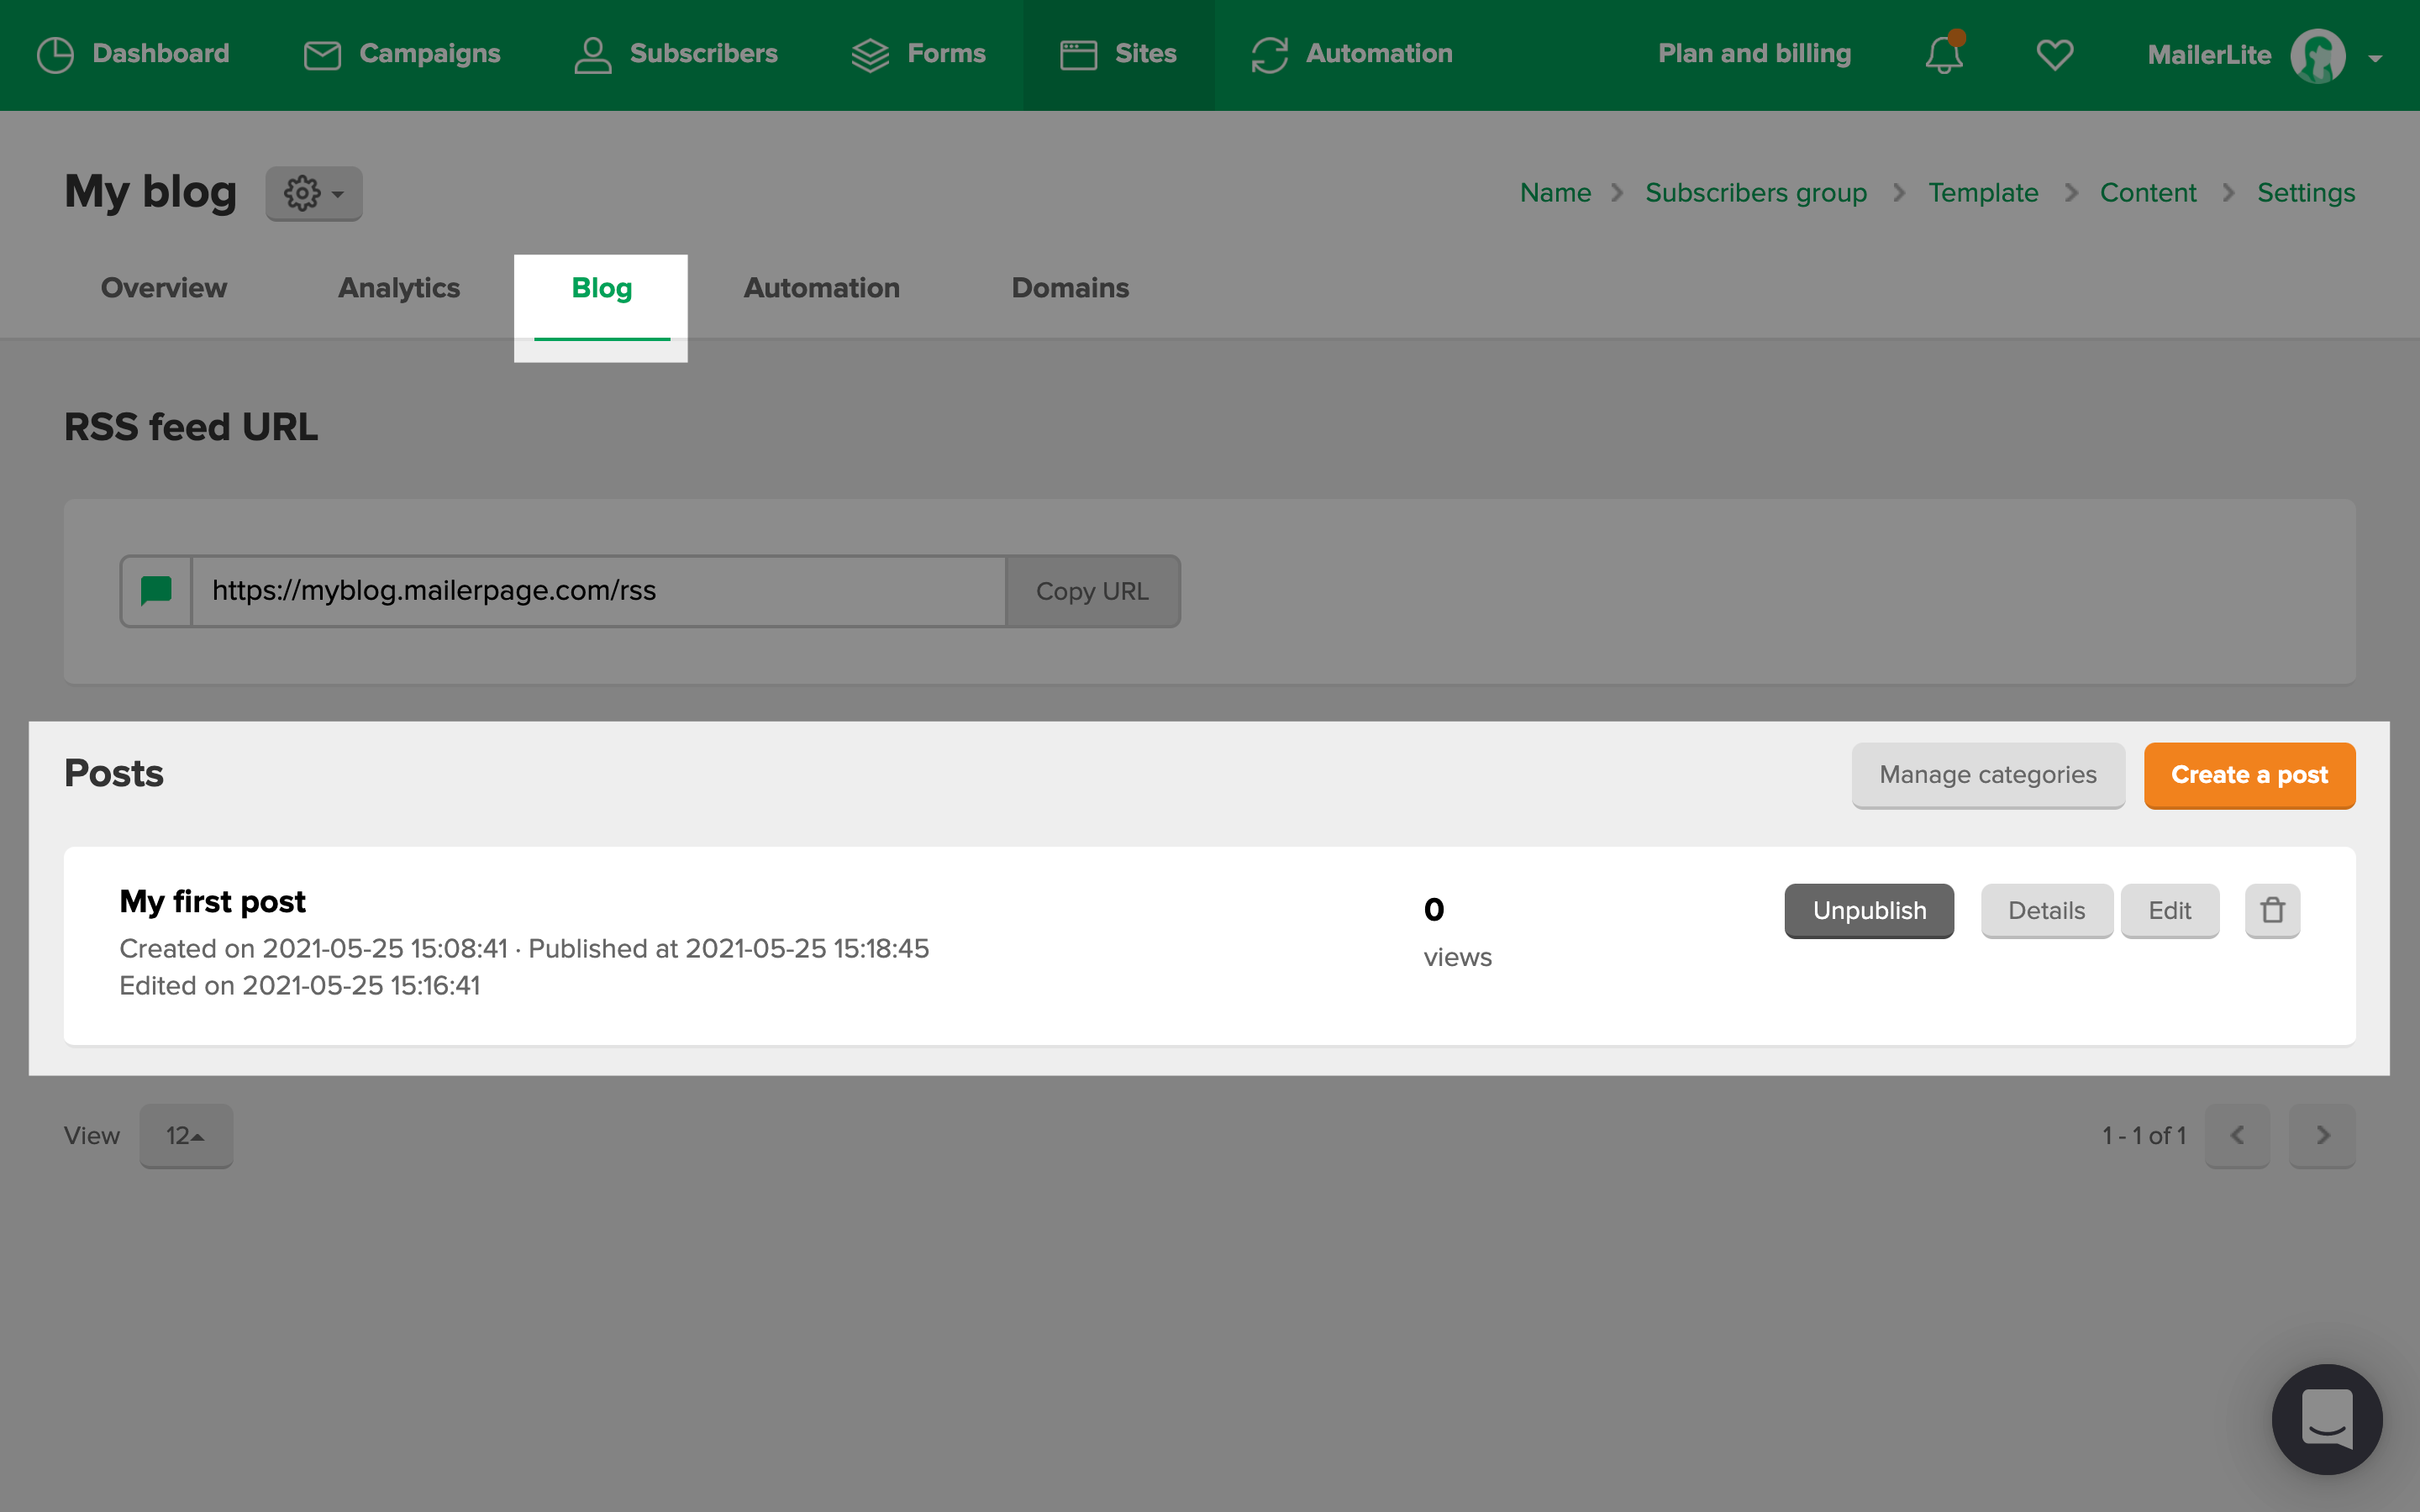
To publish your post, navigate to your Blog tab and click thePublish button next to the post you wish to make public on your website.
Any time you want to add or revise blog posts, you can just return to your website'sBlog tab to edit and create posts without the need to open your website builder.
You can also unpublish blog posts by clicking on theUnpublish button.
For tips on how to create content for your new blog, check out our ultimate guide on how to craft email content people care about.
How to schedule a blog post for later
Once you have finished creating your blog post, you can choose to schedule it for later instead of publishing it right away. To schedule a blog post for a later publishing date:
-
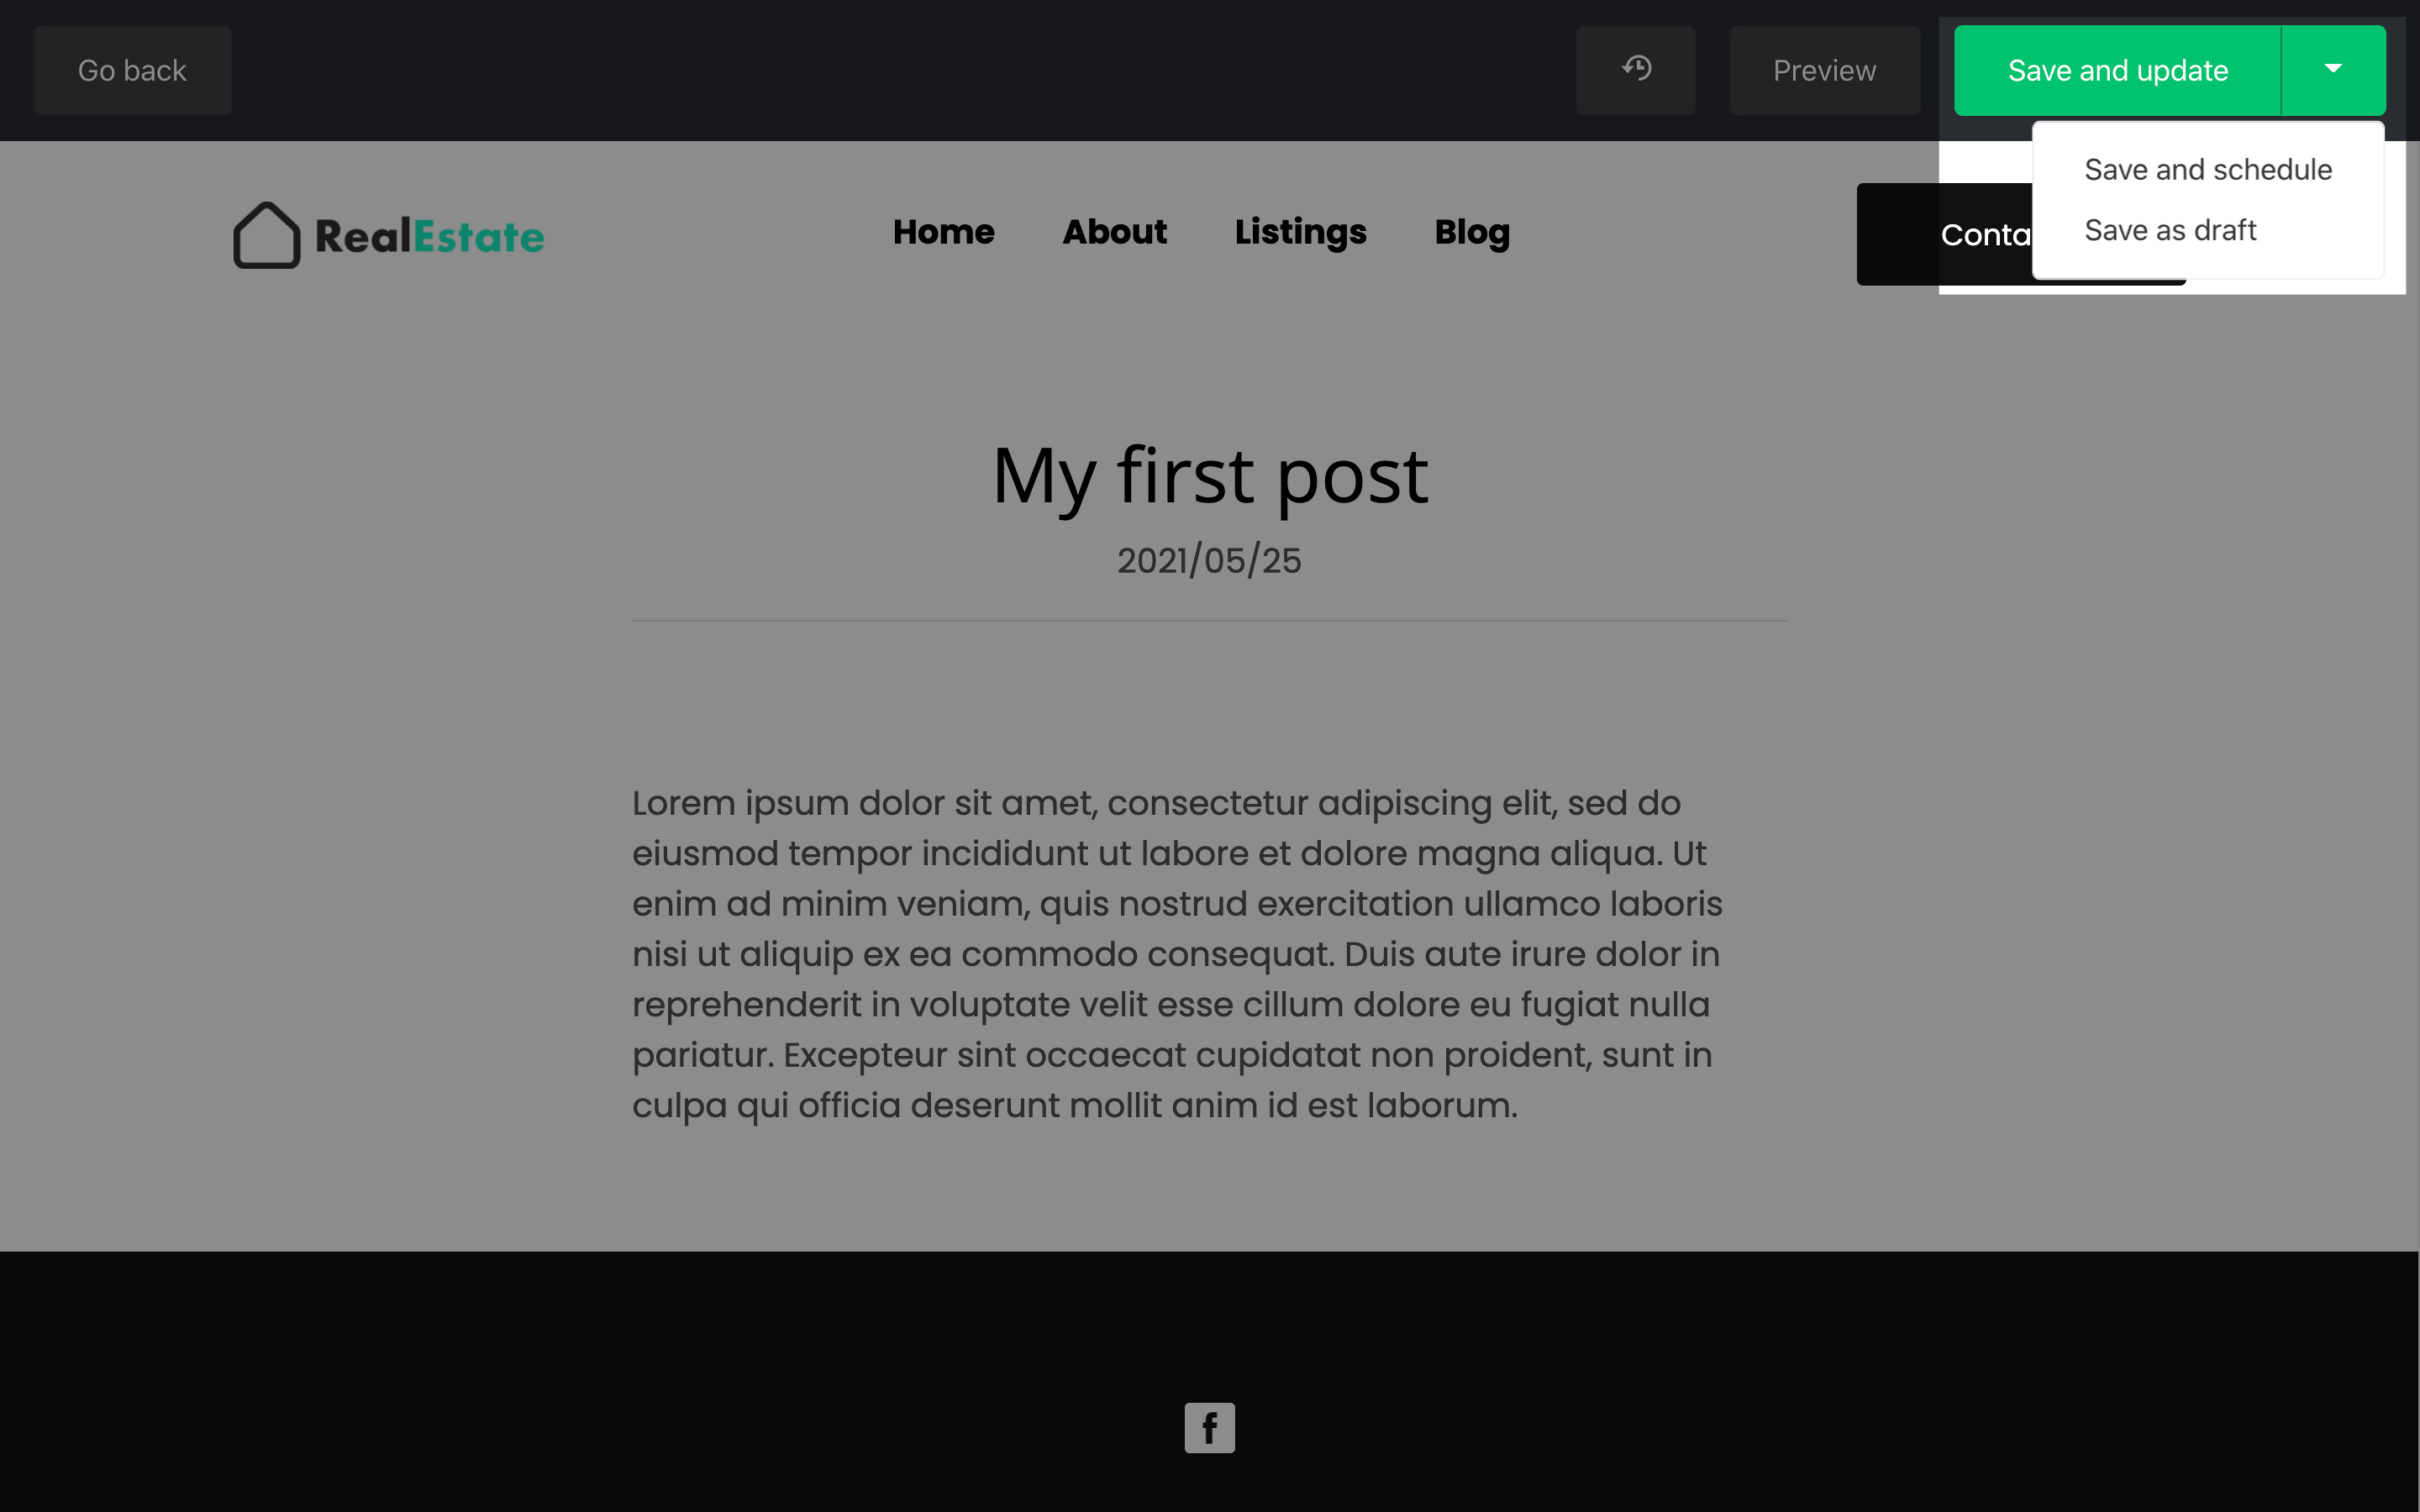
Click the downward-facing arrow next to theSave and publish button.
-
ClickSave and schedule.
-
Enter the time and date you want your blog post to be published.
-
Click Schedule post.
If you have already created your draft, you can still schedule it for later:
-
Navigate to Sites.
-
Click on the title of the website containing the drafted blog post.
-
Click theBlog tab.
-
Find the blog post you wish to schedule and clickPublish.
-
SelectPublish later and enter the time and date you want your blog post to be published.
-
Click Schedule post.
Your blog post will appear as Scheduled in the Blog tab.
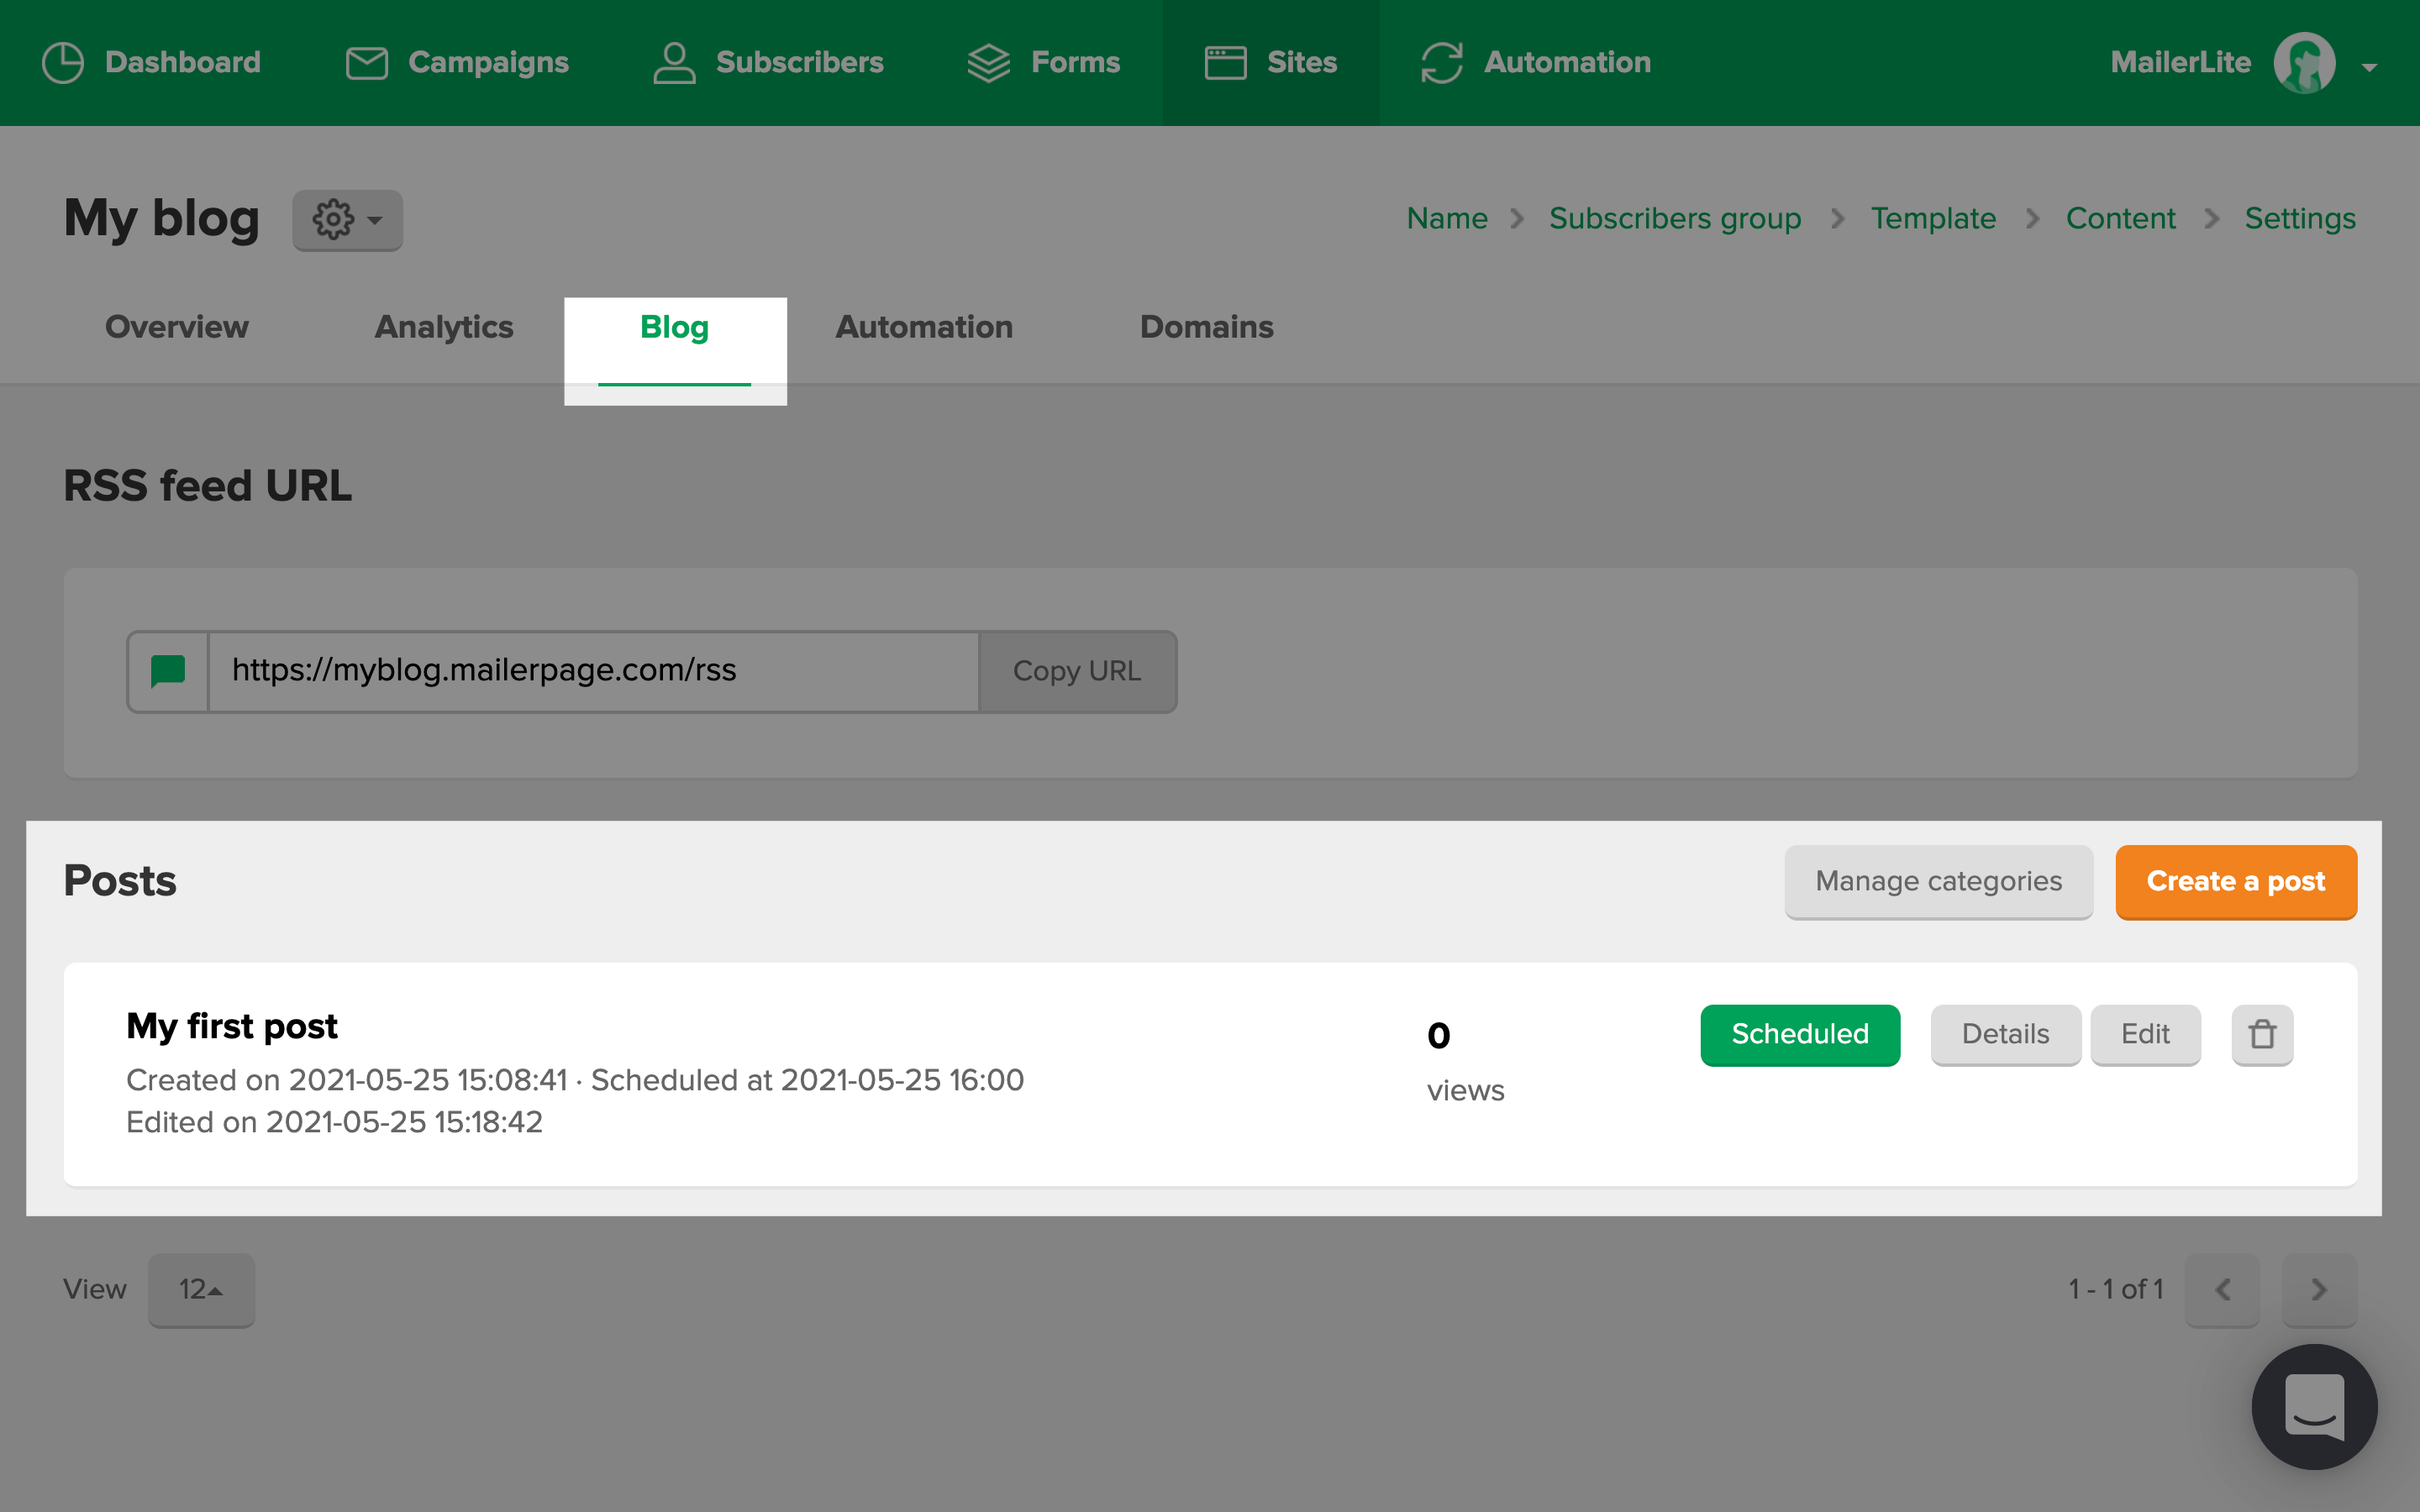
If you wish to change the schedule date and time, or publish your blog post immediately, simply click theScheduled button to select a new schedule or select publish now.
How to change the date of a blog post
If you're migrating from a different platform and want to repost blogs with their original dates, you can edit the date that is displayed when you create a blog post. To edit the date of a blog post:
-
Navigate to Sites.
-
Click on the title of the website containing the drafted blog post.
-
Select theBlog tab.
-
Find the blog post on which you want to change the date.
-
Click theDetails button.
-
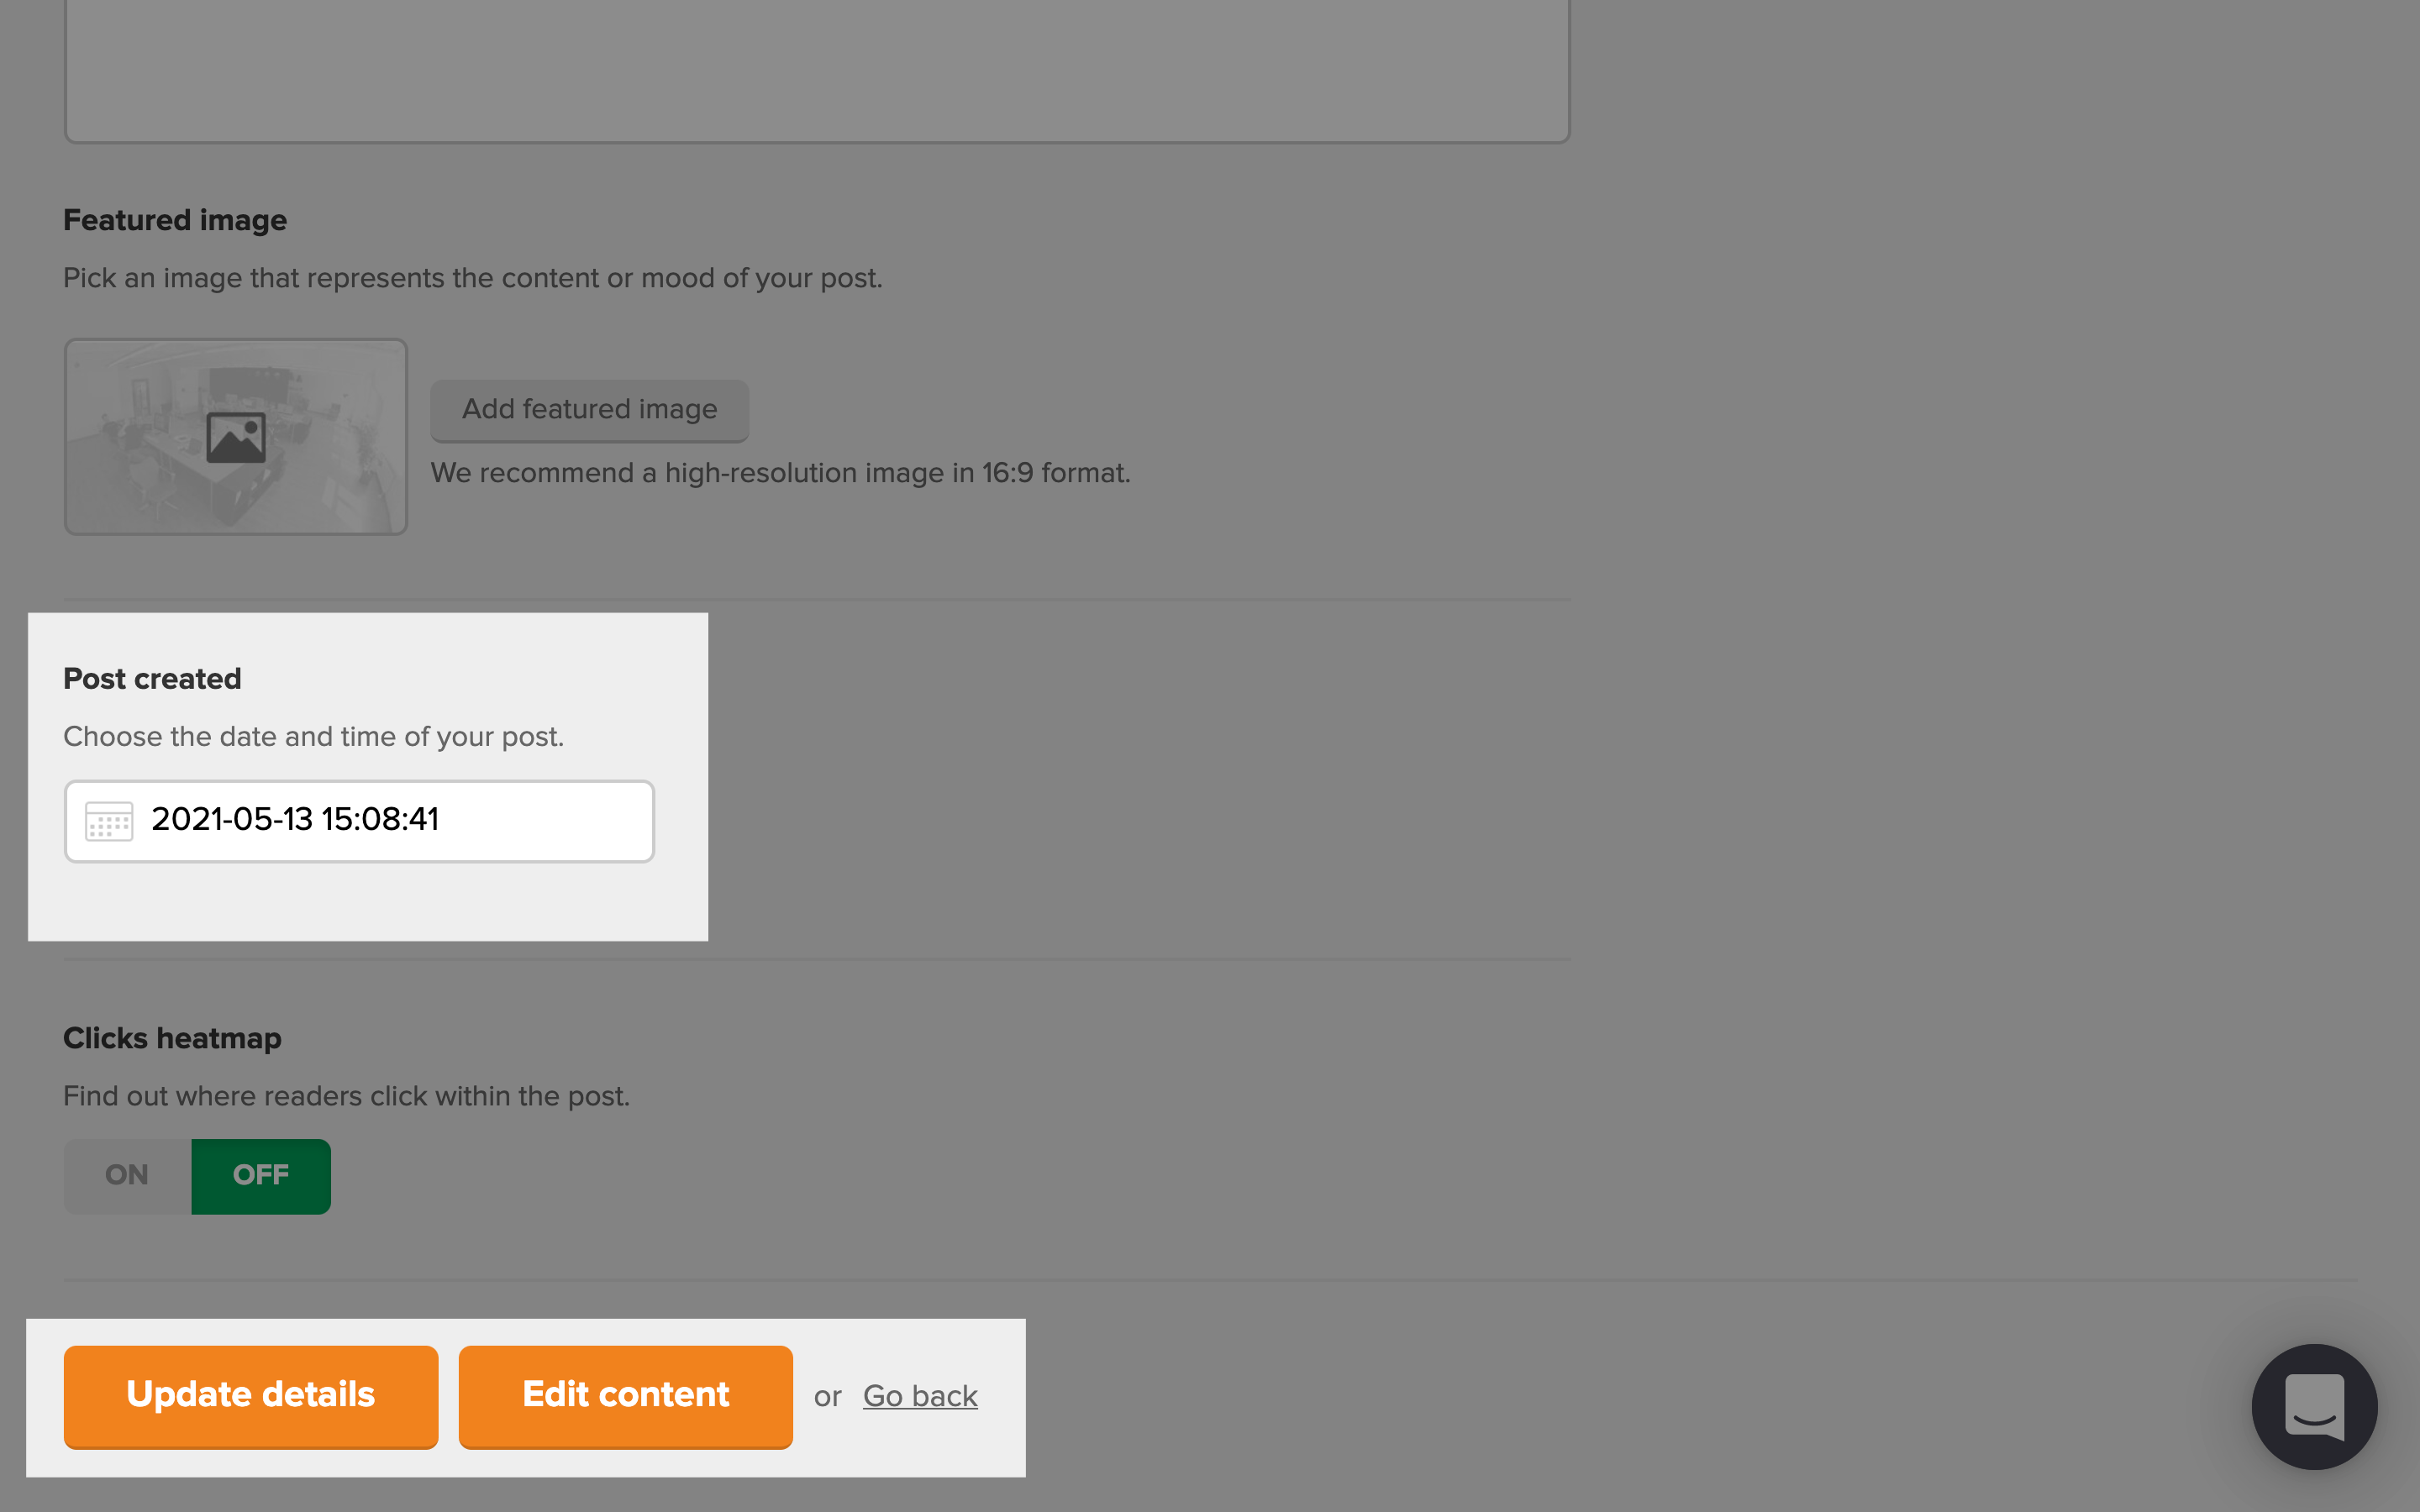
Scroll down to thePost created section and edit the date.
-
ClickUpdate details.
Note:ThePost created date can only be edited on published posts.
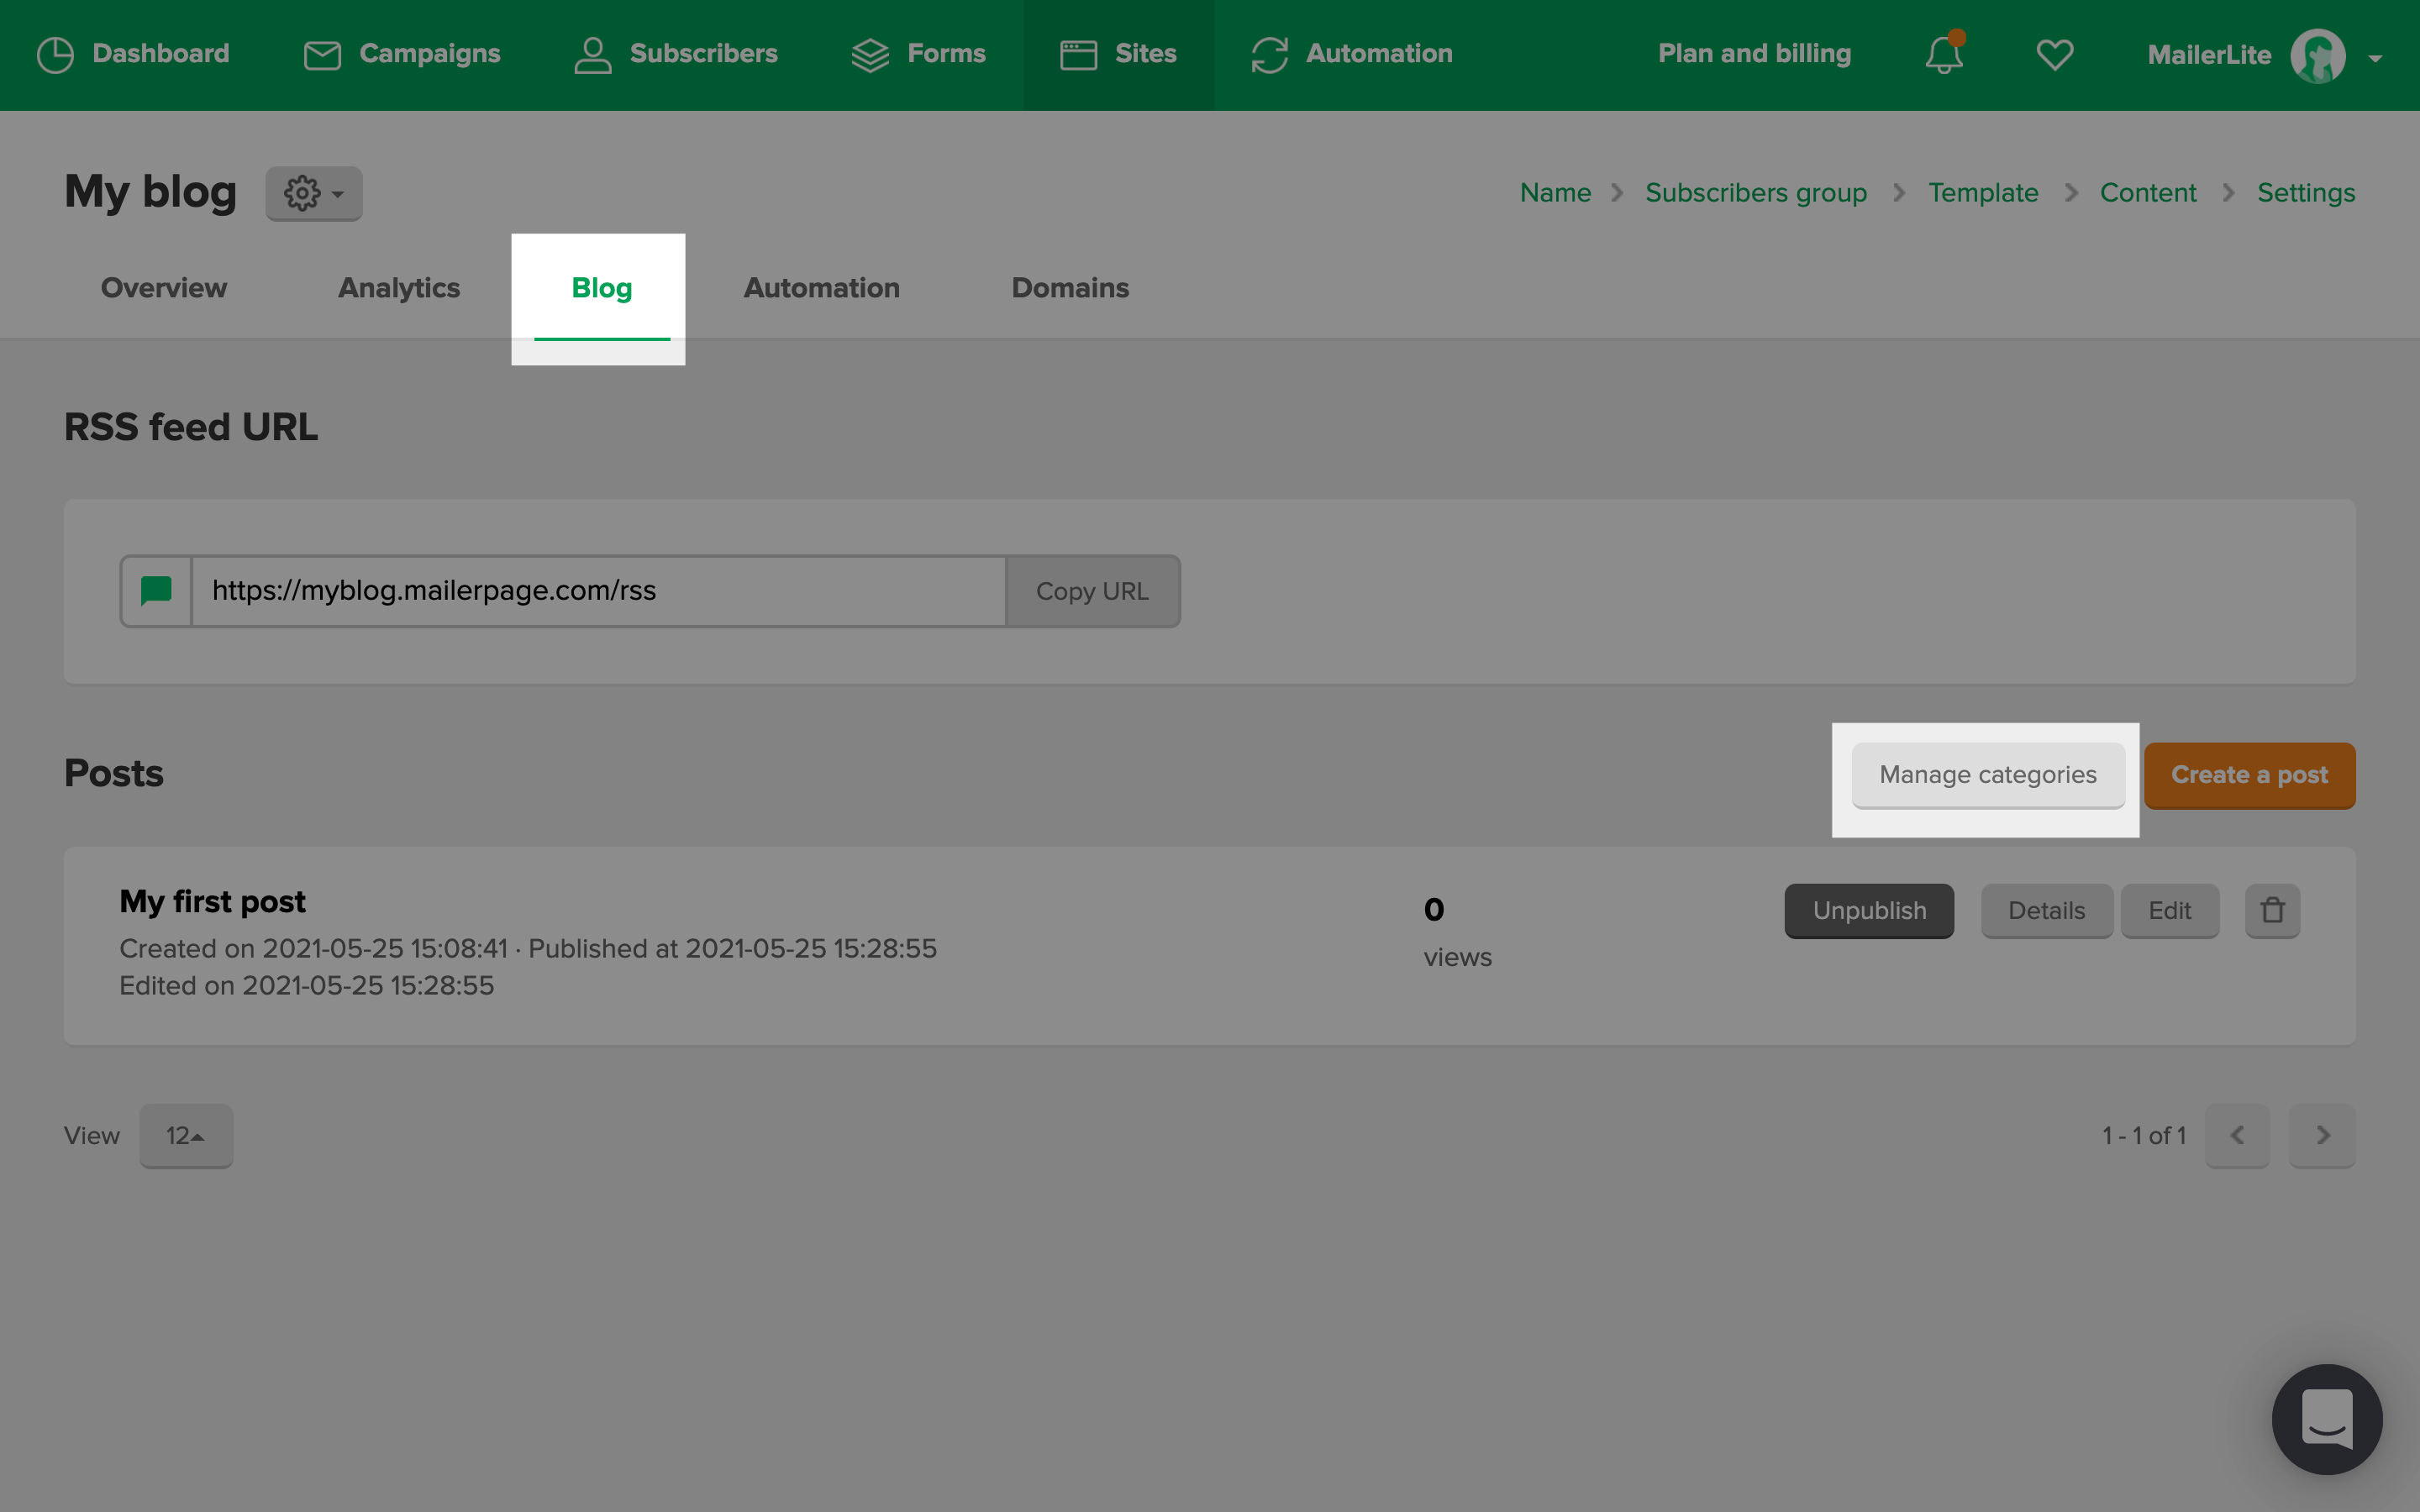
How to create and manage blog categories
To add and edit categories for your blog page:
-
Navigate toSites.
-
Click theWebsites tab and choose the website containing the blog you wish to add categories to.
-
Navigate to theBlog tab.
-
Click theManage categoriesbutton.
-
Click Add a category.
-
Choose a title for your new category. The title is how the category will appear on your website.
-
Choose a Slug for your category page.
-
Click Save.
You can now categorize your blog posts based on the content you post.
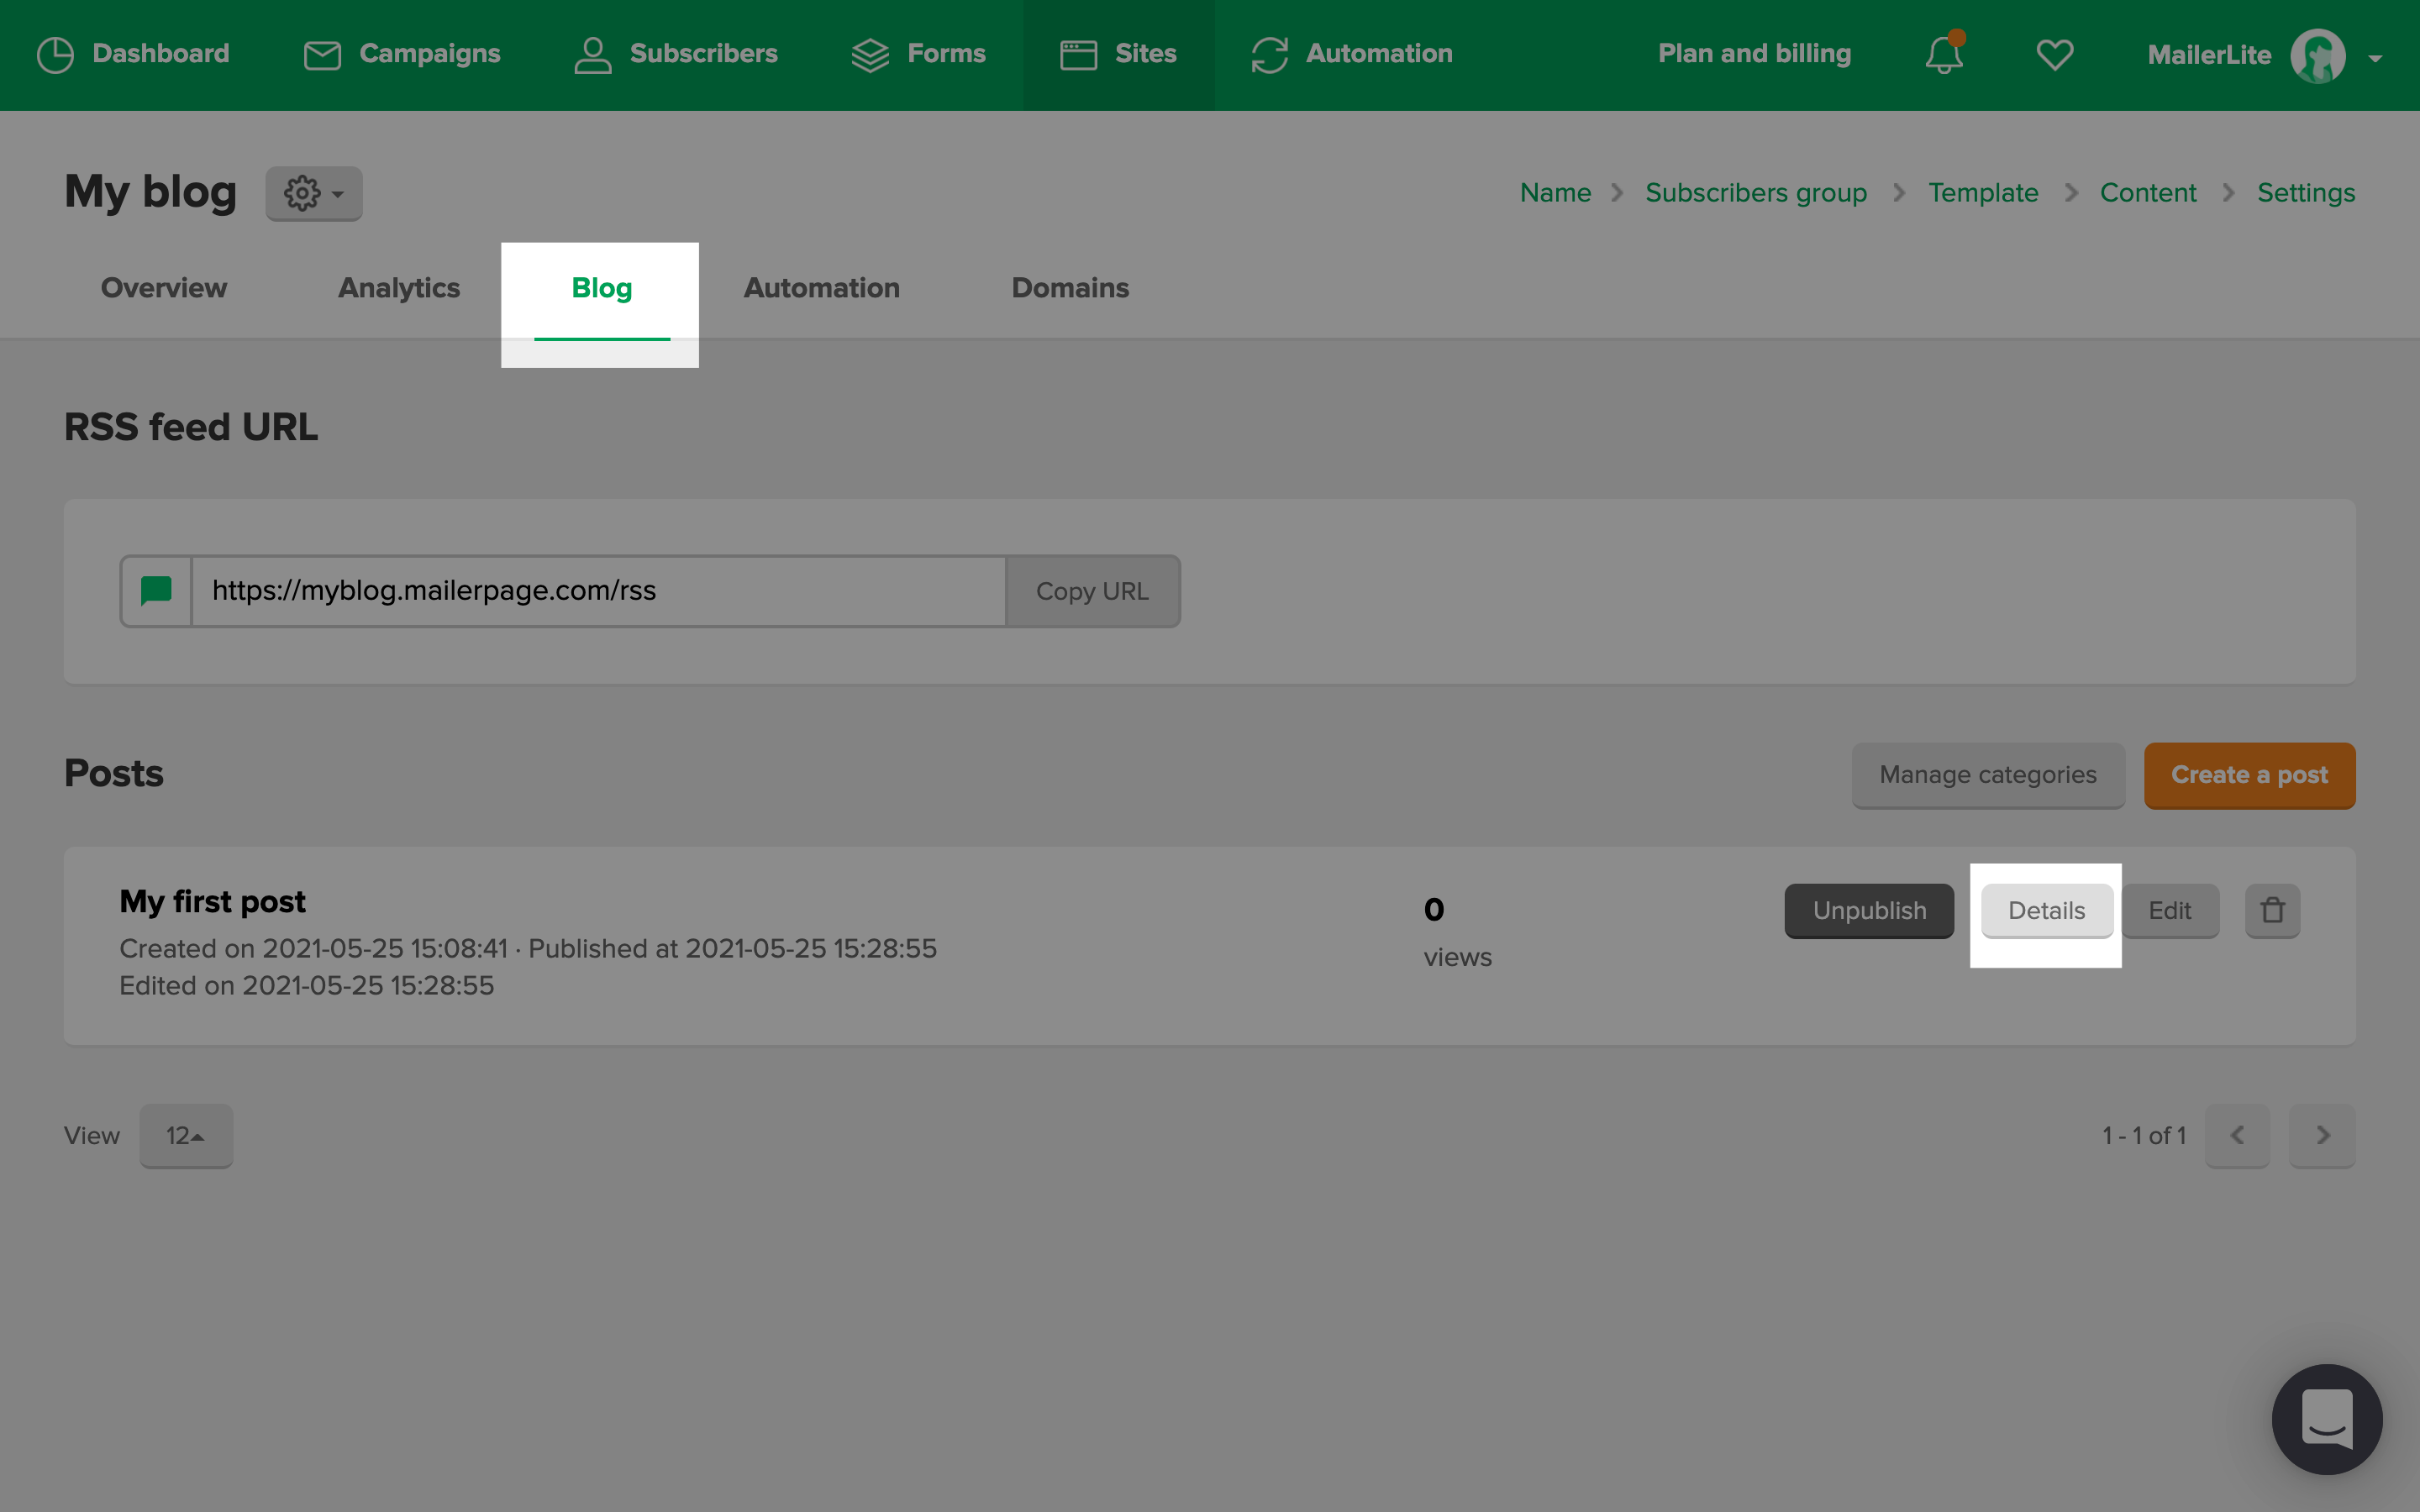
To add an existing blog post to your newly created category:
-
Click theDetails button next to your blog post.
-
Check the box associated with your new category.
What Does A Website Blog Button Look Like
Source: https://www.mailerlite.com/help/how-to-create-a-blog
Posted by: lecroyblescither55.blogspot.com
0 Response to "What Does A Website Blog Button Look Like"
Post a Comment