

Pen And Ink Still Life Drawings
Guide for Drawing Flowers with Pens
Updated: 30 Jan 2021
In this guide, I will demonstrate how to draw any flower, from simple to complex, using a pen.
Well-executed flower pen-drawing is all about accuracy of the structure (form), with attention to foreshortening and overlapping.
Concept Art
First thing first, do not use concept images that are protected by copyright law.
In case someone likes your drawing and wants to buy it, it is best to use images that are free for ANY use.
Here are some websites that let you download FREE stock images:
Pixabay
Unsplash
Pexels
StockSnap.io
FREEIMAGES
PikWizard (in image description, look for license: FREE)
*Taking your own photos is the best solution to create unique drawings and compositions.
How to Create Smooth Lines with a Pen
For a pen drawing to look nice, each mark should be drawn with confidence. Meaning, a smooth line.
That is easier said than done!
With time and practice, the lines will flow. Until then, we will start with a pencil.
The advantage of a pencil is that it is erasable. Therefore, we can fix mistakes until we are happy with the result.
So grab your reference image and draw it with a pencil. Draw it gently so it will be easy to erase later.
Note:
The pencil drawing does not have to be perfect. Remember that nature is abstract. There are no two identical flowers.
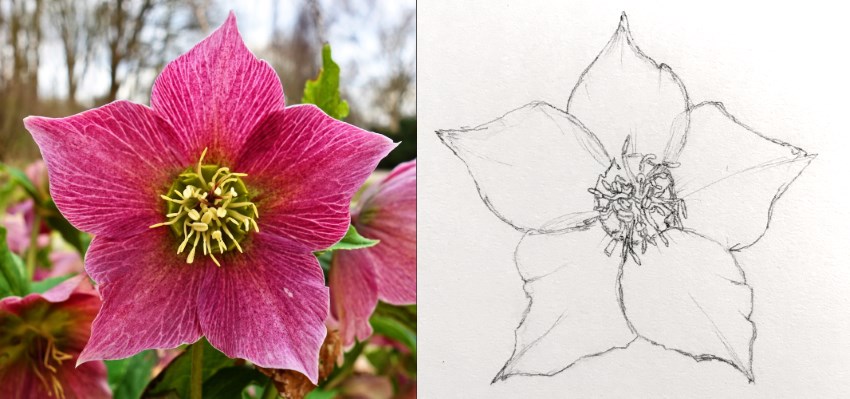 Reference image & pencil sketch
Once the pencil-sketch is ready, it is easy to go over it with a pen. Do it in a confident and smooth way, even if the pen marks are not exactly on top of the pencil marks.
When drawing with a pen it is important to pay attention to overlap.
Parts that are closer to the observer should be drawn first. In this case, draw the stamens first and only then draw the petals.
After the ink from the pen is dry (usually less than a minute, depending on the pen brand), it is safe to gently erase the pencil-drawing marks.
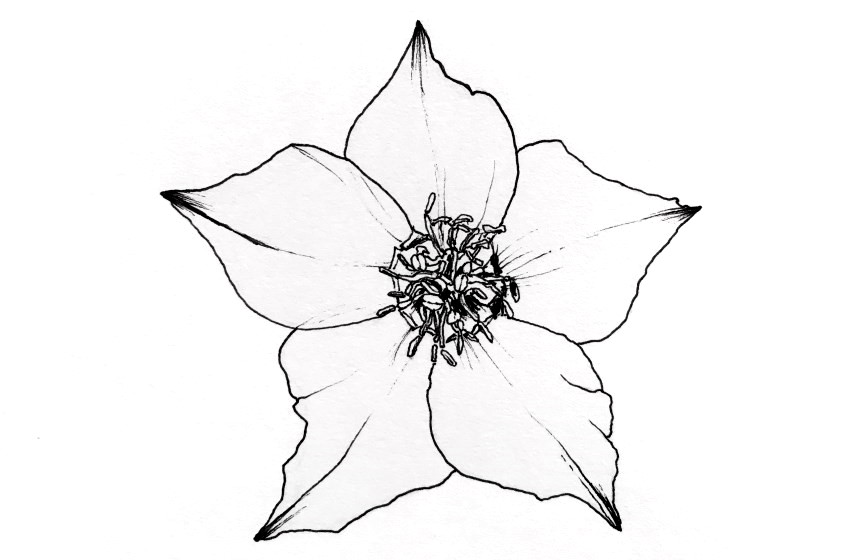 Hellebore flower pen drawing
How to Draw a Complex Flower
Some flowers or compositions are quite complex and attention should be paid to proportions, foreshortening and perspective.
This is too much to deal with when starting to draw.
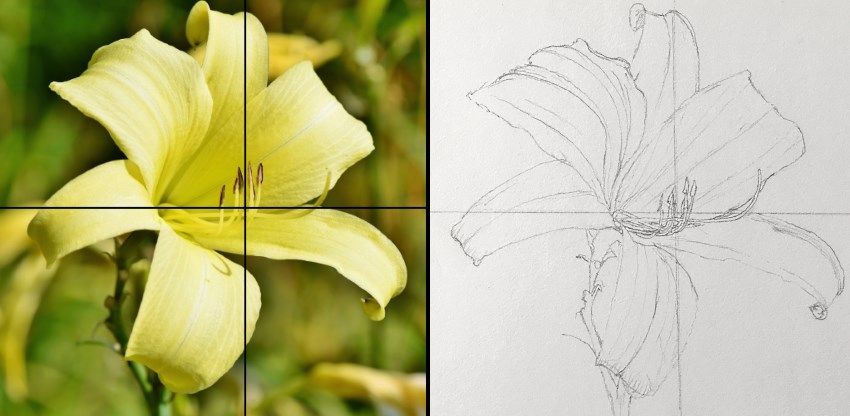
A solution to this problem is to create a grid of guidelines. Then, instead of one complex image, we have several smaller and simpler images.
To find the middle point of an image, draw two diagonal lines from the image corners.
Now we can draw horizontal and vertical lines from the midpoint.
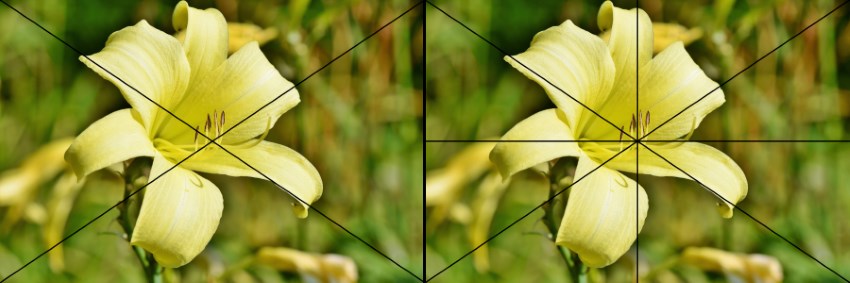 Finding the center & creating a grid
Do the same for the drawing-paper. Make sure the ratio between height and width is the same for both the reference image and the drawing-paper.
You can crop the reference image to get the same ratio.
Now it is easier to draw with a pencil.
Note:
If the image is still complex for you, you can keep adding grid lines for each rectangle.
 Drawing with a pencil
Remember to use the pencil gently. It will be easier to erase after you draw with a pen.
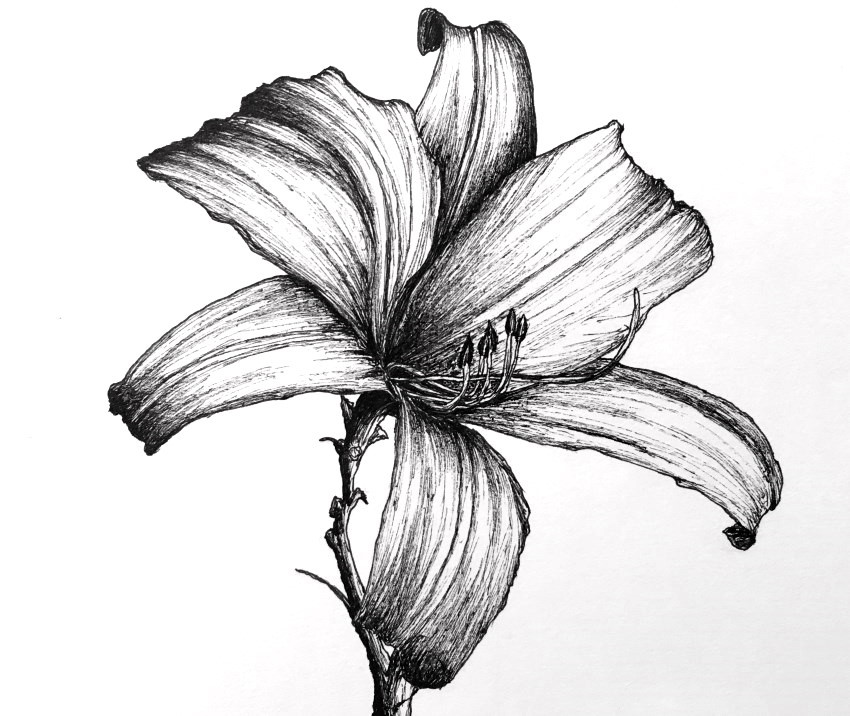 Lily flower pen drawing
Good to know:
If you do not fully understand terms like overlapping, perspective and foreshortening, I highly recommend reading my article on the illusion of depth in art.
Which Pen to Use for Drawing Flowers
While it is possible to draw or sketch with a regular pen, there are many advantages for using pens for artists.
These pens are called fineliners or technical pens and their ink is usually black though some brands offer additional colors (more on that later).
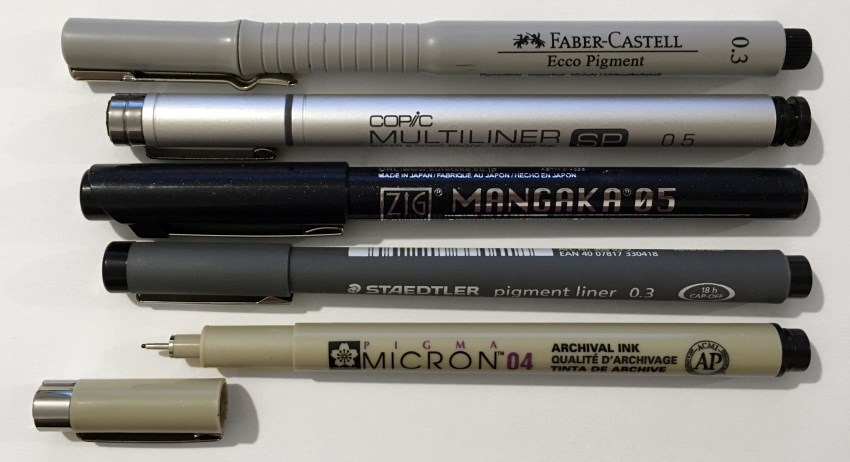 Fineliners
Pens for artists create lines of uniform thickness and they come in different sizes, therefore enabling to draw thick contour lines or thin lines for details.
The ink for these pens is made of pigments and therefore very durable.
To learn more about which pen to use, visit my review for recommended pen brands for drawing.
Line Width & Size
When drawing with a pencil, we can draw soft edges for far away objects.
Pens have one brightness value and therefore cannot produce soft edges.
Instead, we can use a pen with a smaller nib size to create thinner lines for background objects and bigger nib size to create thicker lines for foreground objects.
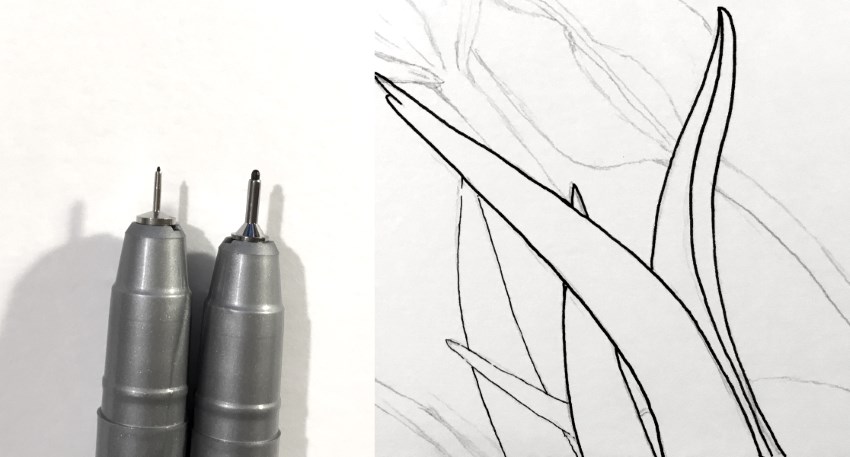 Different nib sizes
Using lines with different thickness to add depth:
 Tulip flowers pen drawing
Another way to add depth is with size.
When drawing in perspective, the farther away an object is, the smaller it will look.
For that reason, flowers in the foreground will be drawn bigger while background flowers will be smaller.
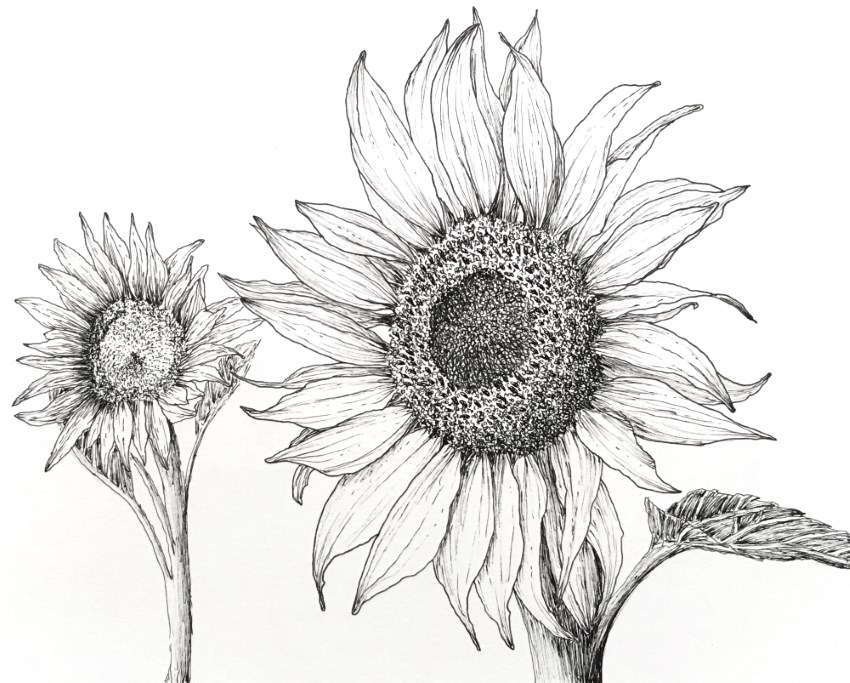 Sunflower pen drawing
Tip:
To add depth to your drawing, create the background flower smaller, use a pen with smaller nib size for it and make the foreground flower overlap it.
Hatching and Crosshatching
Hatching is a drawing technique that uses parallel lines.
A pen produces lines with one (dark) brightness value.
In order to create the illusion of different brightness values, meaning areas that look lighter and areas that look darker, different types of hatching can be used.
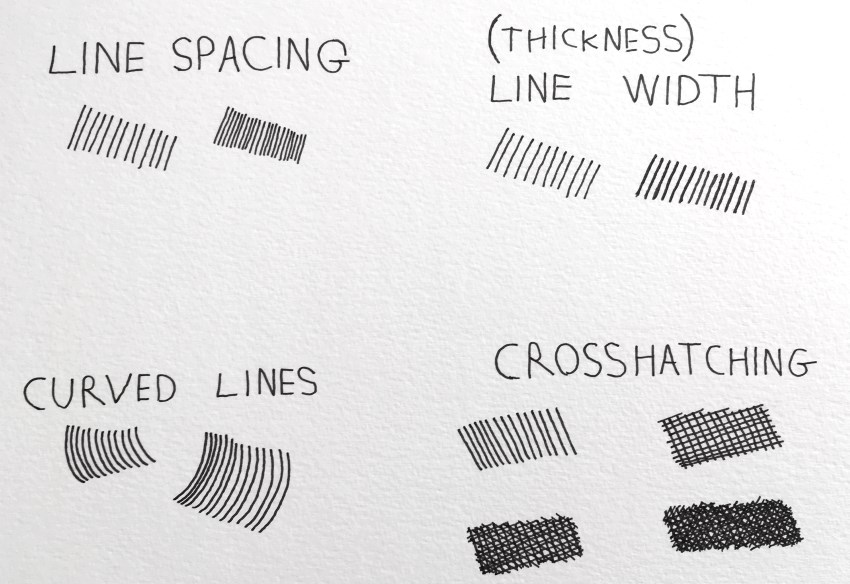 Hatching types
Thin hatching lines can be used for light areas.
By using different degrees of crosshatching, it is possible to create the illusion of different brightness values:
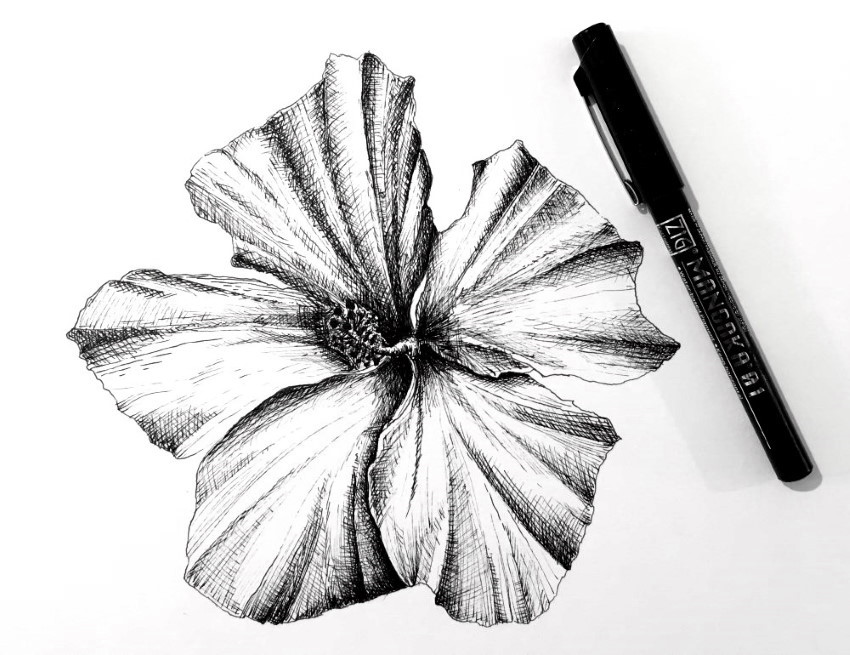 Hibiscus flower pen drawing
Line Types with Pens
As mentioned above, a pen has a single brightness value, but when holding a pen in a sharp angle, it can produce a less defined line and therefore create a second brightness value, which is lighter.
This will not work with all pen brands or on super smooth paper. With some brands, it will only work with one pen size, usually 0.1 nib-size.
For this to work, the strokes should be swift and with confidence.
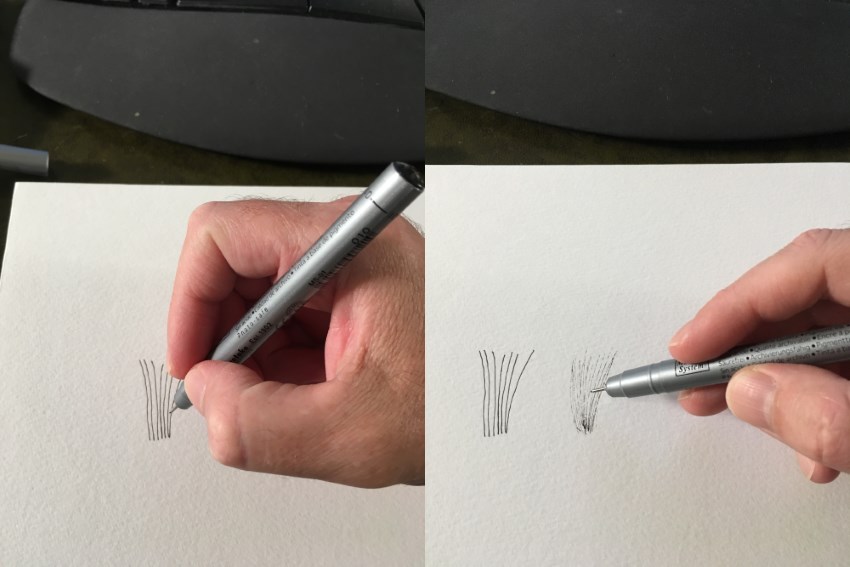 Pen holding angle
Example:
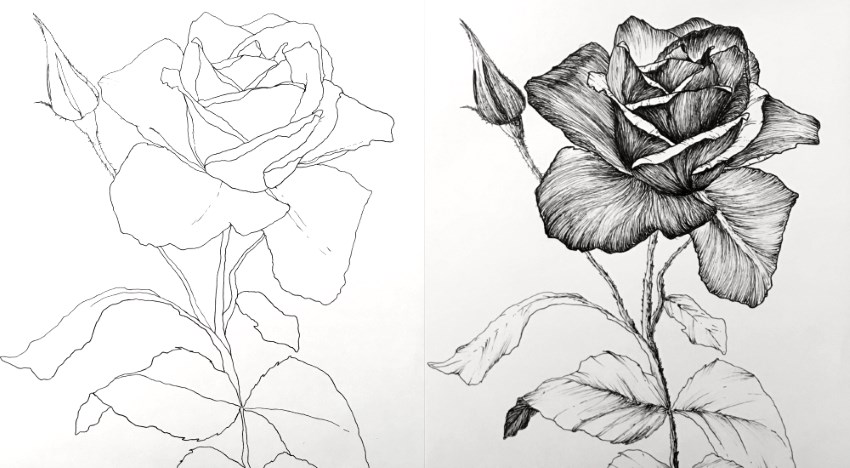 Rose flower pen drawing
How to Add Insects
Drawing takes time.
Trying a new thing, like adding insects or other objects, can be risky.
A practical way to deal with this situation is to start by drawing the new object.
 Drawing a ladybug
When the result is successful, we can continue drawing.
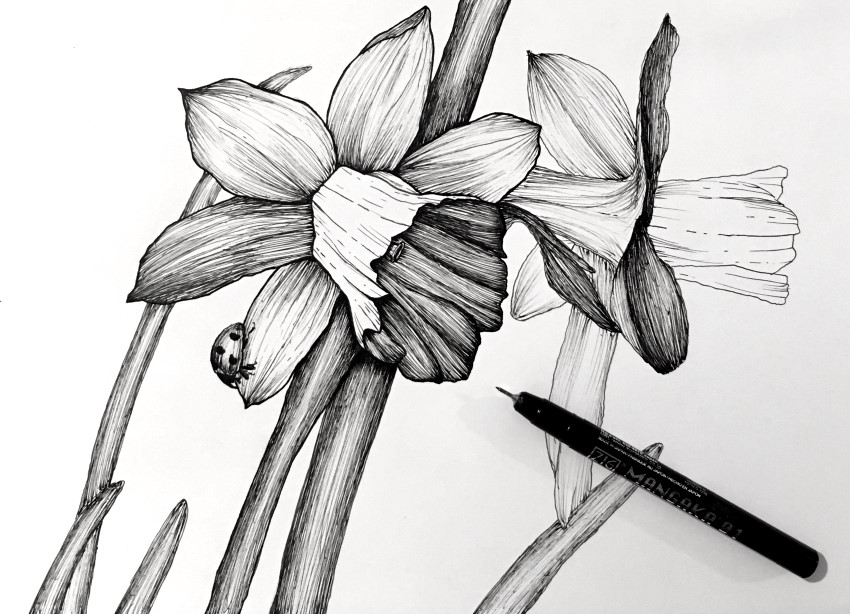 Narcissus flowers
To draw insects, visit my insect drawing guide.

Keeping it Simple
Sometimes, only a few lines can be more than enough.
It is possible to draw lines with a short line or a dot at the end, suggesting a line that gradually disappears.
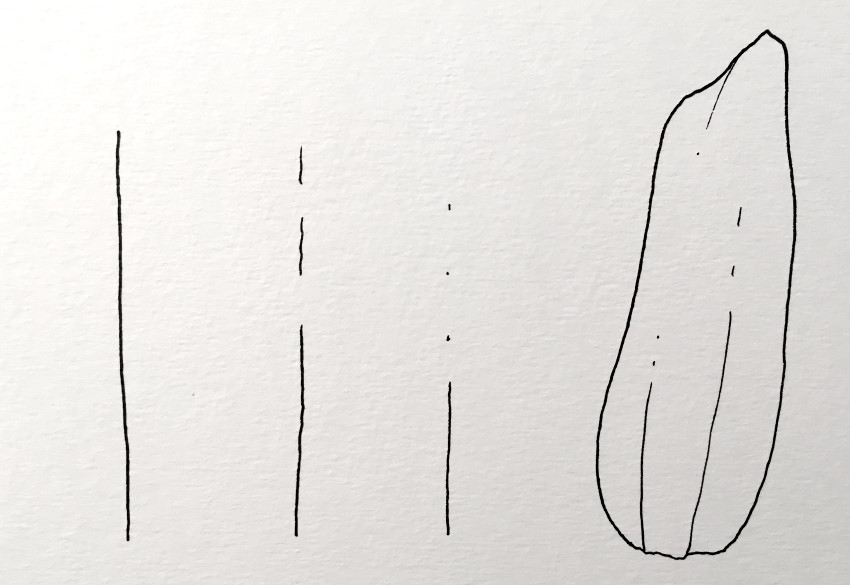 Dots and short lines
The middle part of a flower may seem complicated to draw.
The way to draw it, is to look at the basic shapes it is made of, and their direction.
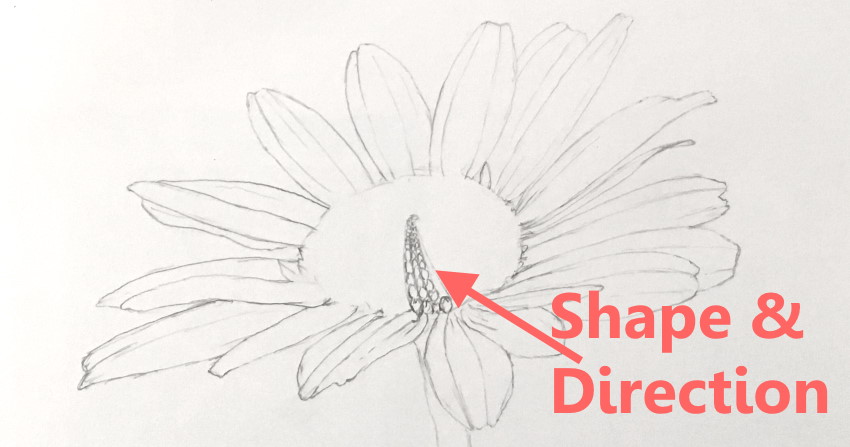 Paying attention to shapes and direction
After drawing the basic shapes, it is important to look at brightness values.
For areas that look darker, we can draw more lines to create the illusion of darker brightness values.
 Common daisy
Let's try a step-by-step drawing for a Muscari plant (grape hyacinth).
It usually has some closed flowers and some open flowers, so we will practice both:
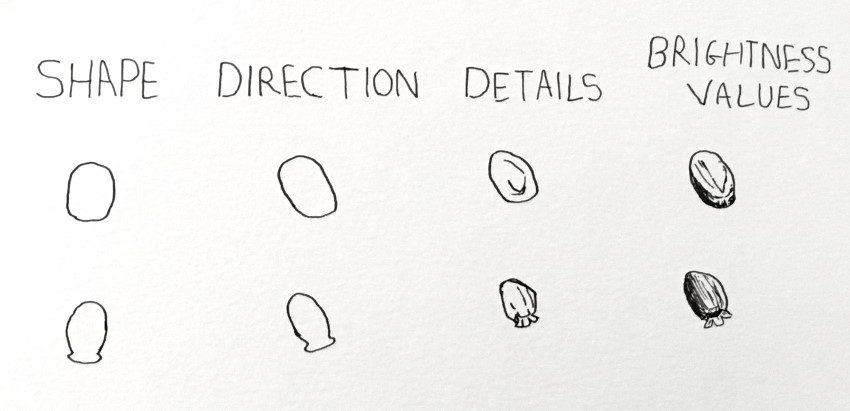 Flowers step-by-step
Now we can draw the whole plant.
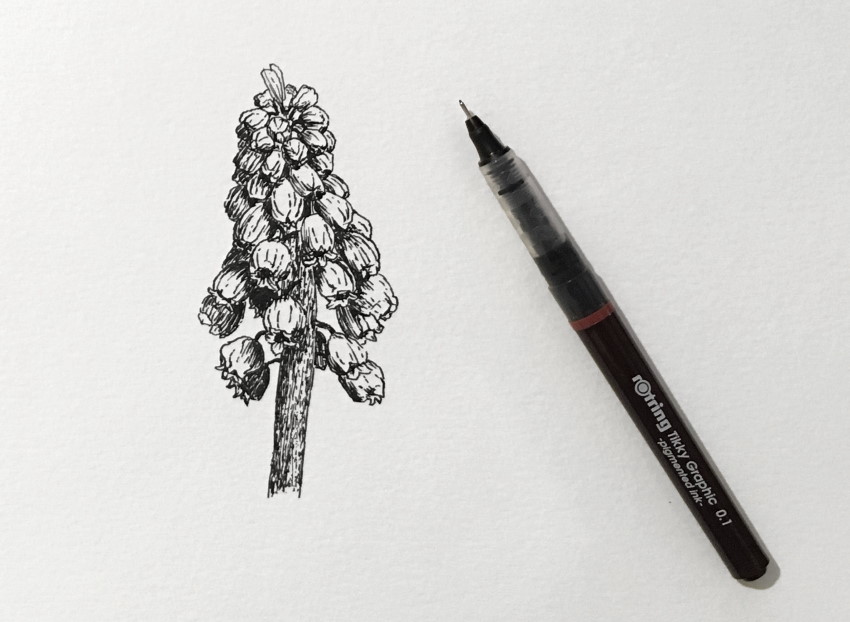 Muscari pen drawing
Ink Color
Pen drawing is not limited to black ink. As mentioned above, some brands offer additional colors.
Nevertheless, the drawing process is similar.
First, focus on accurate drawing. Pay attention to foreshortening and overlapping.
Then, get the brightness values right. Remember, more lines will create the illusion of darker values.
Lastly, some artistic license is more than welcome.
Blue ink example:
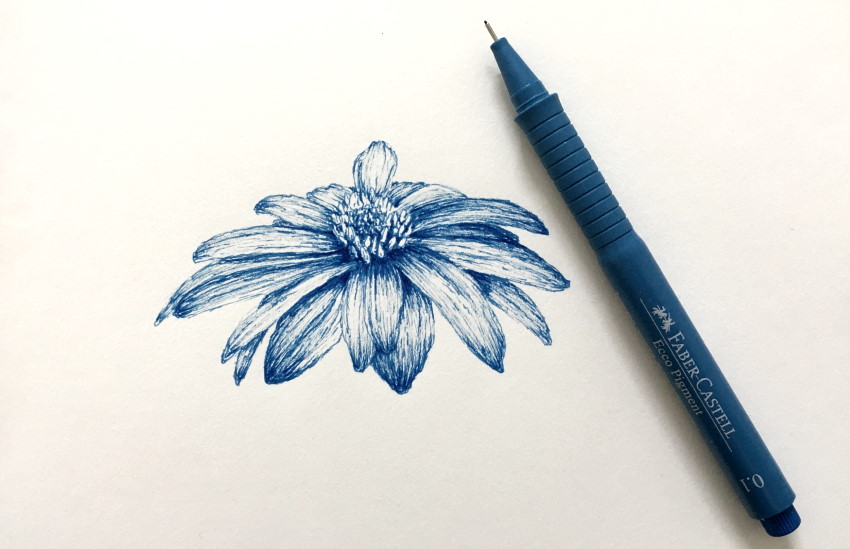 Anemone blanda flower
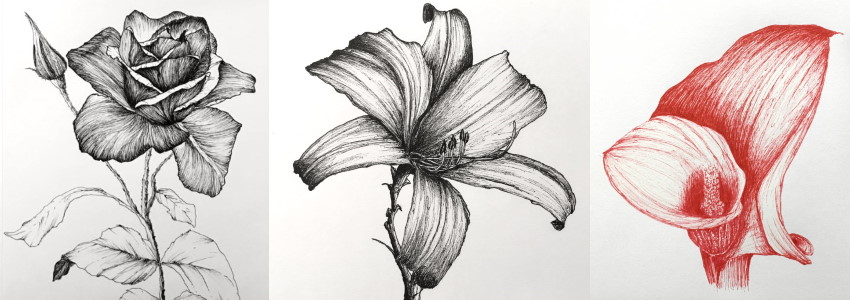
Red ink example:
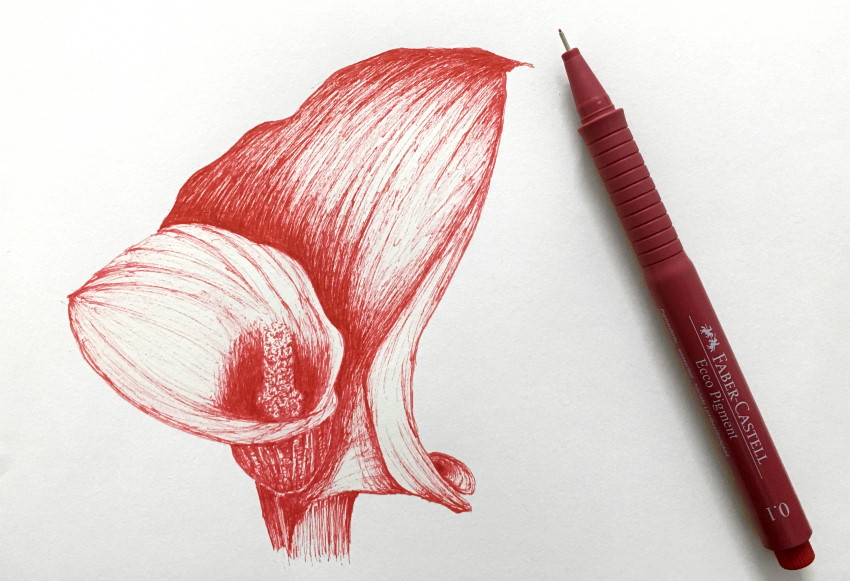 Anthurium flower
Remember, try to be as accurate as possible and then focus on brightness values.
Make sure there is enough contrast between light and dark areas. That way, the drawing will stand out.
Sepia ink example:
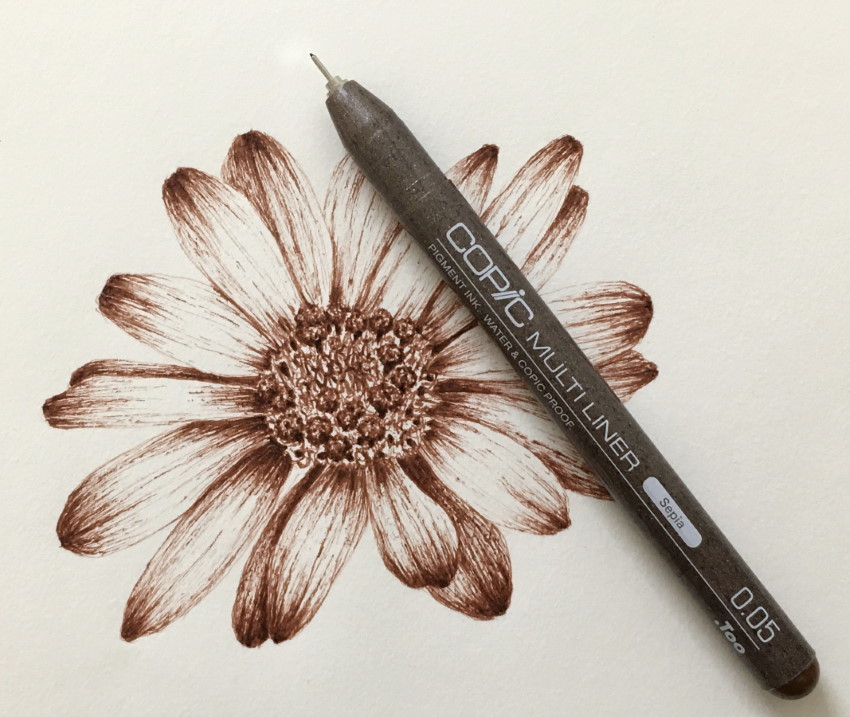 Marguerite flower
Foreshortening
Object that is in front of us will look smaller when it is far, but it will keep the ratio between height and width.
Foreshortening is a distortion that occurs when looking at an object (or a plane) along the line of sight.
In this example, we can see how a remote control will look shorter in height than in width as we look at it along the line of sight:
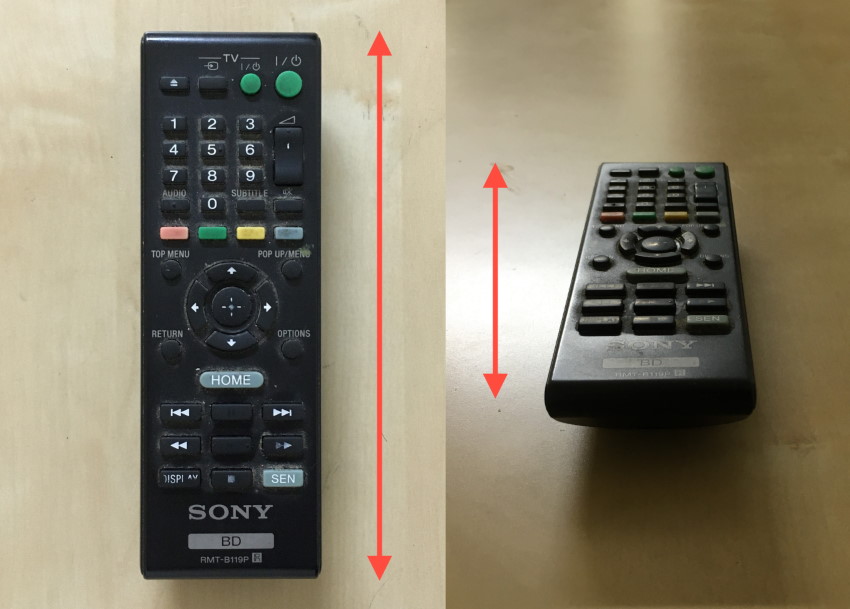 Foreshortened remote control
When we draw flowers, we pay attention to foreshortening in order for the drawing to look realistic, and interesting!
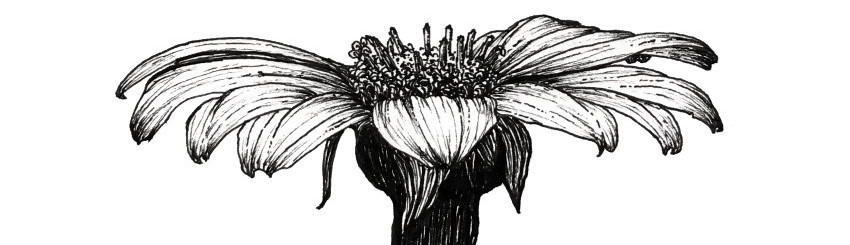 Foreshortened flower
In many cases, some petals are foreshortened, while others are less foreshortened.
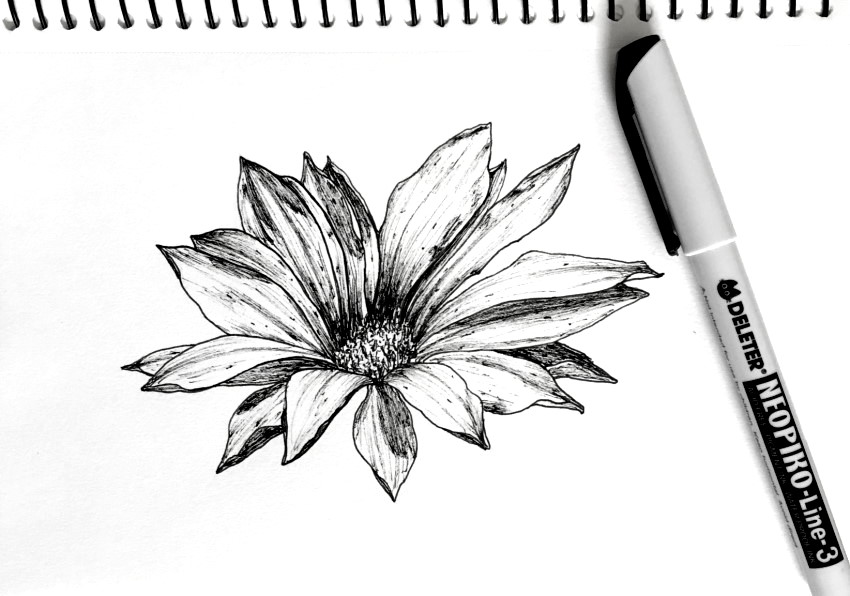 Gazania flower
Contrast & Image Editing
Contrast is essential for an appealing drawing or painting.
The blackness of a technical pen on the whiteness of a drawing-paper will produce contrast.
The problem lies when taking a photo.
For me, the best time to take a photo is at daylight. But, when completing a drawing at evening or night I am eager to upload it to my website or to social networks.
My apartment lighting is less than ideal, and it produces a warm, weak light, resulting in a yellowish flat photo.
To fix that, I use an image graphic editor (ANY image editing software will work) to decrease saturation and increase contrast. Problem solved!
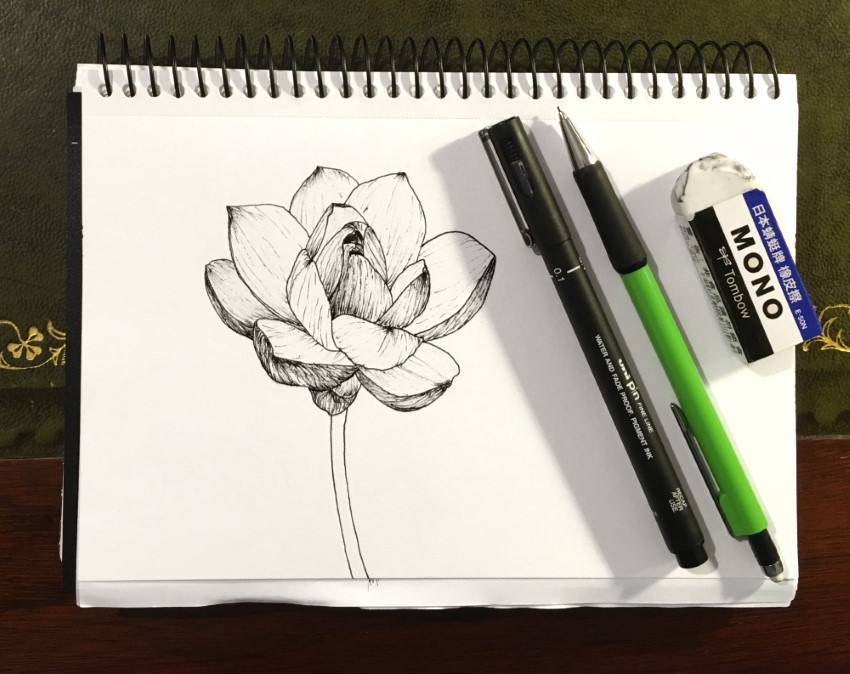 Lotus flower
Killing it on Social Media
To succeed on social media, many factors should be considered. For example, good content or SEO.
After analyzing successful flower-drawing Instagram accounts, I found a few tips and techniques that work.
1. Draw bold!
Meaning, draw thick, noticeable contour lines:
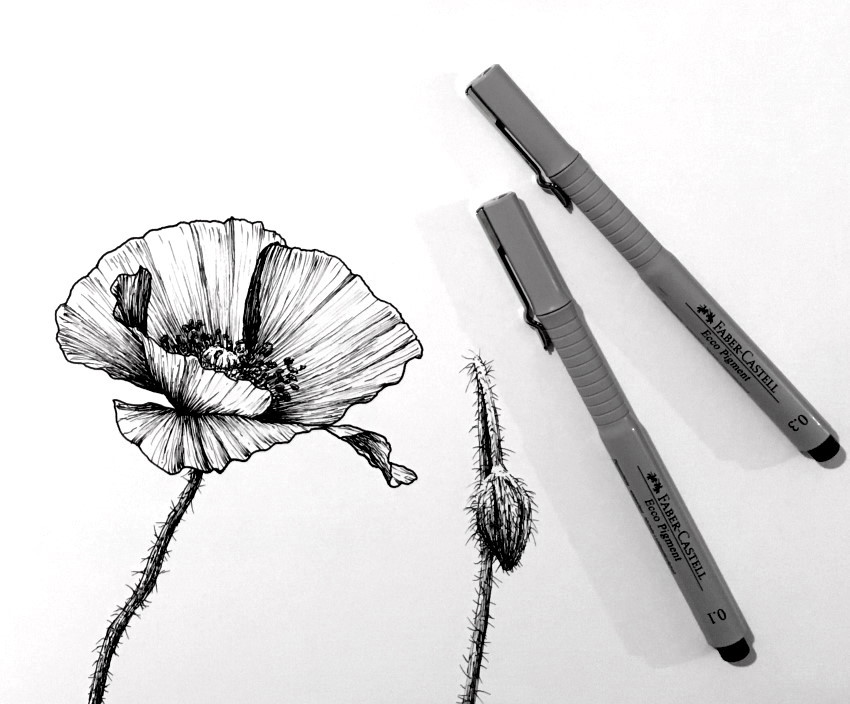 Poppy flower
2. Small images
A pen drawing has its limitation. A small pen-drawing image will look better than a close-up.
To do that, take a photo of your flower drawing (or sketch) including its surrounding. For example, the actual flower you used as reference, a step-by-step process, pens you used and so on.
In addition, remember that most people use their smartphone for social networks, so a tall image will occupy more screen space and therefore, have more presence.
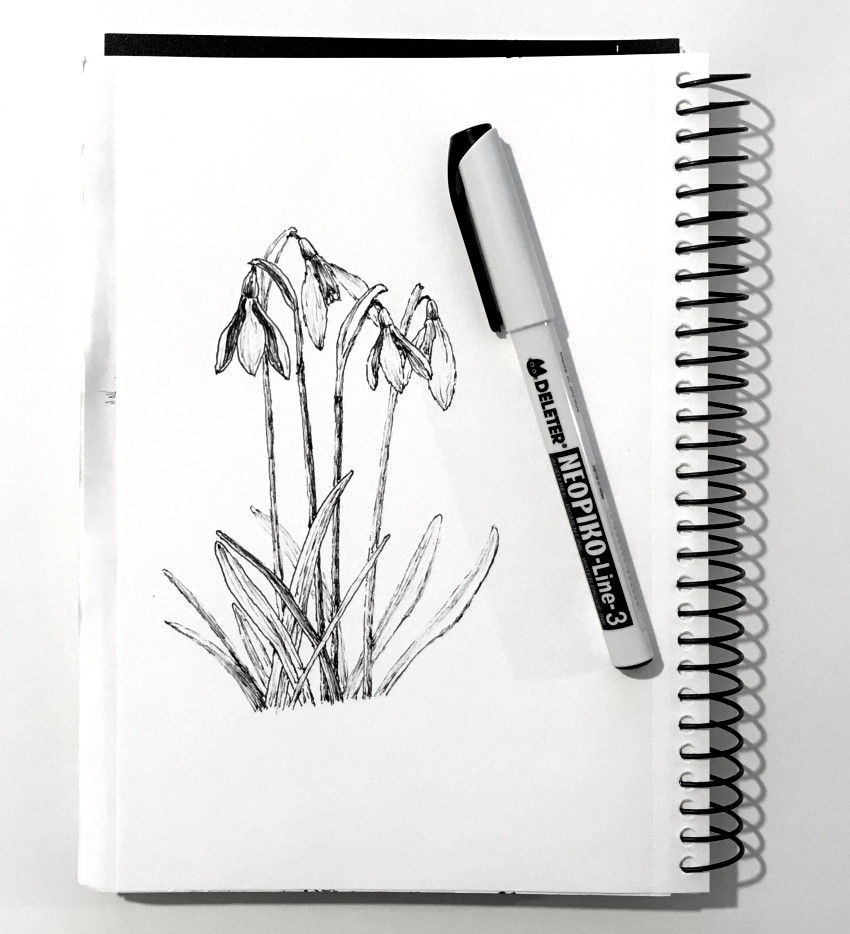 Snowdrop flowers (Galanthus)
3. Draw big
Drawing on a large paper sheet, like size A4, allows you to add more details and then, the small photo for your drawing will look more refined.
That said, simple drawings with little detail-work, do well too.
Keep in mind:
Complex flowers or compositions are challenging and time-consuming, even for experienced artists.
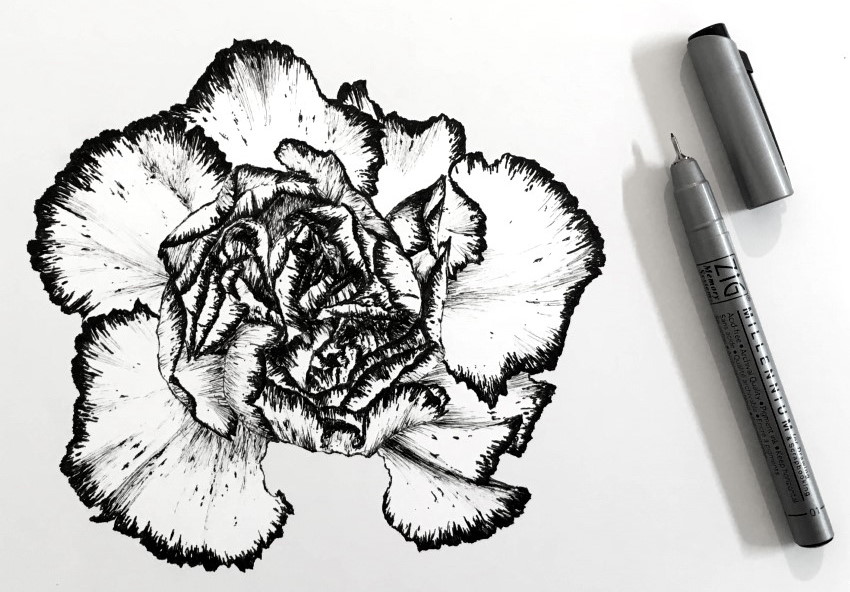 Carnation
4. Floral art
Once you are comfortable drawing a specific flower, you can draw a full paper sheet of that flower. (Another option is to draw several types of flowers).
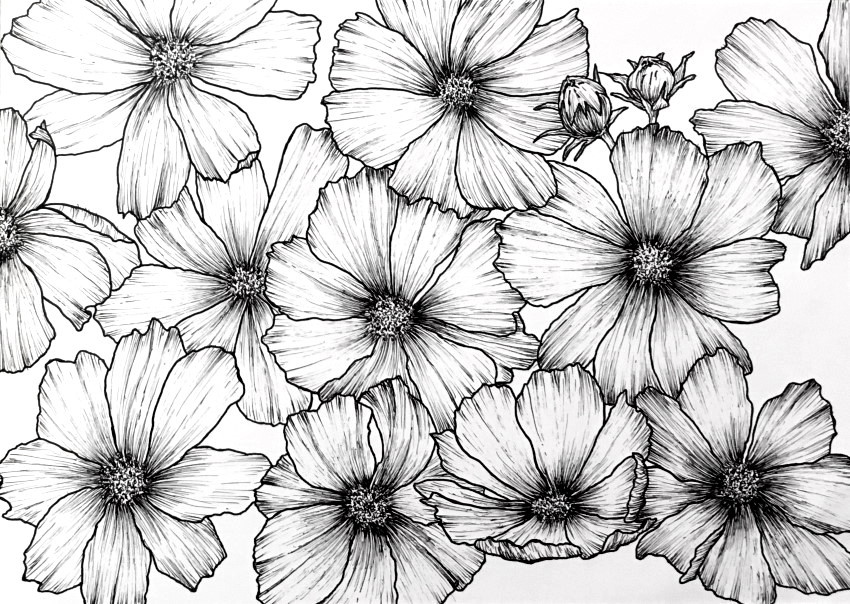 Cosmos floral art
Painting the background in black will add contrast:
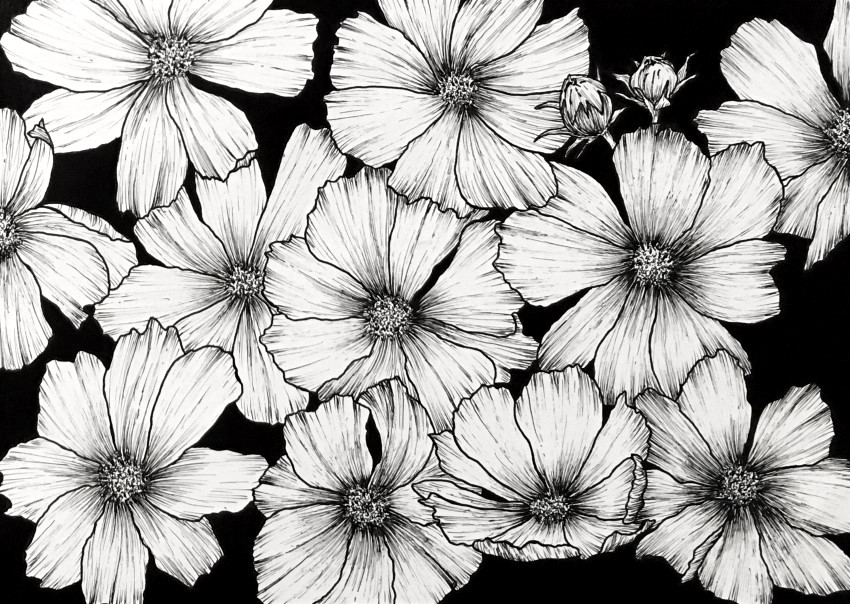 Cosmos flowers
For the background, I used Zig Real Brush marker. Here is my markers review for artists.
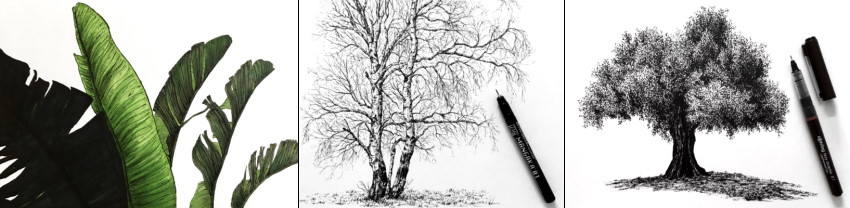
5. Mix it up!
Any plant, leaf, fruit, vegetable or tree are complementary to flowers.
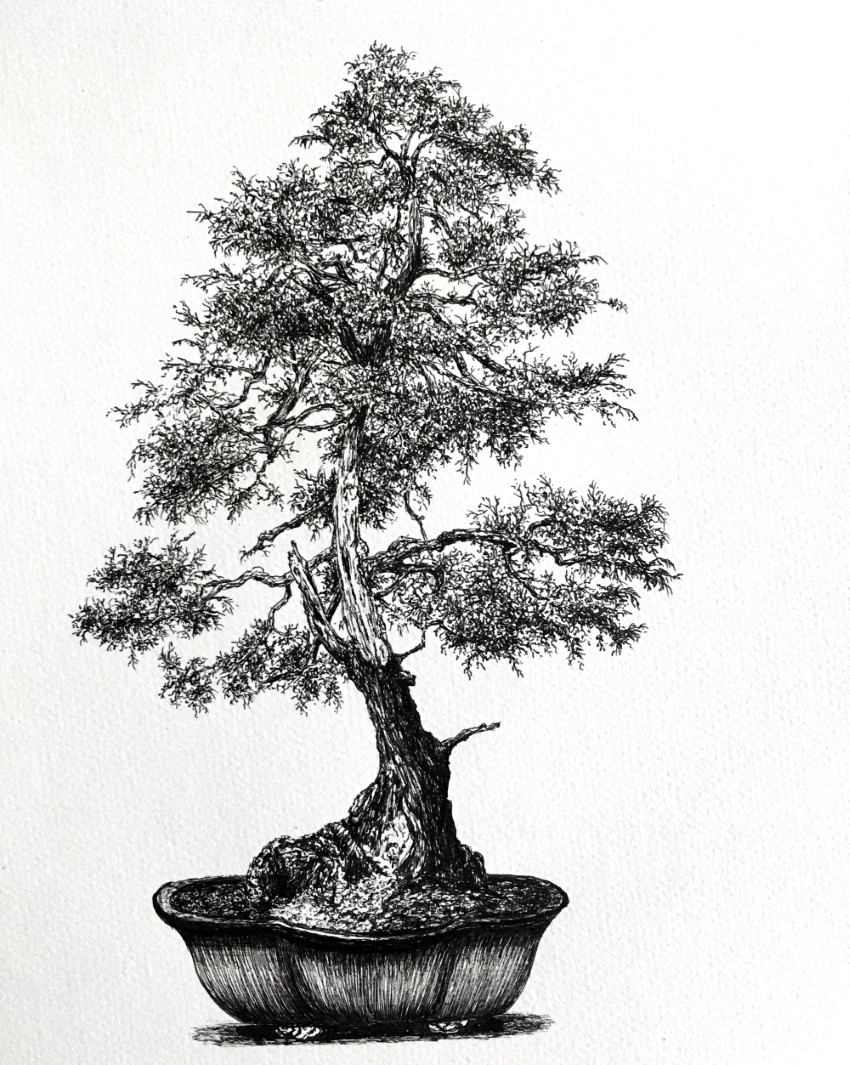 Bonsai pen drawing
If you like drawing trees, visit my easy guide for drawing trees with a pen (including MANY examples).
6. Do your thing!
After practicing with flower-drawing, you will start to develop your own style. That is the best way to succeed.
You can use colored paper-sheets.
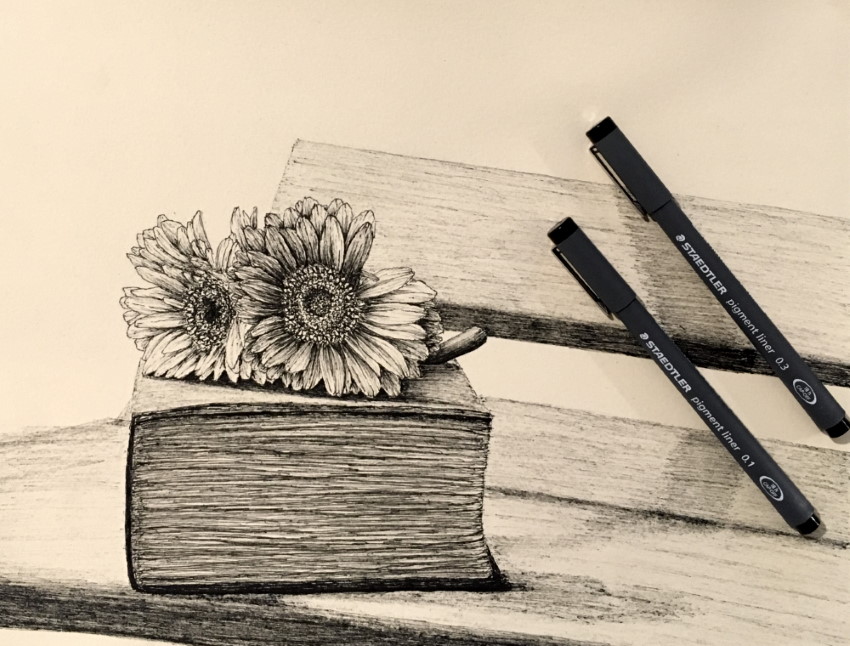 Gerbera flowers
Summary
After some practice with drawing flowers using pens, it becomes quite fun and relatively fast to produce.
Where to go next?
For learning to draw realism, visit my guide for drawing in a realistic style.
To understand composition, start here: composing a still life for drawing.
If you like using pens, you might be interested in my DIY guide for drawing your own treasure map.
![]()
![]()
Copyright © RanArtBlog.com. All Rights Reserved. | Sitemap
Pen And Ink Still Life Drawings
Source: https://ranartblog.com/blogarticle23.html
Posted by: lecroyblescither55.blogspot.com
0 Response to "Pen And Ink Still Life Drawings"
Post a Comment